Make Your Own Fritzing Parts
Metadata
Go to Metadata View
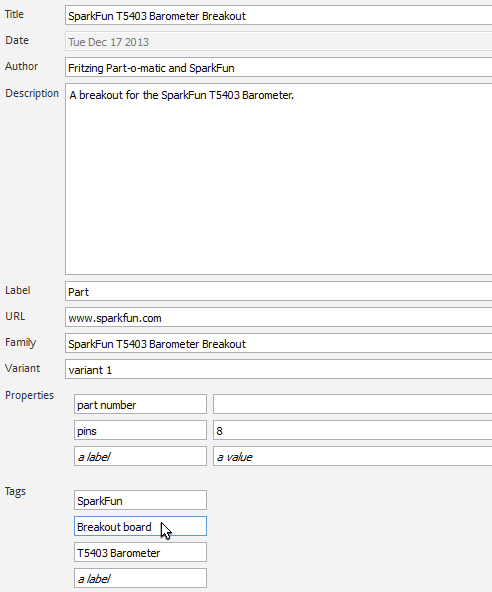
Go to the Parts Editor, and click the Metadata button to go into Metadata view. The Metadata is where you will add all the important information about your part!
Different Sections in the Metadata View
Title: Pretty self-explanatory. This is going to be the name of your part.
Date: The date entry is locked in Fritzing. The date should show the date you are creating the part. If you update the part later down the road, the date will be changed to the current date of the last update.
Author: You will want to put your name in here, so, if you share your part with the Fritzing community, they know who made the part.
Description: Description should included anything that is important about the board, such as operating voltage.
Label: The Label is shown in Schematic view and makes it easier to tell which part you have selected. For the SparkFun T5403 Barometer Breakout, the Label is changed to Part. The reason for that is, because Part is fairly small and the SparkFun T5403 Barometer Breakout name is already on the schematic graphic itself. It is up to you what you want to label your part!
URL: Consider posting the url of the part, so anyone can get more information about your part.
Family: If you have a part that comes in different colors, chip packages, etc, you will want them to be in the same Family. For example if you have a through-hole LED that comes in different colors, all the different colors of the same LED will be in the same family.
Variant: When creating a brand new part, you want to make sure the Variant is 1. When you do revisions in the future, it will change the next revision to Variant 2 if it is in the same family.
Properties: A place to put important details like part numbers, pin spacing, and etc.
Tags: Use tags that can be found easier and best describe your part in as few words as possible.
