LilyTiny Plush Monster
 Gella
Gella 
Introduction
Craft a glowing-eyed stuffed monster while exploring the LilyTiny preprogrammed microcontroller. This is a project based on the Tiny Monster Activity created at MIT's High-Low Tech Lab by Emily Lovell, Jie Qi, and Natalie Freed. While the original monster activity uses one LED, this project will use two (or more) to light up the monster's eyes. We'll learn how to hook up the LilyTiny board, prototype with alligator clips, and plan a conductive thread circuit on a three dimensional project.
This is a great project to try after you've done a couple e-sewing projects and before you are ready to start programming a full LilyPad Arduino project.
Suggested Reading
If you've never worked with e-textiles before, you may want to have a look at these other tutorials.
Materials and Tools
Let's go over all of the things you'll need to sew your project together:
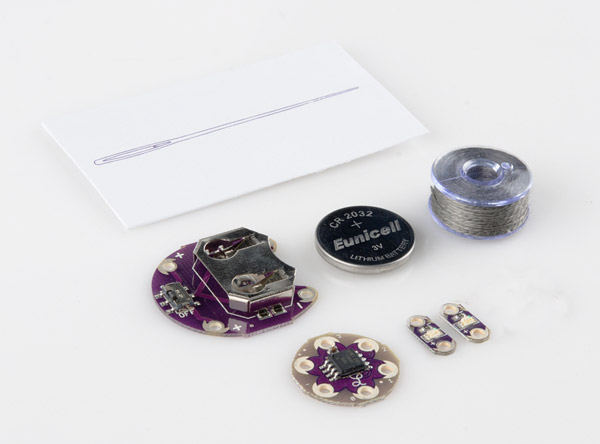
You will also need:
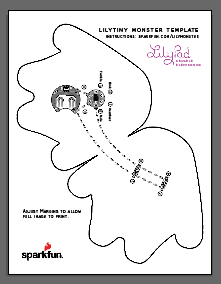
- Monster template - download and print the pdf template.
- Felt - a 9x12 sheet of craft felt will make one monster.
- Scissors
- Hot glue gun
- Cotton or embroidery thread
- Fiber fill or something to stuff the monster with - such as scrap fabric
- Optional - extra craft supplies to decorate (feathers, sequins, googly eyes, etc).
Step 1: Cut Out Template
Download and print the provided template. Align the template on your felt, and cut it out. We're using an adaptation of the monster shape featured in Sew Electric, because it is an easy shape to cut out and sew and has plenty of room to attach all our LilyPad pieces. Feel free to use the template as a starting point, and design your own monster.
Right-click the image below, and choose “Save Link As” to download the template to your computer.
Rather than having two pieces that we then sew together, the template is one piece of felt that we'll sew on and fold in half to finish. The connection point also serves as a bridge for all our conductive thread stitching to cross so that we can test the circuit flat before stuffing.
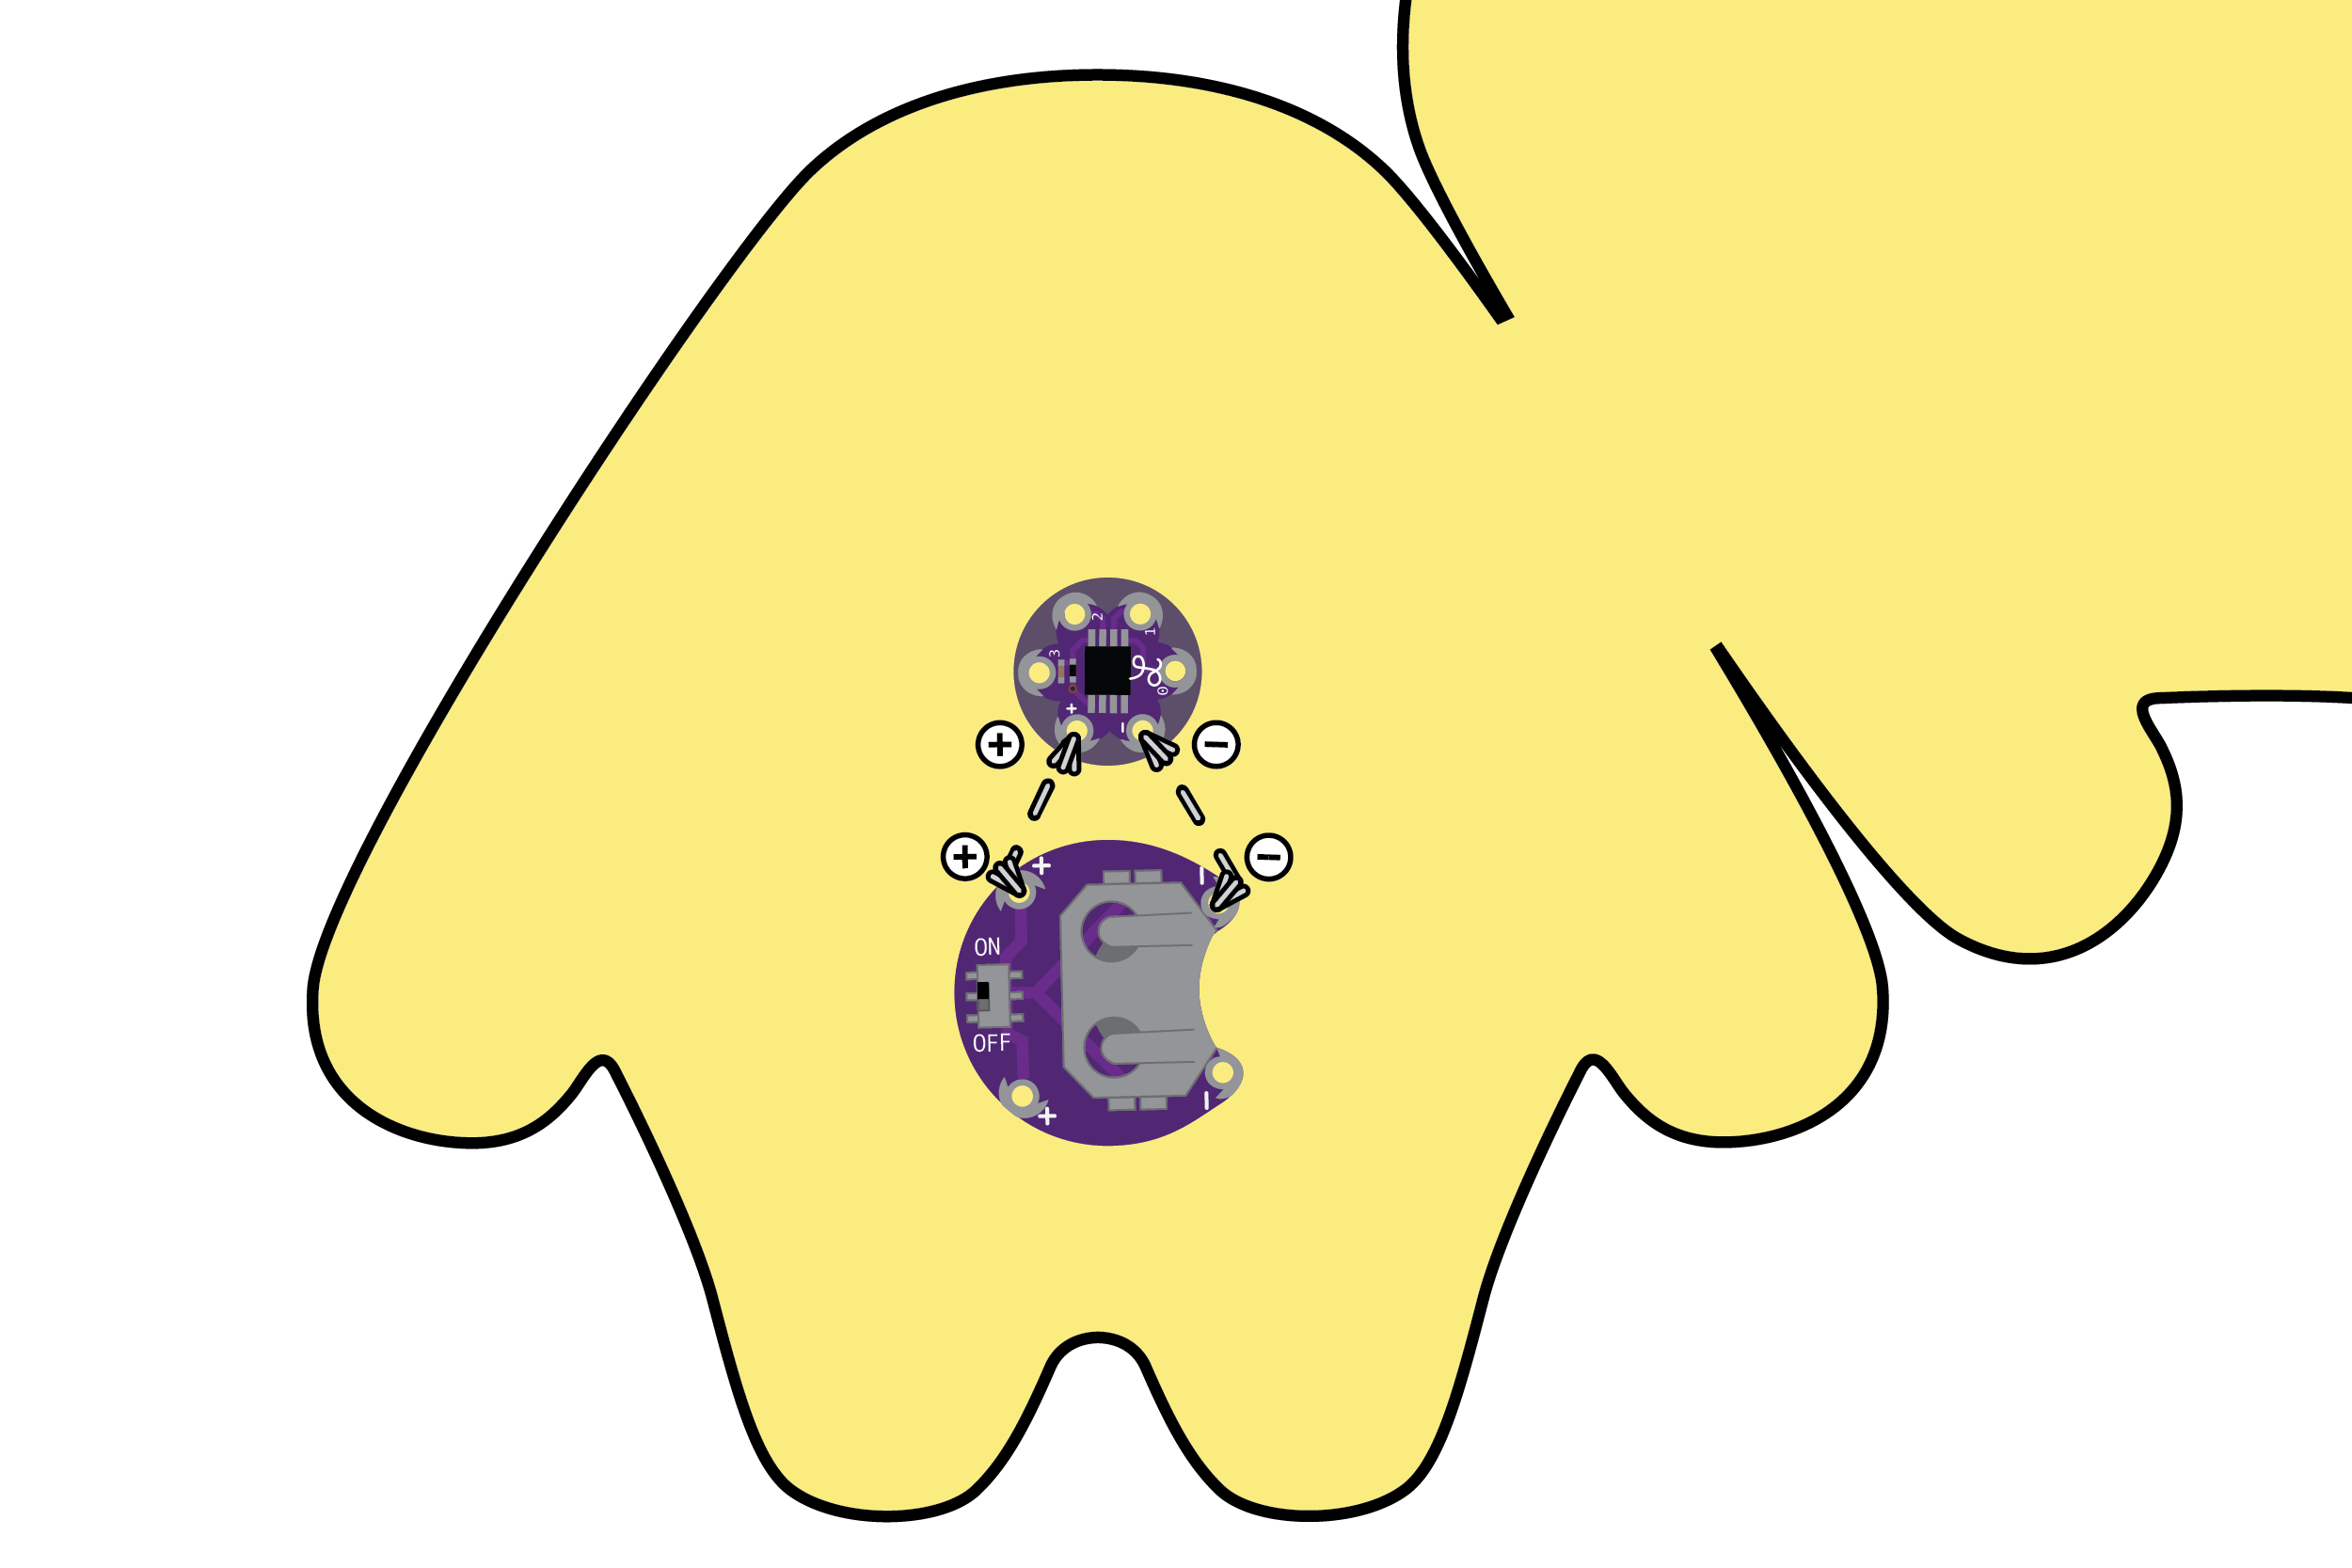
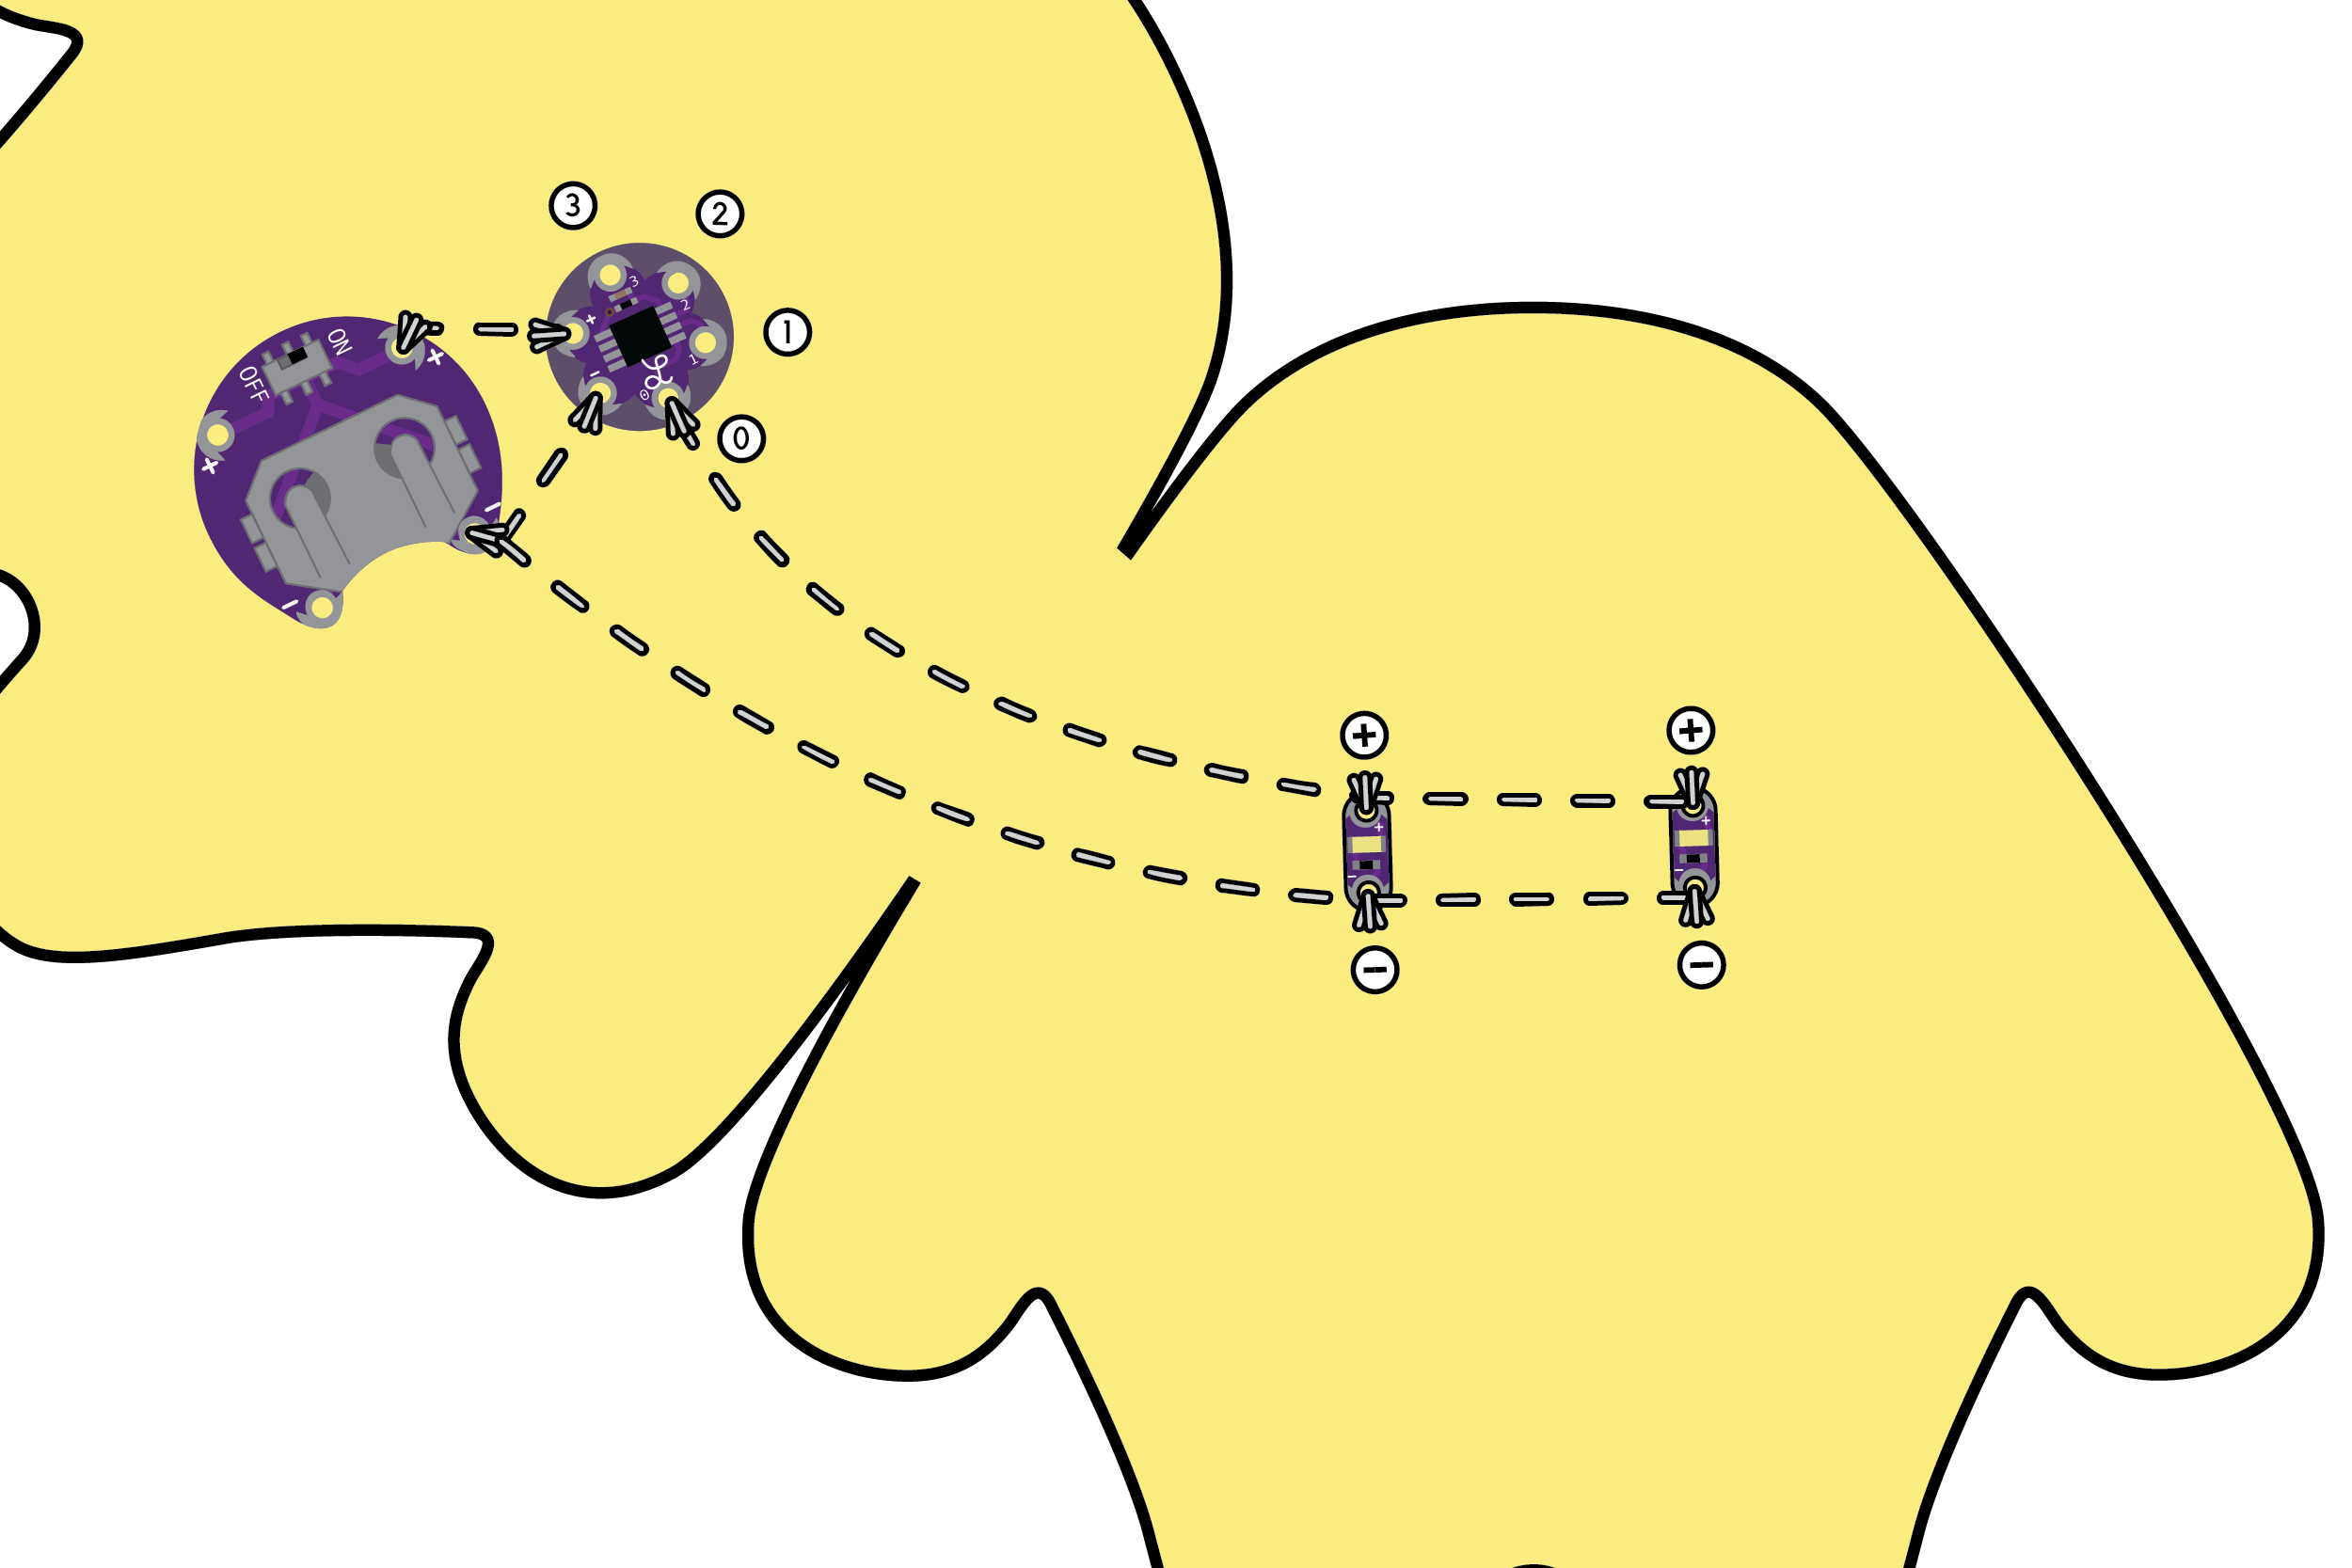
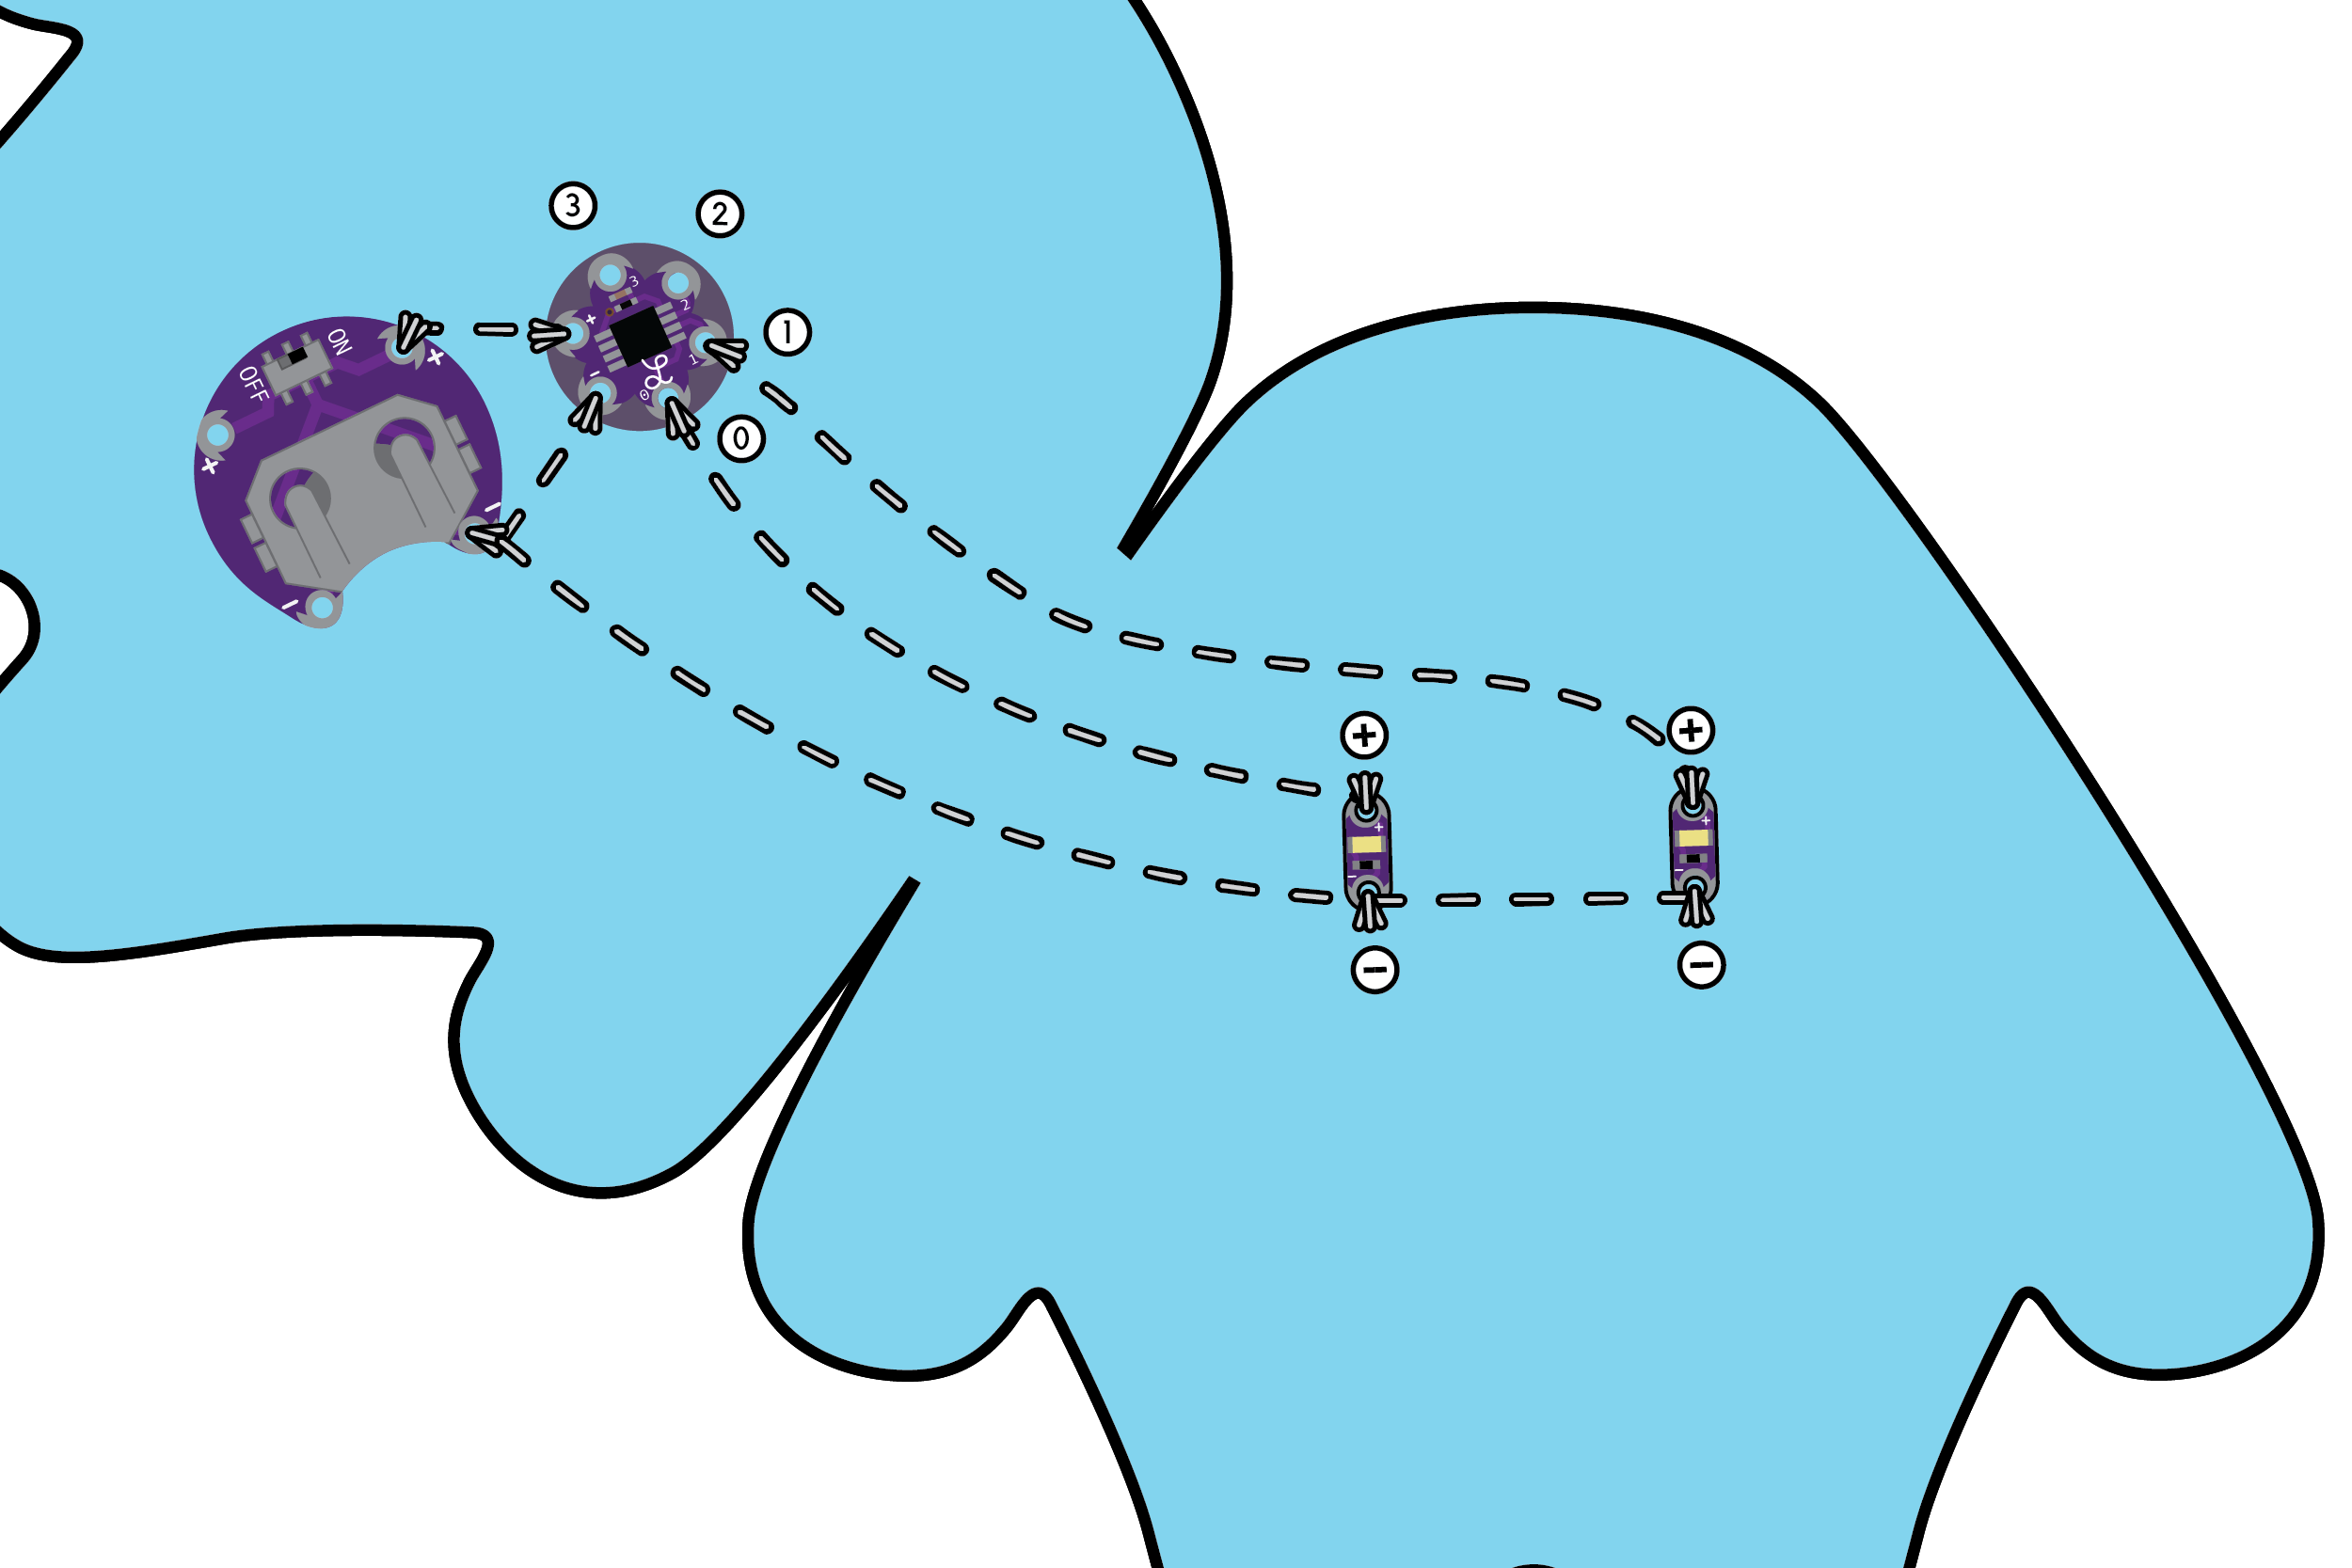
Step 2: Place Components
We'll start building our monster by attaching the LilyTiny and battery holder. Take a look at the template and arrange the battery holder and LilyTiny so that their positive and negative sew tabs face each other.
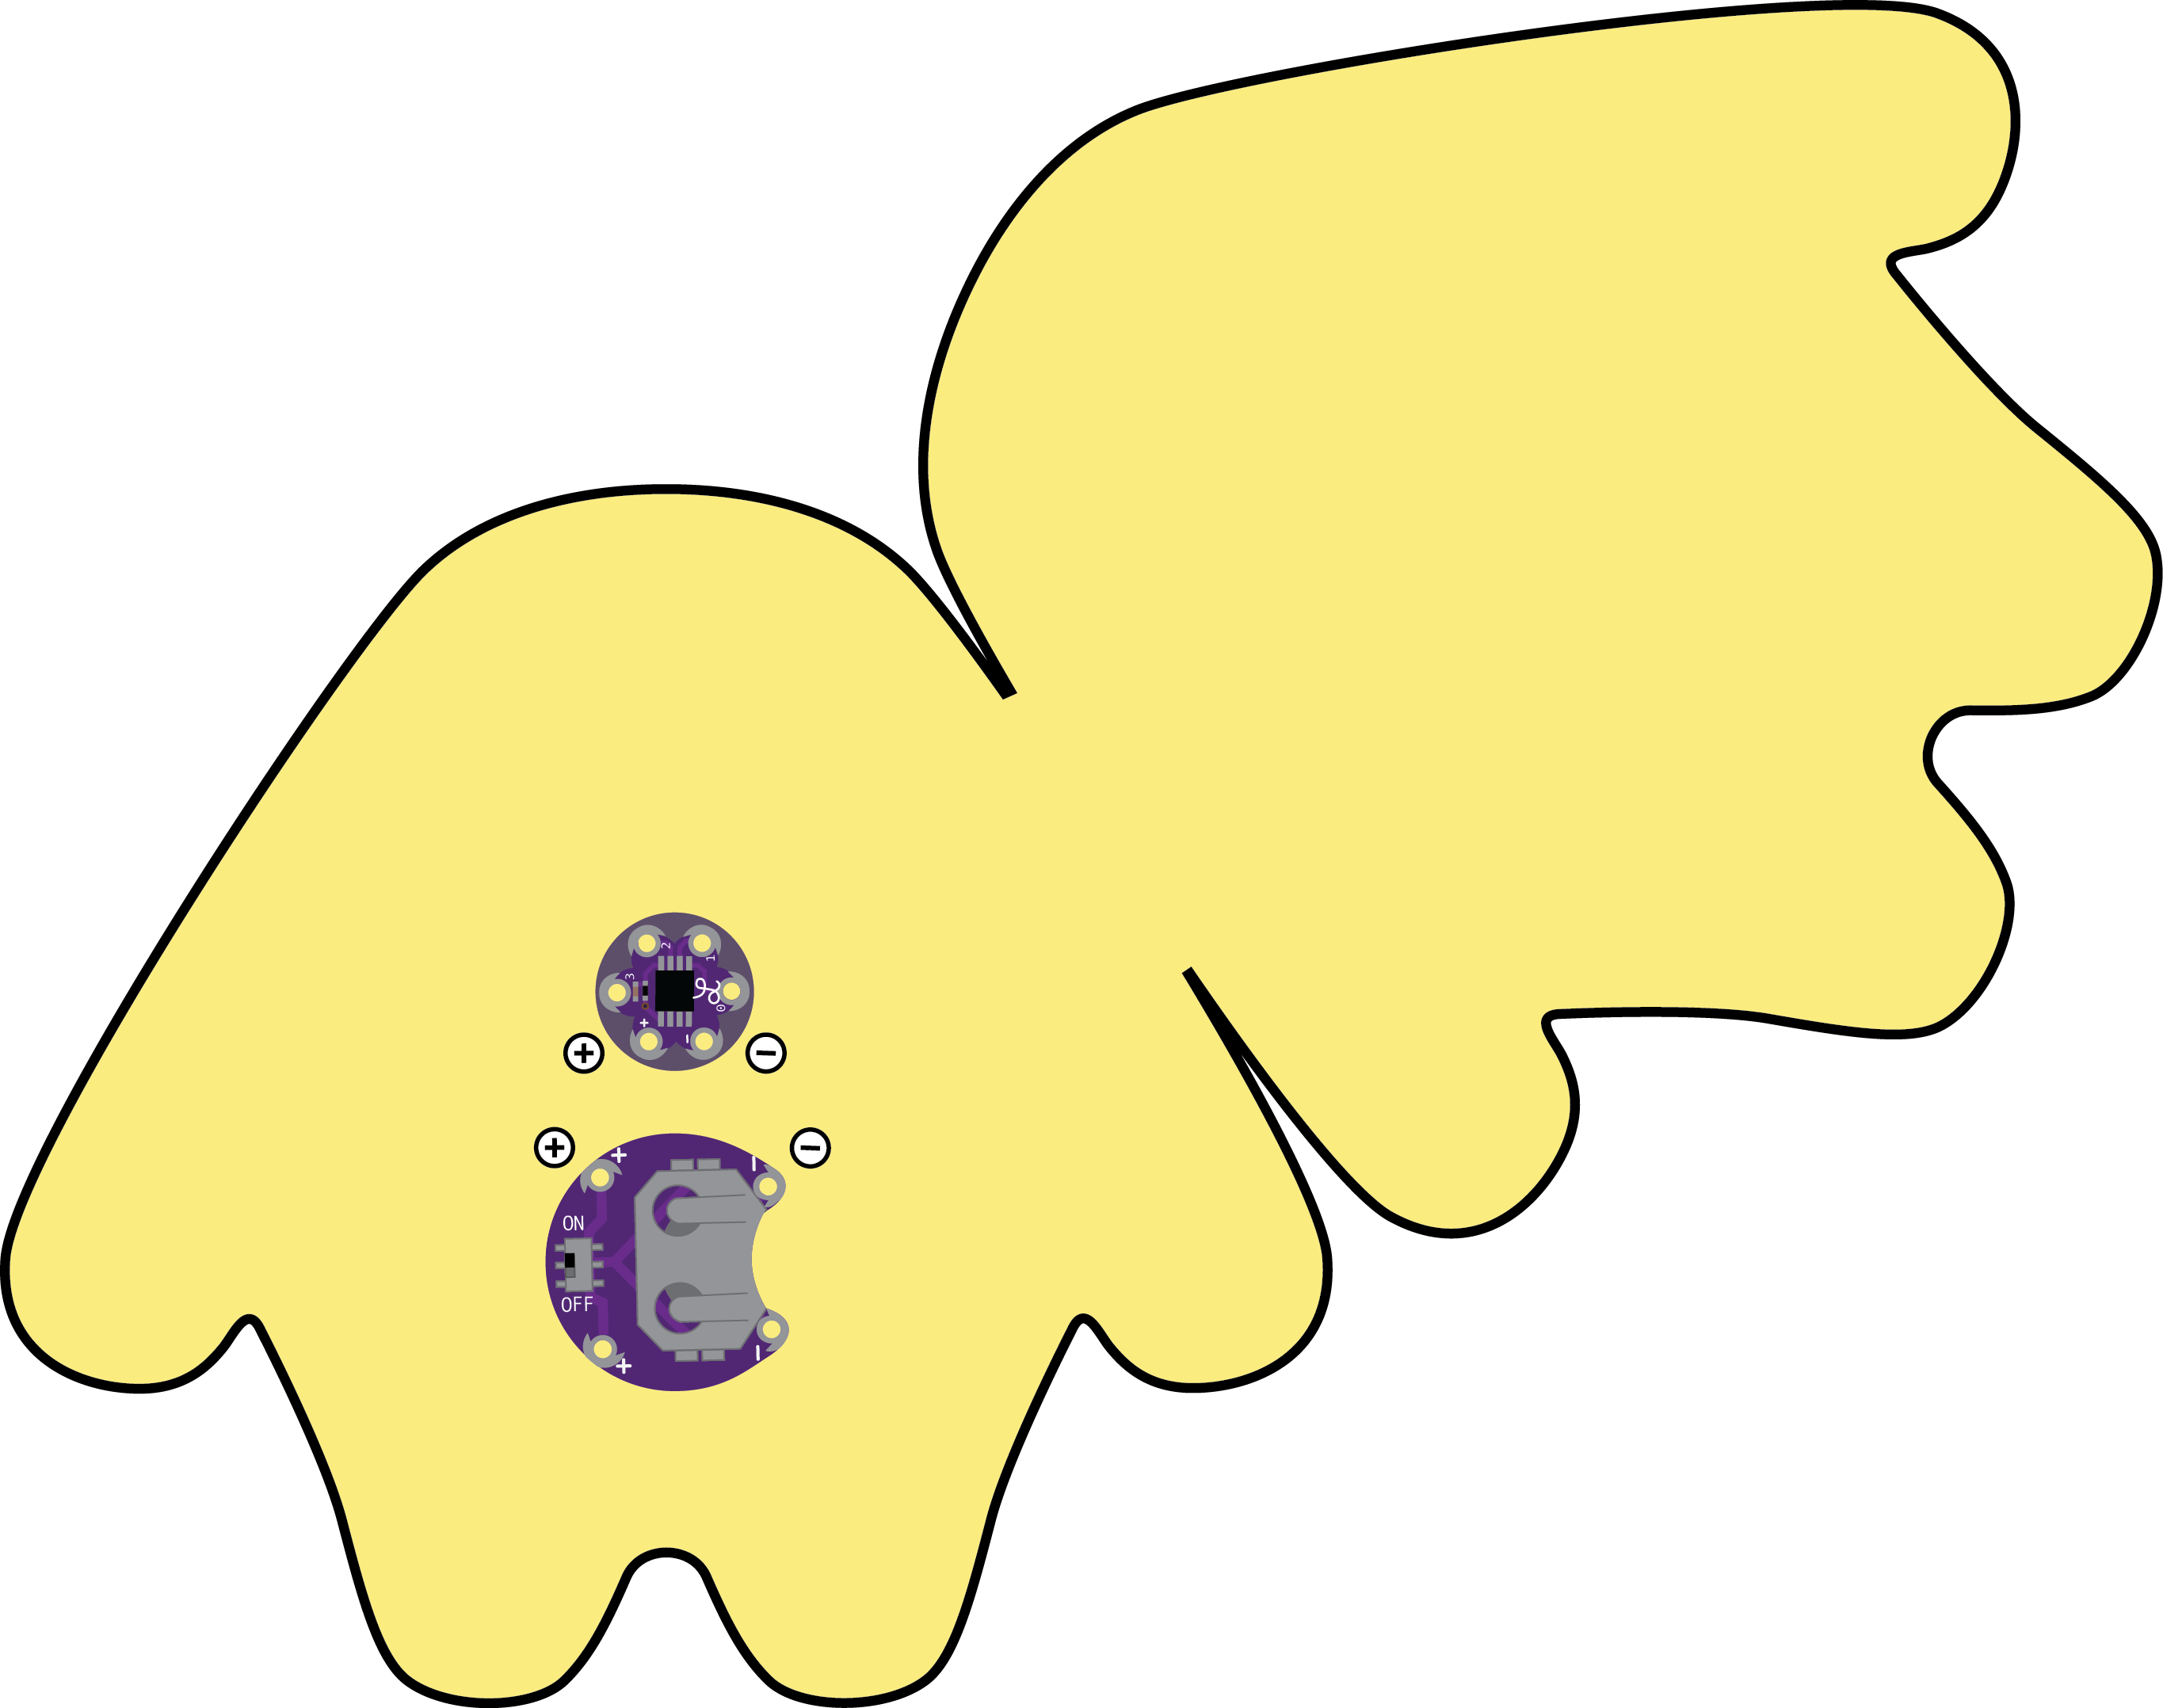
Then, use a little dab of hot glue on the back of the pieces to adhere to the fabric. Be careful not to fill any of the sewing holes with hot glue.
Don't worry about attaching the LEDs just yet - we'll be deciding where they go in a later step.
Step 3: Stitch Power and Ground Lines
Time to sew! Thread a needle with ~12 inches of conductive thread and tie a knot at the end.
Start by looping 2-3 times through and around the positive sew tab of the battery holder closest to the LilyTiny.
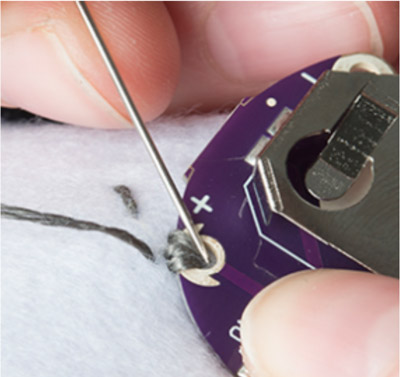
Stitch across the fabric until you reach the positive tab on the LilyTiny. Loop 2-3 times and knot it there. Cut off any excess thread.
Repeat this process for the negative tab on the battery holder to connect it to the negative tab on the LilyTiny.
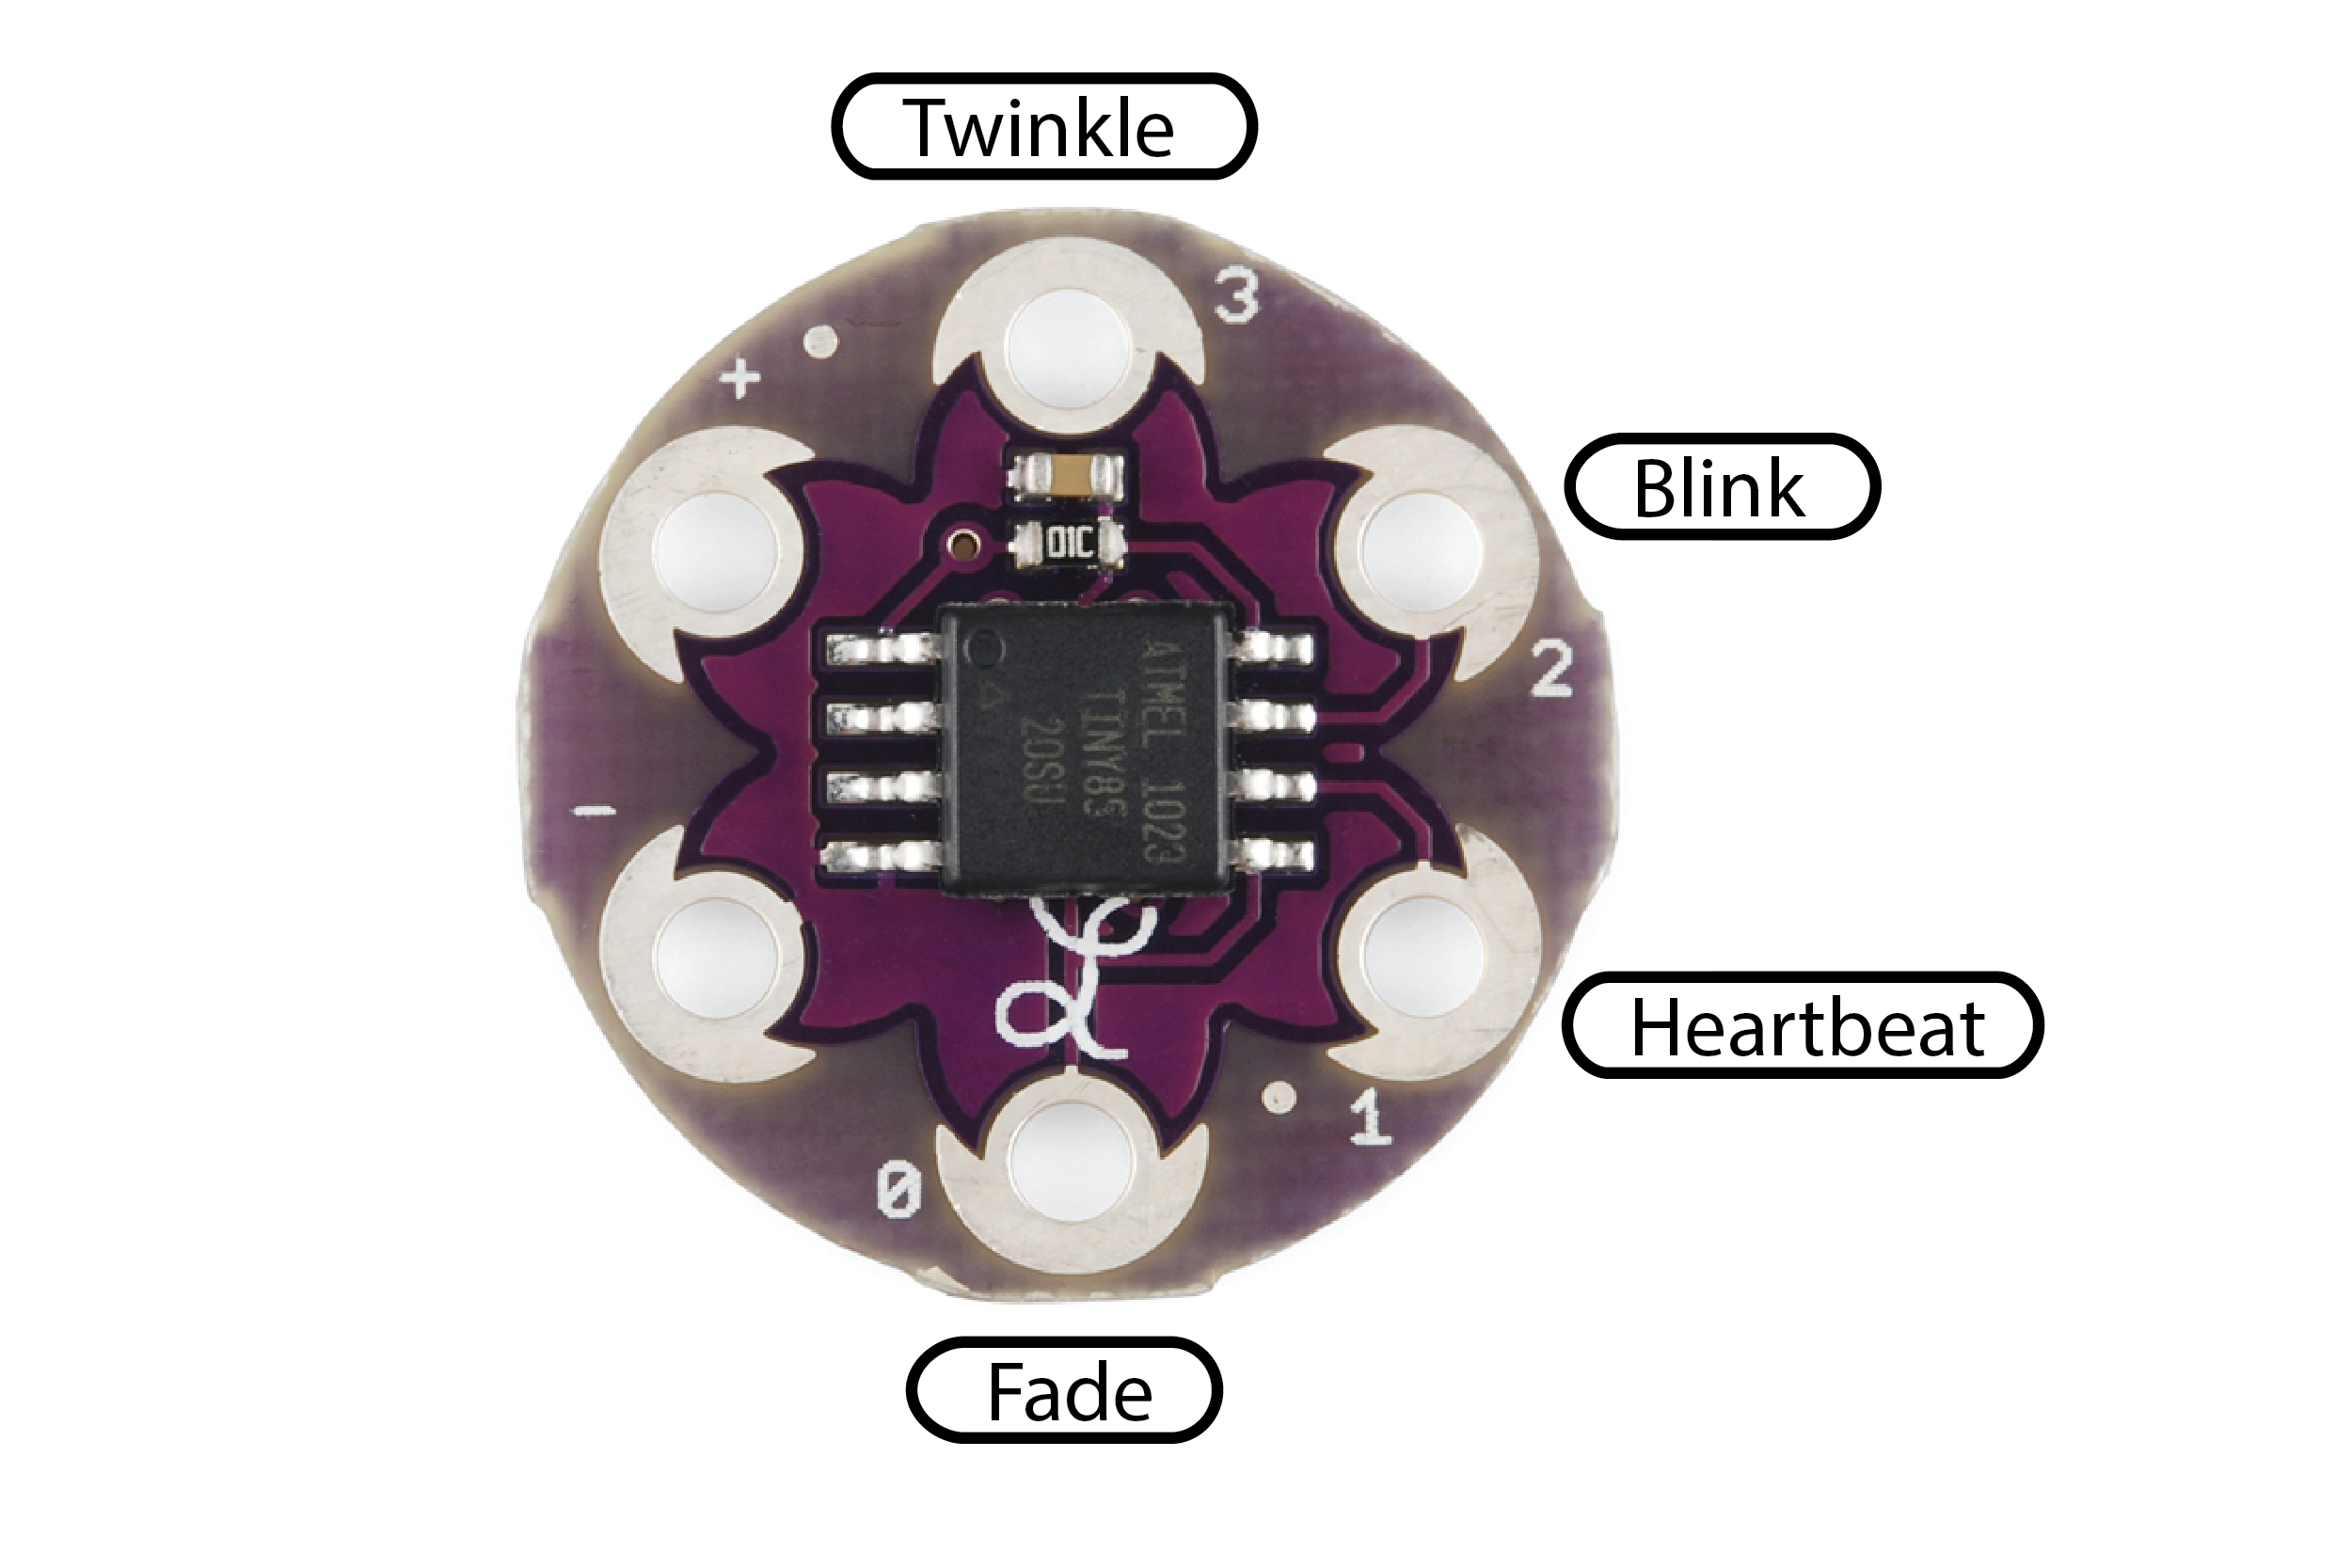
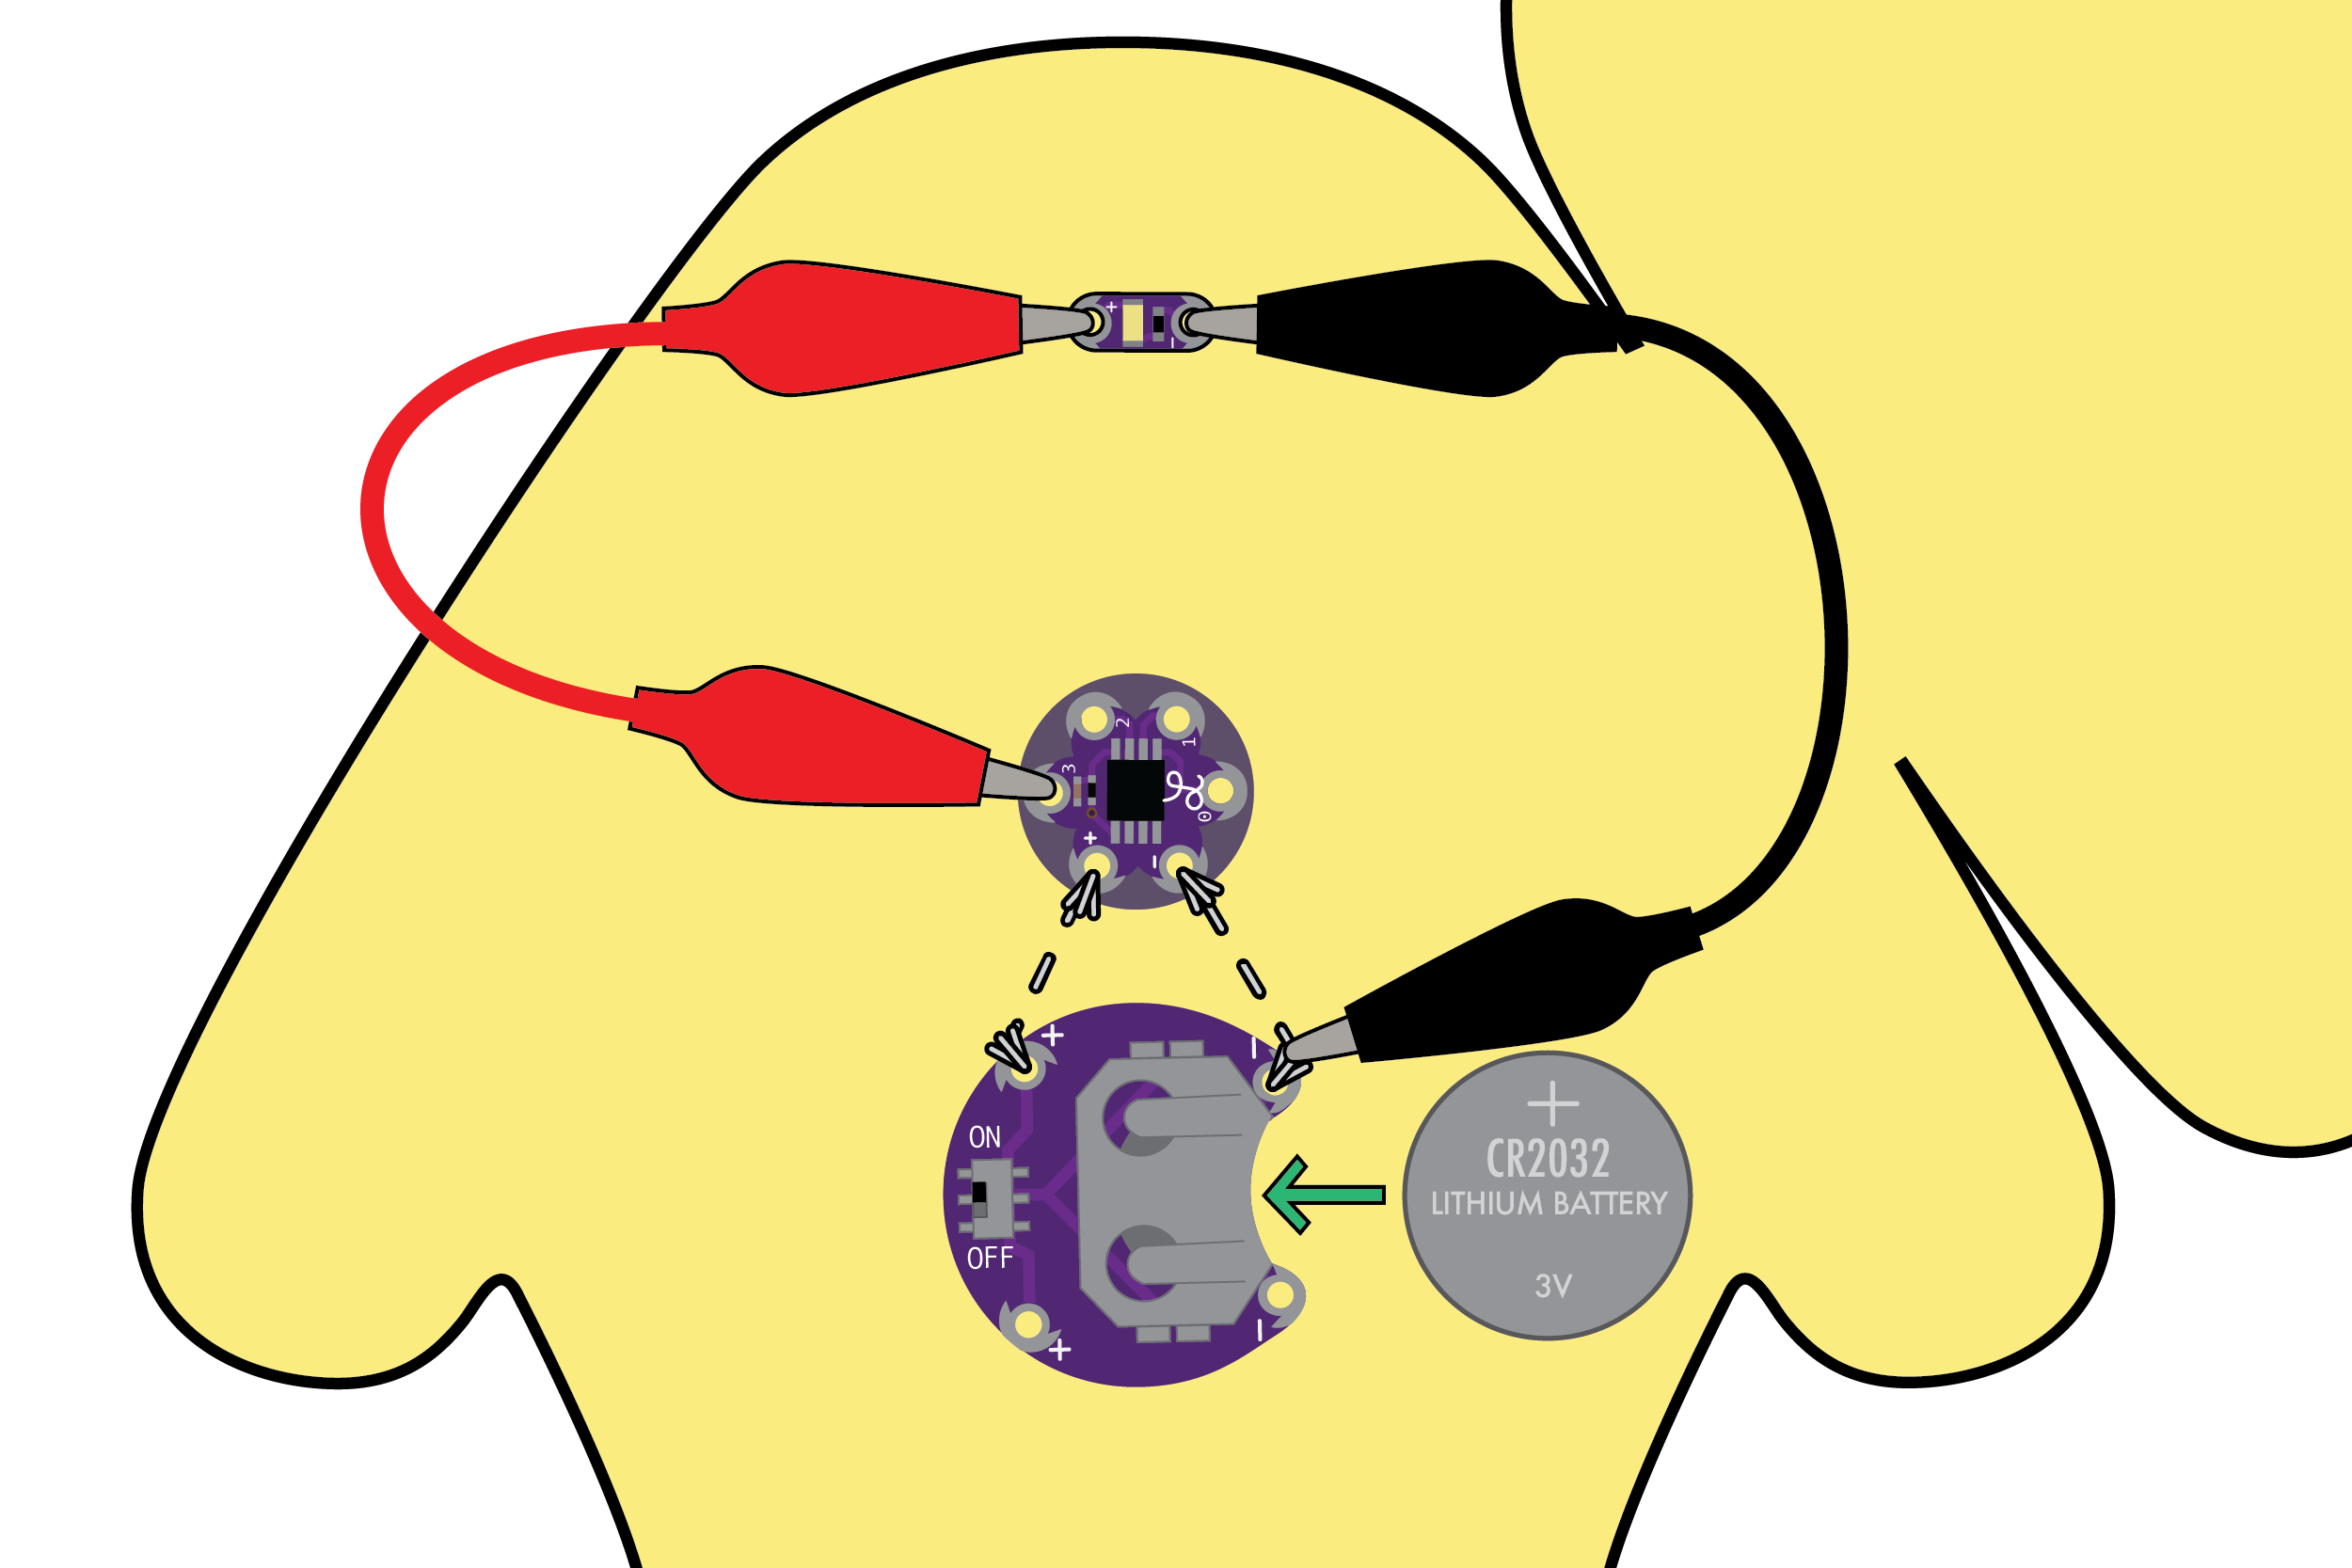
Step 4: Exploring the LilyTiny Pins
Next we will use alligator clips to temporarily connect an LED to the LilyTiny and decide which light pattern looks best for our monster. Each numbered sew tab is programmed with a different light effect.
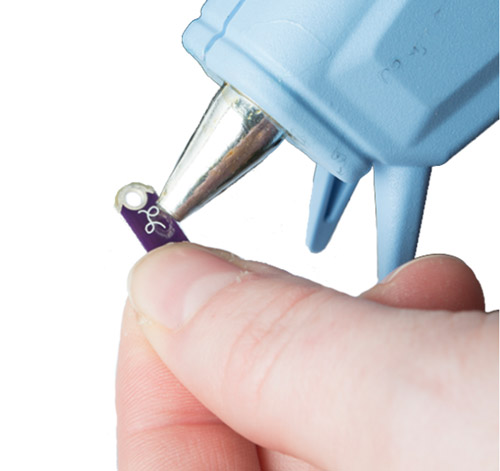
Use an alligator clip to attach the negative side of the LED to one of the negative tab on the battery holder. If the sewn one is too hard to grab with the clip, you can use the bottom negative tab. Make sure that the teeth of the clip are making good contact with the metal around the sewing holes.

Next, use another alligator clip to connect the positive end of the LED to one of the numbered tabs on the LilyTiny. Once everything is hooked up, insert a coin cell battery into the battery holder, and turn the slide switch to the ON position. You should see a light pattern begin on the LED. To explore what the other LilyTiny tabs do, carefully detach the end of the clip attached to the numbered hole, and move it to another one.
Step 5: Place LEDs
Now that we've decided what we want our LEDs to do, time to decide where they go.
Make sure to remove the battery from its holder and set aside before using the conductive thread. We'll power the project up again once we're done sewing the LEDs in place.
On the right side of the monster cut out, decide where the eyes should go. We're using two LEDs for eyes, but feel free to use one for a cyclops design, or more for a different look. As you are planning the LED placement, make sure all the negative sides of the LEDs point downward, and the positive sides point upward.

Use a hot glue gun to fix the LEDs in place, making sure not to get any extra glue in the holes.
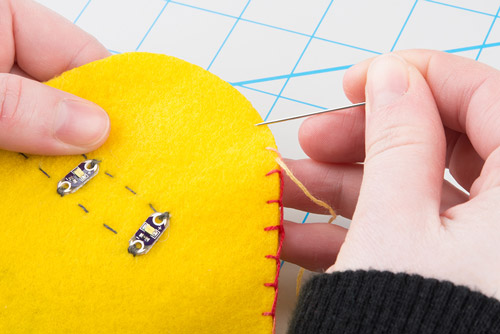
Step 6: Connect LEDs to LilyTiny
To make both LEDs light up together from one pin on the LilyTiny, we'll be stitching them in a parallel circuit. Begin at the tab you chose on the LilyTiny, stitch along to the first LED, loop 2-3 times around the positive hole, then continue stitching until you reach the next one. Loop 2-3 times around, then tie a knot. To help plan where the stitches will go, you can use a marker to draw lines between the LEDs before sewing. If you don't want to see the lines of conductive thread across the front of the monster, you can use a hidden stitch (blind stitch).
Note how the stitching leaves enough room around the LilyTiny and other stitch lines so they don't accidentally touch.
Once all our stitching is finished, let's add the battery back in and test the circuit. If everything is working, turn the switch to the OFF position before the final step.
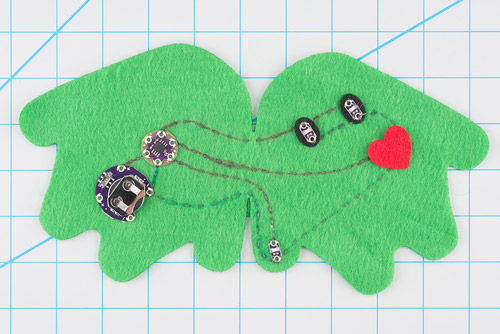
This example monster shows multiple LilyTiny tabs being used. The battery is in its holder for testing before moving on to the next step.
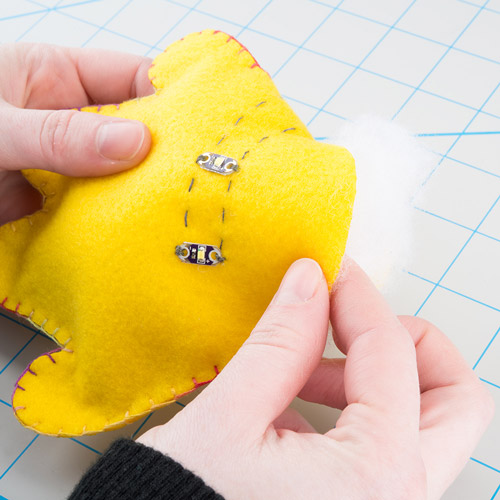
Step 7: Sew and Stuff Monster
Time to start the finishing touches on our monster. For e-textile projects with stitches on two sides that may touch, we'll need some sort of insulation. Luckily fiber fill or fabric scraps will provide enough of a spacer that the conductive thread on the front and back won't accidentally short circuit.
Make sure the battery is out of the project or switch is turned to OFF before this step.
Fold the felt in half so that all the LilyPad components are on the outside. Using a non-conductive thread such as cotton, nylon, or some fancy embroidery stitching, sew along the edges of the felt - leave a 1-2" opening for stuffing.
Finishing Touches and Embellishments:
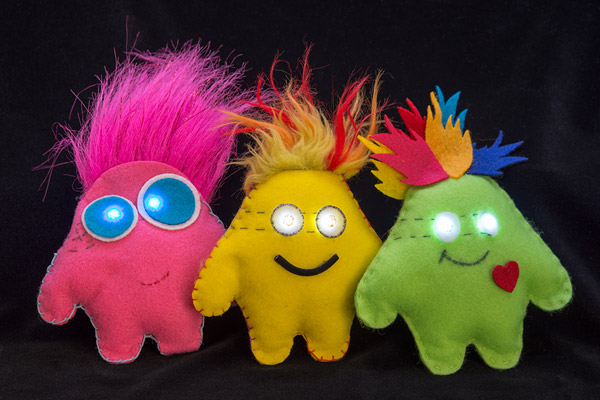
Once the monster is stuffed, close up the opening with a few more stitches, and start crafting a personality for it with eyes, facial features, or hair.
- White felt circles over the LEDs make great eyeballs - the felt is thin enough that the LEDs will shine through.
- If you want to hide your conductive thread stitching, try some fabric paint in a matching color or other decorations. This will also help protect from any short circuits if you accidentally set the monster down on a metal or conductive surface.
- Faux fur or feathers make great crazy hair.
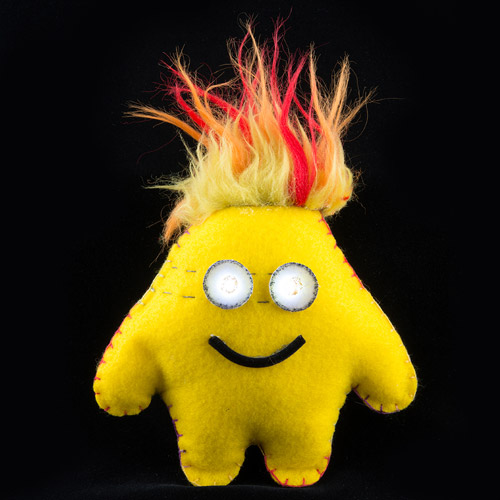
Here are some examples of finished monsters:
Resources and Going Further
Now that you've built the monster, you can try reprogramming the LilyTiny to create your own blinking effects.