Twinkling Trick or Treat Bag
Introduction
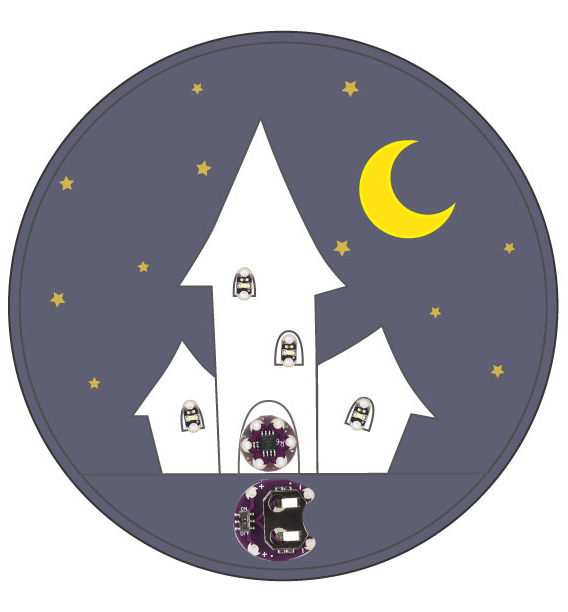
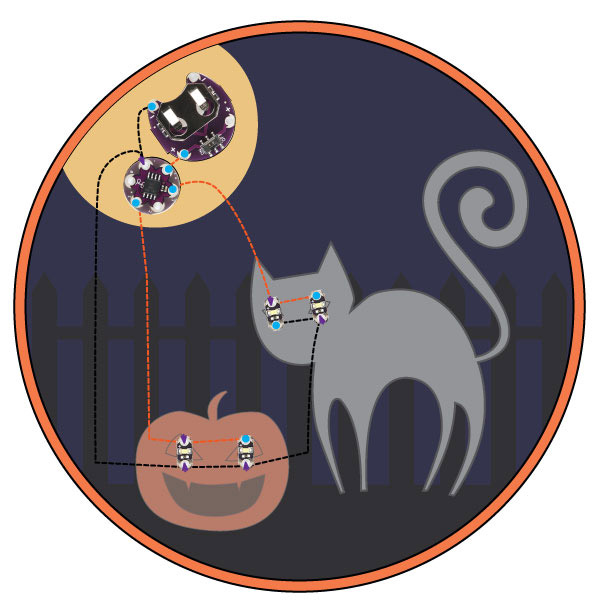
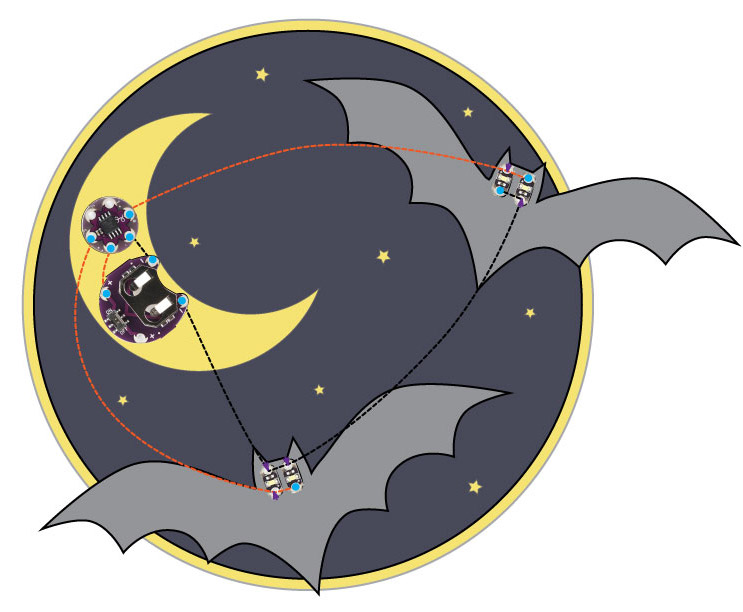
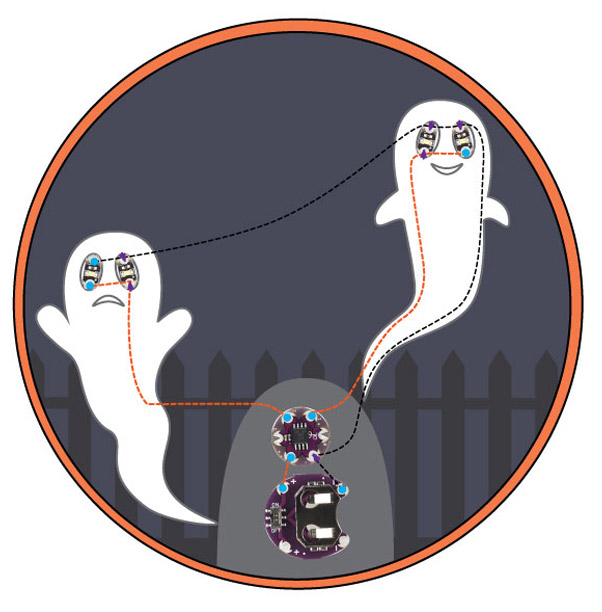
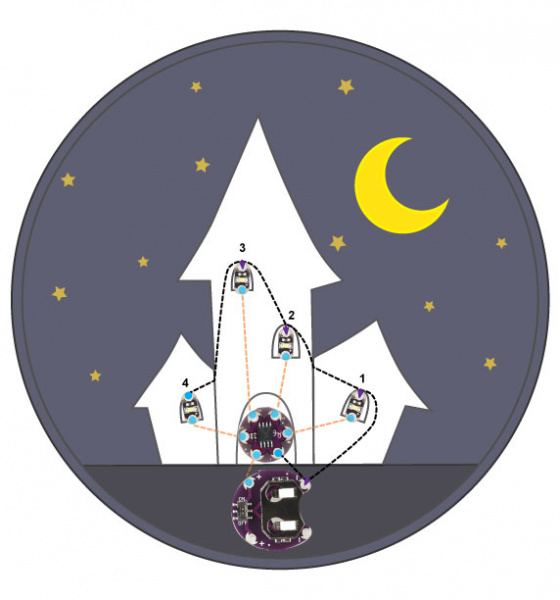
Get started crafting a twinkling treat bag! Download one of our pre-made designs and attach to your bag using an iron-on transfer. For this tutorial we'll be using the Haunted House design, but the process is similar for every template.
LilyTwinkle ProtoSnap
DEV-11590Suggested Reading
If you've never worked with e-textiles before, you may want to have a look at these other tutorials.
Materials and Tools
Let's go over all the things you'll need to sew your project together:
- Cotton Tote Bag
- Iron-On Fabric Transfers (check your local craft or hobby store)
- Inkjet Printer (if using Iron-On Transfers)
- Felt or Fabric (Black, Yellow, Orange, Gray, and White - depending on your design)
- Scissors
- Hot Glue Gun
- Velcro
- Insulating material (examples: acrylic/fabric paint, fabric glue, iron-on interfacing, or extra fabric) see Step 7 for more info.
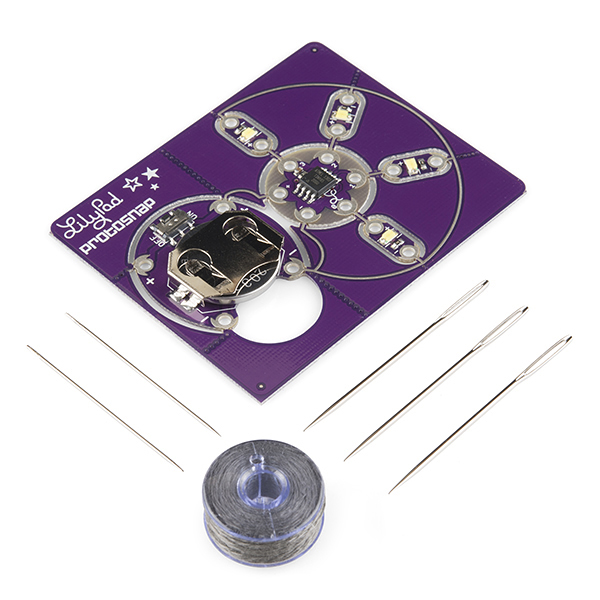
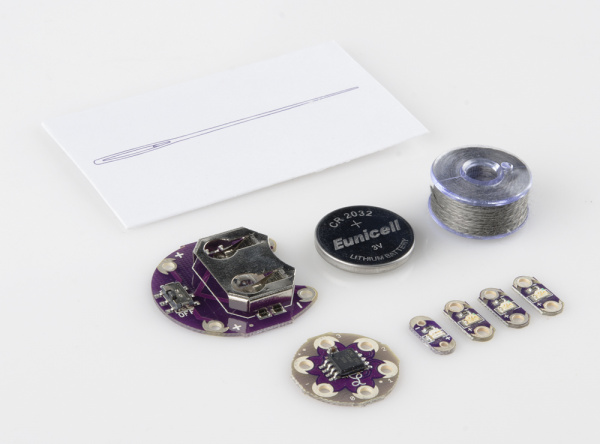
ProtoSnap LilyPad Twinkle Kit Includes:
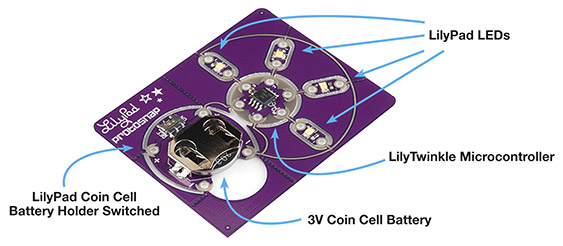
- LilyTwinkle Microcontroller
- 4 White LilyPad LEDs
- LilyPad Coin Cell Battery Holder (Switched)
- 3V Coin Cell Battery
- Bobbin of Conductive Thread
- Sewing Needles - We recommend you use the smaller needles that come with your kit, the big needles will leave large holes around your stitches when sewing through the iron-on transfer.
For the graphics in this tutorial, we'll be using a key that helps explain what is going on at each step:
Step 1: Prepare Your Canvas
We'll be translating the circuit from our ProtoSnap LilyTwinkle onto the tote bag. First, choose one of the Halloween designs to transfer onto the bag.
Download House Design
Download Cat Design
Download Bat Design
Download Ghost Design
After downloading a design, follow the directions on the package of your iron-on transfers to prepare your print. Tip: do a test print on plain paper before using the transfer paper to make sure your printer's margins show the whole template.
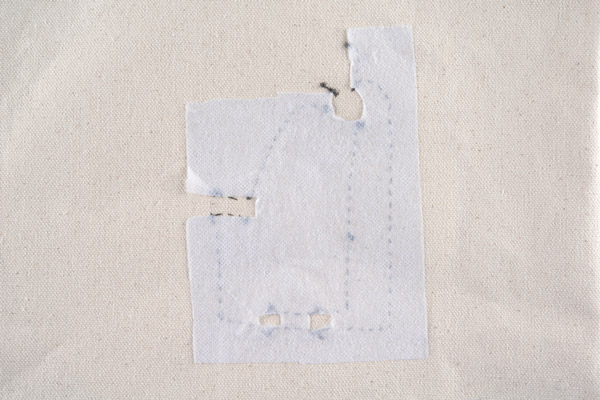
Let the transfer dry (typically 30 minutes after printing), then cut around the design to remove all the instructional text and info. Place the image on the tote bag and follow the package instructions to iron it on. After ironing, let the transfer cool for a few minutes before peeling the backing away.
While we are waiting for the design to cool off, let's break apart our LilyTwinkle pieces and fire up the glue gun for the next step. You may need to use snips to break them apart. Remove the battery and set it aside until all the sewing is completed.
Step 2: Attach Components
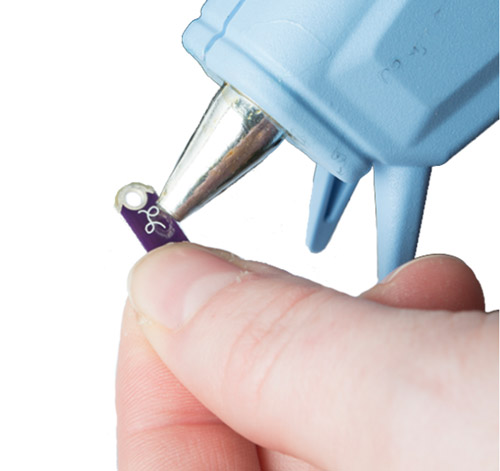
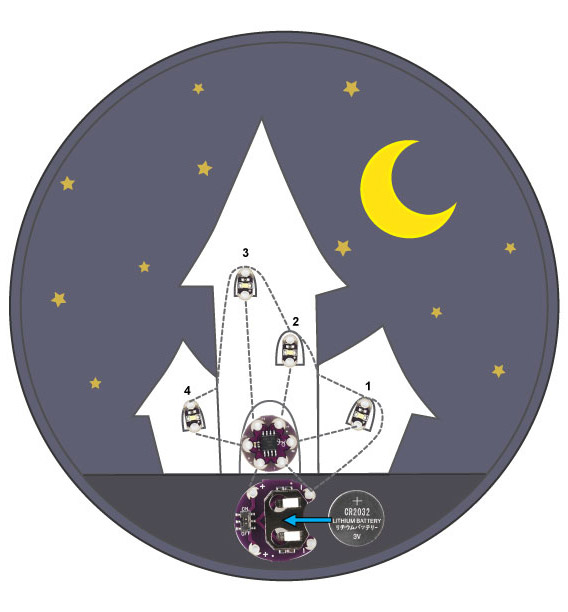
Look at your design to identify the outlines where each component is placed. Line up the positive and negative symbols on your components with their matching outline on the tote bag. Then use a little dab of hot glue on the back of the pieces to adhere to the fabric. Be careful not to fill any of the sewing holes with hot glue. If your glue is seeping through the first layer of fabric and accidentally gluing the bag shut, use a piece of cardboard inside the tote while attaching components.
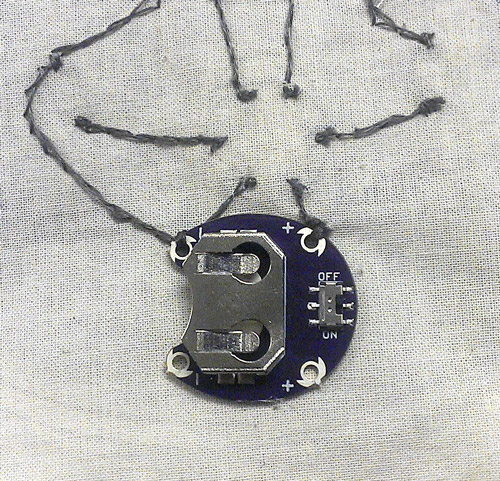
If you'd rather have your battery holder on the inside of the bag than the outside, it will look like this (picture is of finished project):
Step 3: Sew Power Lines
Double check that all your components are face up and positioned correctly. Thread a needle with ~12 inches of conductive thread and tie a knot at the end.
Stitching Tip: Occasionally check both the front and back of your stitches as you work to make sure you aren't accidentally sewing the bag closed or tangling the conductive thread inside the bag.
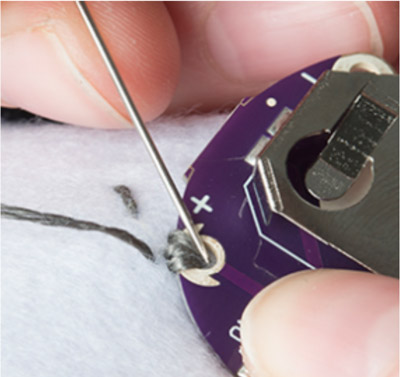
Start by looping 2-3 times through and around the positive pin of the battery holder closest to the LilyTwinkle.
Stitch along the marked line until you reach the positive pin on the LilyTwinkle. Loop 2-3 times and knot it there. Cut off any excess thread.
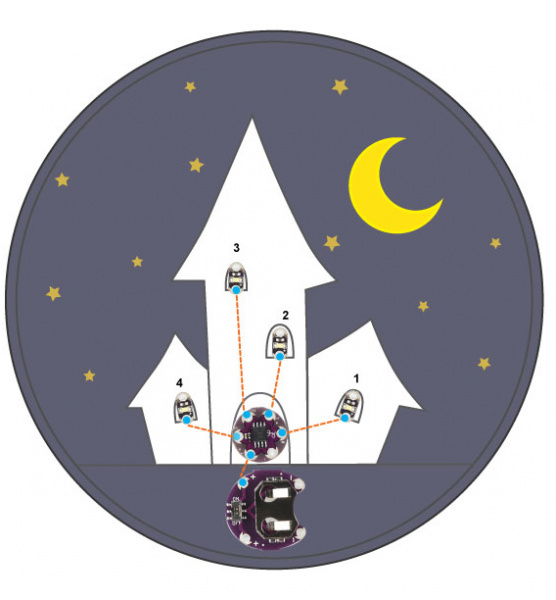
Repeat this process for the LEDs, following the lines to connect the positive ends to the marked holes on the LilyTwinkle as shown below.
Differences in Templates:
The other designs group LEDs together in a parallel circuit. The Bat, Cat, and Ghost designs use two LEDS to one pin on the LilyTwinkle so that they light up together. For these LEDs, loop 2-3 times over the first LED in the pair and then continue stitching until you reach the next one, loop 2-3 times around, then tie a knot.
Want to learn more about multiple LED circuits? Check out LDK Experiment 2: Multiple LED Circuits.
Note: Bat design uses both negative pins on the battery holder instead of one so that the stitching doesn't accidentally touch the board.
Step 4: Sew Negative Lines
The negative lines work a little differently - we can connect all of them together with one piece of conductive thread. Make sure you have a really long piece of thread to start with.
Remember to keep checking both the front and back of your stitches to avoid tangles or knots.
- With a new piece of thread loop 2-3 times through and around the negative pin of the LilyTwinkle and follow the line to connect it to the negative pin of the battery holder.
- Continue sewing up to your first negative pin on LED 1.
- Loop through and around it there 2-3 times and continue your trace from right to left. Loop 2-3 times through and around each of the negative pins on LEDs 2-4.
- Once you reach the negative pin on LED 4, loop and knot it there. Cut off any excess thread.
- Hooray! This completes your sewing.
Step 5: Power It Up
After all the stitching is done, check your design for any loose thread tails or short circuits (threads overlapping where they shouldn't). If everything looks okay, insert the battery into the battery holder and turn the switch to the ON position. Your design should start twinkling!
If your design is not lighting up, you may need to do some troubleshooting. Refer to the E-Textile Basics tutorial for help if you need it.
Now let's finish decorating our tote by adding some felt shapes to hide the components.
Step 6: Decorate
Time to cover up the electronics so they shine through your design! Use the provided templates to cut shapes out of felt or fabric.
Download House Shapes
Download Cat Shapes
Download Bat Shapes
Download Ghost Shapes
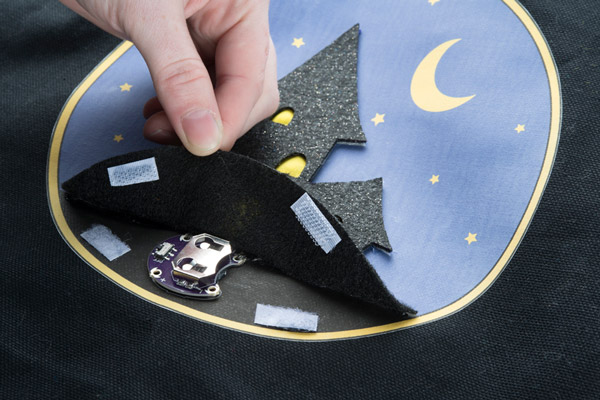
For the shapes covering the battery holder and LilyTwinkle, use velcro to turn them into a flap so you can still access the battery to change it out if needed. You can also cut a small hold right above the switch so that you can turn the bag on/off without needed to lift the flap.
Glue the other shapes over the LEDs to hide them away. Adding a layer of contrasting fabric under the eyes of the ghost and cat designs make for an even spookier look.
Step 7: Insulate
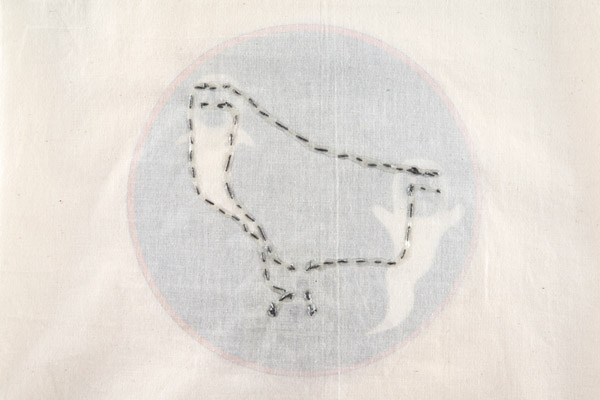
Once the front of your project is decorated, it's time to insulate the conductive thread so that stitches won't accidentally touch each other and short circuit when the fabric moves. Isolating conductive thread also protects it from wear and tear and will prolong the life of your project. These methods are shown for the inside of your project, the paint and glue methods also work well on the outside.
Some ways to insulate conductive thread (choose one):
- Use acrylic or fabric paints to paint over the stitching.
- Use fabric glue to cover the stitches.
- Use iron-on interfacing to cover the stitches (on the back of your project) - be careful not to iron directly on any LilyPad components, they could melt.
- Attach a piece of fabric on the inside of the tote to protect the stitches.
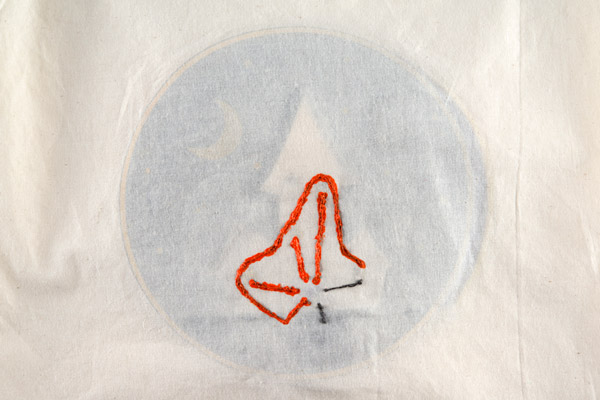
Example of painted insulation - the orange is the paint and grey is the conductive thread. Tip: Use a paintbrush to paint accurate lines. 3D puff paint in squeezable containers also works well.
Example of fabric glue insulation - clear fabric glue lets the stitching show through while still protecting it. Tip: Rub a tiny bit of baby powder or flour over the glue if it is still tacky after drying.
Example of interfacing insulation - cut interfacing to cover stitches only. Tip: Use a craft iron to get into small spaces.
Example of fabric insulation - glue or stitch over the conductive thread. Tip: Use the backing from your iron-on as a template to trace onto felt/fabric.
Other Insulation Techniques:
Kobakant's wearables website has a great overview of different insulation/isolation methods: How To Get What You Want: Isolating Traces
Resources and Going Further
Now that you know how to light up the night with LilyTwinkle, you may want to check out some of these other tutorials:


