LilyPad Basics: E-Sewing
 Gella
Gella 
Troubleshooting
As you work on e-sewing projects, you may encounter problems such as loose connections that keep LEDs from lighting or cause your circuit to malfunction. Most LilyPad tutorials have a troubleshooting section to help you identify and solve problems with your circuit.
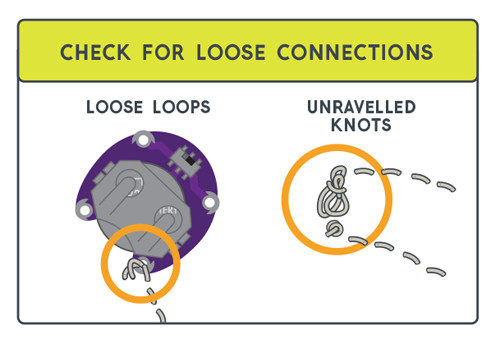
Circuit only working sometimes? Check for loose connections.
If the conductive thread is not making a tight connection to the LilyPad piece's sew tabs, current will not be able to flow through consistently. If the project moves, the conductive thread may pull away from the sew tab and disconnect the circuit. To fix, pull stitching tight with tweezers or a needle if possible. You may also sew over the top of existing thread to create more tension and hold the thread securely to a sew tab.
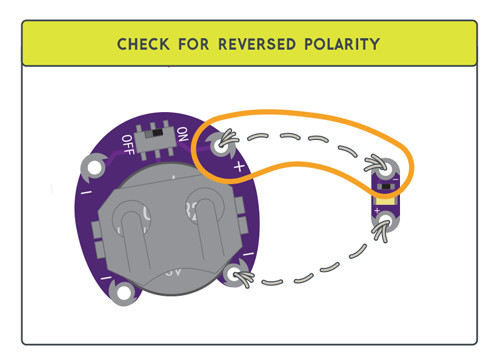
Circuit not working? Double check your polarity.
Some LilyPad components are polarized, meaning electric current can only flow through them in one direction. If sewn into the circuit incorrectly, they will not function. Double check the labeled sew tabs before you stitch to make sure they are oriented correctly.
Other issues to check for:
- Make sure the switch on your battery holder is in the ON position.
- Check to see if your battery is dead. You can do so with a multimeter. Try installing a spare battery.
- If following a project template, double check that the components are connected together in the right configuration
If you are still having trouble, you can use a multimeter to check for continuity or issues with your circuit. Our How To Use a Multimeter tutorial will help you get started.