Light-Up Plush
 Gella
Gella 
Arranging Your Circuit
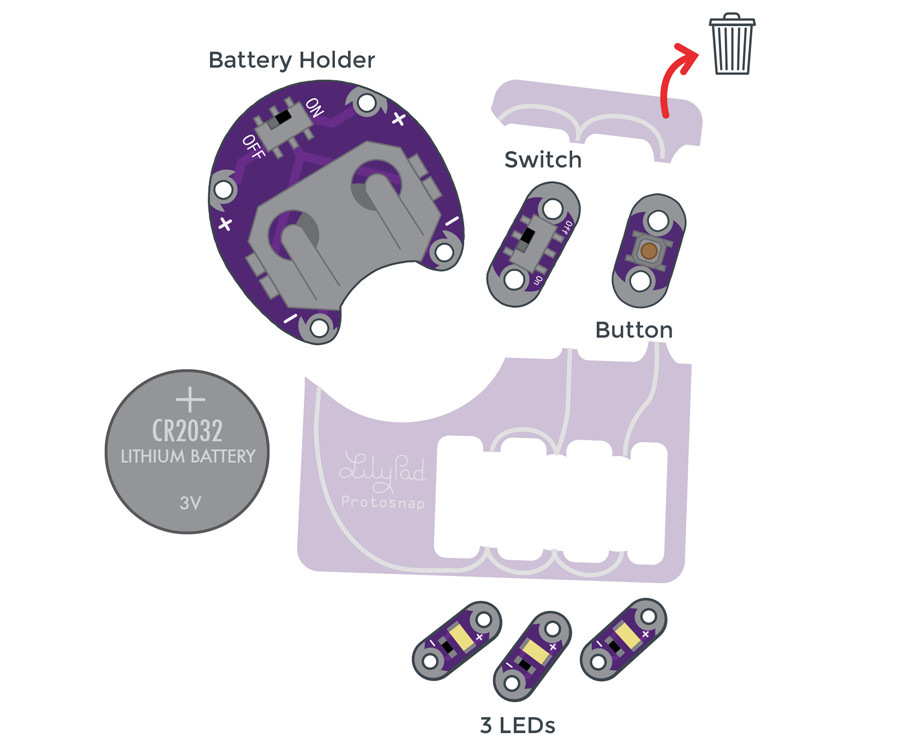
Carefully snap apart the connected components on the E-Sewing ProtoSnap panel. Discard the non-sewable pieces and scraps. You will end up with six LilyPad pieces: a battery holder with battery, three LEDs, a button, and a switch.
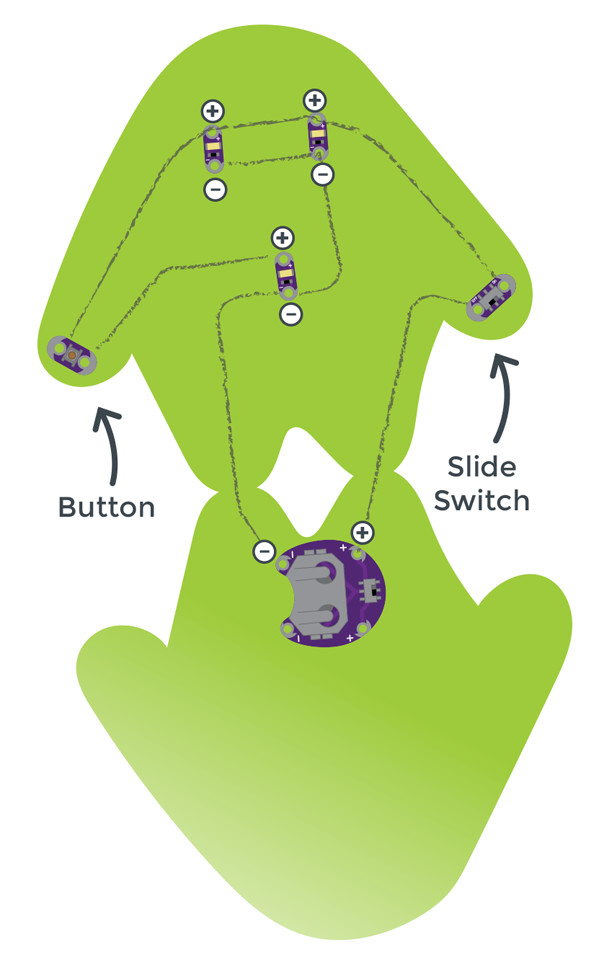
Arrange the pieces on the felt according to the diagram below. Make sure to check the orientation of the LilyPad LEDs before you stitch them together. The positive tabs of the LED connect to the button or switch, and the negative tabs connect to the negative tab on the battery holder. When your circuit design is finalized, use a dab of glue on the back of each component to attach them to the felt.
This project has a lot of stitching. If you want to hide the stitches, use a layer of felt or decorations over the thread after you’ve finished your circuit (see Finishing Touches section), or use a hidden stitch (see our E-Sewing Basics tutorial).