IR Control Kit Hookup Guide
 jimblom,
  bboyho
Example 3: Transmitting
After you've gotten the remote and receiver working, it's time to add some IR transmission to the setup.
For this example, we'll set up an infrared data relay using both the receiver and an IR LED to transmit data. IR codes received by the Arduino can be sent out the LED by the press of a button.
Setting Up the Hardware
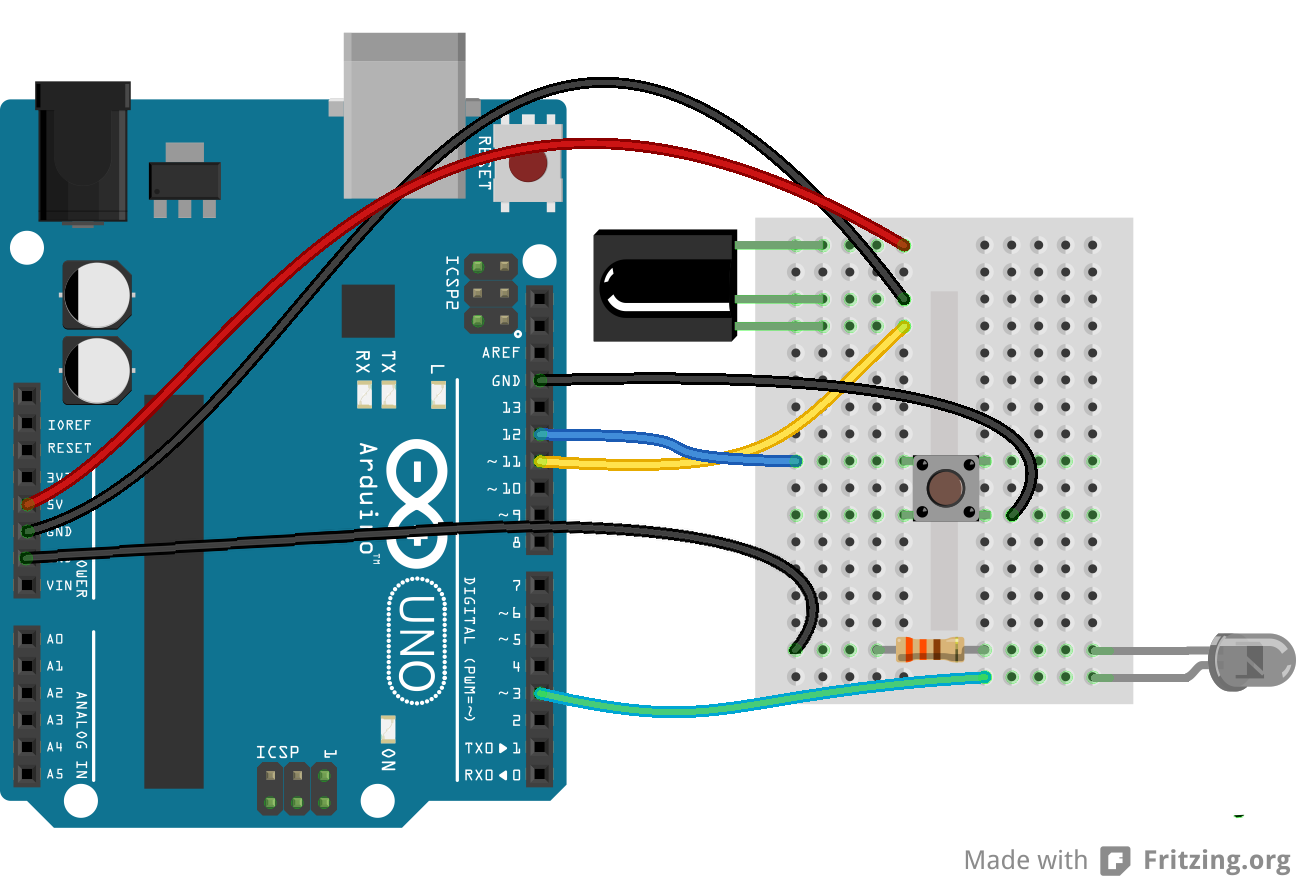
On the hardware level, using the IRremote library, there's only one pin we can use to transmit IR data: pin 3. There's not any give here; pin 3's PWM-capabilities make it one of the best choices for transmitting the 38kHz modulated IR data.
We'll also be adding a button to this circuit. If you don't have a button around, you can simply pull pin 12 LOW to emulate a button press. Here's the whole circuit:
Adding Code
Once you've got the hardware all wired up, copy and paste the code below. Then upload it to your Arduino.
language:c
/* IRrecord (Redux)
by: Jim Lindblom
SparkFun Electronics
date: October 1, 2013
This sketch uses Ken Shirriff's *awesome* IRremote library:
https://github.com/shirriff/Arduino-IRremote
It's a slightly modified version of the IRrecord example that
comes with that library.
This sketch uses the IR receiver diode to "record" an IR code.
Then, when triggered via a button on pin 12, it will transmit
that IR code out of an attached IR LED on pin 3.
Hardware setup:
* The output of an IR Receiver Diode (38 kHz demodulating
version) should be connected to the Arduino's pin 11.
* The IR Receiver diode should also be powered off the
Arduino's 5V and GND rails.
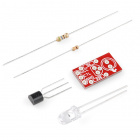
* The anode (+, longer leg) of an IR LED should be connected to pin 3 of
the Arduino. The cathode (-) should be connected to a 330
Ohm resistor, which connects to ground.
* A button should be connected to ground on one end, and pin
12 of the Arduino on the other.
*/
#include <IRremote.h> // Include the IRremote library
/* Connect the output of the IR receiver diode to pin 11. */
int RECV_PIN = 11;
/* Initialize the irrecv part of the IRremote library */
IRrecv irrecv(RECV_PIN);
decode_results results; // This will store our IR received codes
IRsend irsend; // Enables IR transmit on pin 3
/* Storage variables for the received IR code: */
unsigned int irLen = 0; // The length of the code
unsigned int irBuffer[RAWBUF]; // Storage for raw (UNKNOWN) codes
int codeType; // The type of code (NEC, SONY, UNKNOWN, etc.)
unsigned int codeValue; // The value of a known code
boolean codeReceived = false; // A boolean to keep track of if a code was received
const int buttonPin = 12; // Button pin. Pulled up. Triggered when connected to ground.
// setup() initializes serial and the Infrared receiver.
void setup()
{
Serial.begin(9600);
irrecv.enableIRIn(); // Start the receiver
pinMode(buttonPin, INPUT_PULLUP);
}
// loop() checks for either a button press or a received IR code.
void loop()
{
if (irrecv.decode(&results))
{
updateIRReceive(); // Sort out the received code
codeReceived = true; // Enables code transmit on button press
irrecv.resume(); // re-enable receive
}
// If the button is pressed, and we've received a code...
if ((digitalRead(buttonPin) == LOW) && (codeReceived == true))
{
sendCode(); // Sends out our code. (See bottom of sketch).
irrecv.enableIRIn(); // Re-enable receiver
// We only want to be able to send the code once. Re-set
// codeReceived to false:
codeReceived = false;
}
}
/* This function reads in the received IR data, and updates the
following variables:
* codeType -- How was the IR signal encoded? SONY, NEC,
UNKNOWN, etc.
* irLen -- The length (number of marks and ticks) of an IR code.
* Depending on the codeType, one of these two variables will
be updated as well:
* codeValue -- IF the codeType is a known type, this variable
will contain the received code.
* irBuffer -- If the codeType is UNKNOWN, this buffer will
contain the format of the received code.
This function borrows heavily from the IRrecord example code.
*/
void updateIRReceive()
{
codeType = results.decode_type;
irLen = results.rawlen;
if (codeType == UNKNOWN)
{
irLen--;
// We need to convert from ticks to microseconds
for (int i = 1; i <= irLen; i++)
{
if (i % 2)
{
// Mark
irBuffer[i-1] = results.rawbuf[i]*USECPERTICK - MARK_EXCESS;
Serial.print(" m");
}
else
{
// Space
irBuffer[i-1] = results.rawbuf[i]*USECPERTICK + MARK_EXCESS;
Serial.print(" s");
}
Serial.print(irBuffer[i-1], DEC);
}
Serial.println();
}
else
{
if (codeType == NEC)
{
Serial.print("Received NEC: ");
if (results.value == REPEAT)
{
// Don't record a NEC repeat value as that's useless.
Serial.println("repeat; ignoring.");
return;
}
}
else if (codeType == SONY)
{
Serial.print("Received SONY: ");
}
else if (codeType == RC5)
{
Serial.print("Received RC5: ");
}
else if (codeType == RC6)
{
Serial.print("Received RC6: ");
}
else
{
Serial.print("Unexpected codeType ");
Serial.print(codeType, DEC);
Serial.println("");
}
Serial.println(results.value, HEX);
codeValue = results.value;
irLen = results.bits;
}
}
void sendCode()
{
if (codeType == NEC)
{
irsend.sendNEC(codeValue, irLen);
Serial.print("Sent NEC ");
Serial.println(codeValue, HEX);
}
else if (codeType == SONY)
{
irsend.sendSony(codeValue, irLen);
Serial.print("Sent Sony ");
Serial.println(codeValue, HEX);
}
else if (codeType == RC5 || codeType == RC6)
{
// Put the toggle bit into the code to send
codeValue = codeValue & ~(1 << (irLen - 1));
if (codeType == RC5)
{
Serial.print("Sent RC5 ");
Serial.println(codeValue, HEX);
irsend.sendRC5(codeValue, irLen);
}
else
{
irsend.sendRC6(codeValue, irLen);
Serial.print("Sent RC6 ");
Serial.println(codeValue, HEX);
}
}
else if (codeType == UNKNOWN /* i.e. raw */)
{
// Assume 38 KHz
irsend.sendRaw(irBuffer, irLen, 38);
Serial.println("Sent raw");
}
}
To use the sketch, you'll still need an IR remote. Begin by opening the serial monitor (at 9600 bps). Then press a button on the remote. The serial monitor should notify you that a IR code was received. The Arduino's now all loaded up, ready to spit out its own IR code.
To send out the IR code, press the button connected to pin 12 (or just short a jumper wire from 12 to GND). The way the example code is written, the IR LED will send the IR code once until the Arduino receives another IR code to record. Unless you have a device that is looking for specific IR codes, you may not see anything happen. Try the sketch out with some IR remotes and appliances around your house. Can your Arduino trigger your TV to mute?
Delving Into IR Sends
If you're using the IRremote library to transmit data, there are just a few lines of code you'll need to add. First, you'll need to declare an instance of IRsend at the top of your code:
language:c
IRsend irsend;
There are a variety of transmitting options made available by the library. They vary by encoding scheme, which usually depends on the manufacturer. You can use any of these functions to send out IR data:
language:c
void sendNEC(unsigned long data, int nbits);
void sendSony(unsigned long data, int nbits);
void sendRC5(unsigned long data, int nbits);
void sendRC6(unsigned long data, int nbits);
void sendDISH(unsigned long data, int nbits);
void sendSharp(unsigned long data, int nbits);
void sendPanasonic(unsigned int address, unsigned long data);
void sendJVC(unsigned long data, int nbits, int repeat);

void sendRaw(unsigned int buf[], int len, int hz);
If you don't have an appliance matching any of those manufacturers (NEC, Sony, DISH, Sharp, Panasonic, JVC, etc.), you'll have to use the sendRaw function to transmit your IR code.
If you want to drive an IR LED properly, consider using the IR LED with a transistor and resistor that was used in the design of the old SparkFun Max Power IR LED kit. To control, simply provide it with voltage (5V), ground, and connect the CTL pin to a digital pin on your Arduino, and you can drive this kit just like a normal LED. However, a 330Ω attached to your IR LED should give about 10 feet of range.