IoT RedBoard ESP32 Development Board Hookup Guide
 SparkFro
Example 2: WiFi
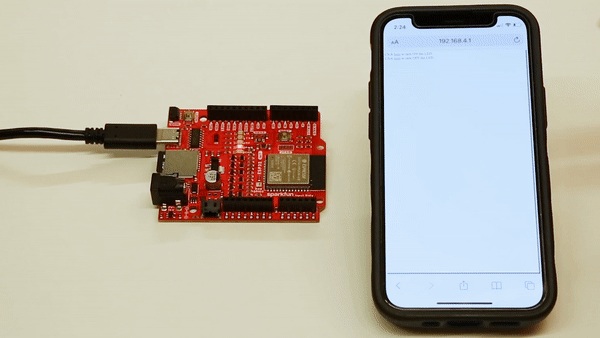
One of the main selling points of the ESP32 is the Wireless functionality. The Access Point example is a nice standalone demo; you connect to an AP created by the ESP32 (SSID and password are configurable), then connect to a web server running on the ESP32 (must use IP address 192.168.4.1), where the LED can be toggled on/off.
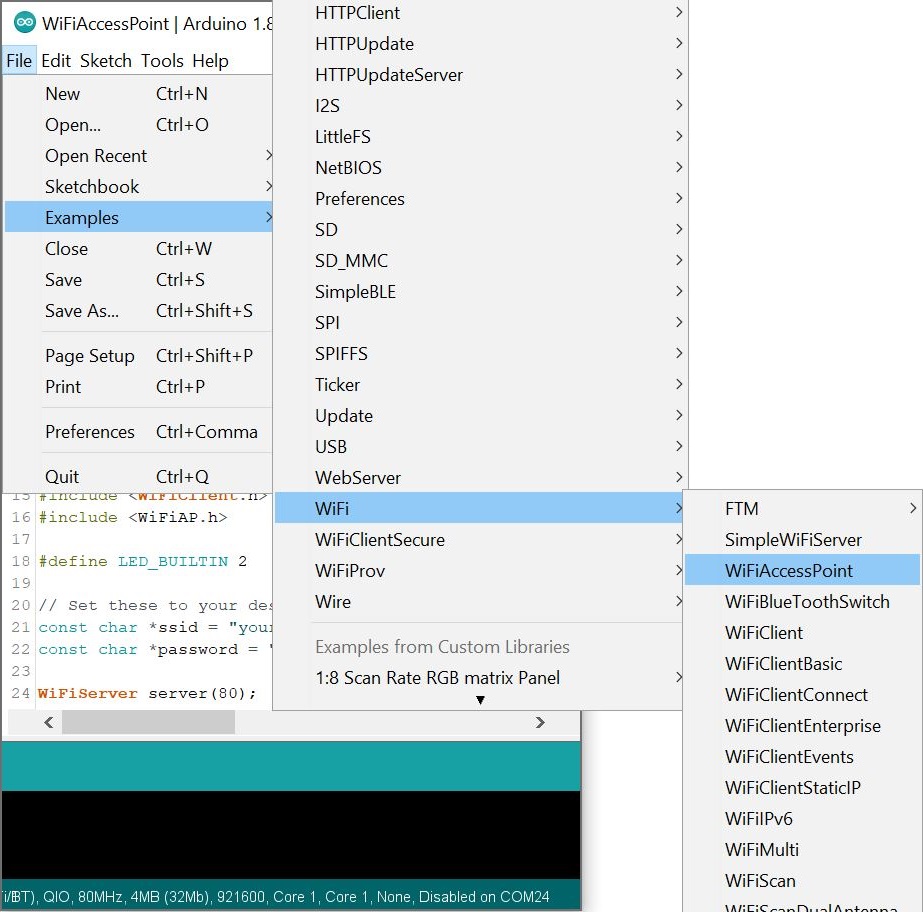
To find this example, go to File > Examples, and under "Examples for SparkFun ESP32 IoT RedBoard" you'll select WiFi > WiFiAccessPoint.
There are a few things you'll need to edit in your example. First, make sure LED_BUILTIN is set to "18". Then you'll need to update your network name and password. MAKE SURE your password is at least 8 characters!
language:c
#define LED_BUILTIN 18

// Set these to your desired credentials.
const char *ssid = "yourAP";
const char *password = "yourPassword"; //This needs to be >= eight characters long
Once these are updated, make sure you have the correct board and port selected, and then upload your code.
Assuming your code uploaded correctly, we can now connect to our Access Point, navigate to the webpage, and turn on and off our LED!
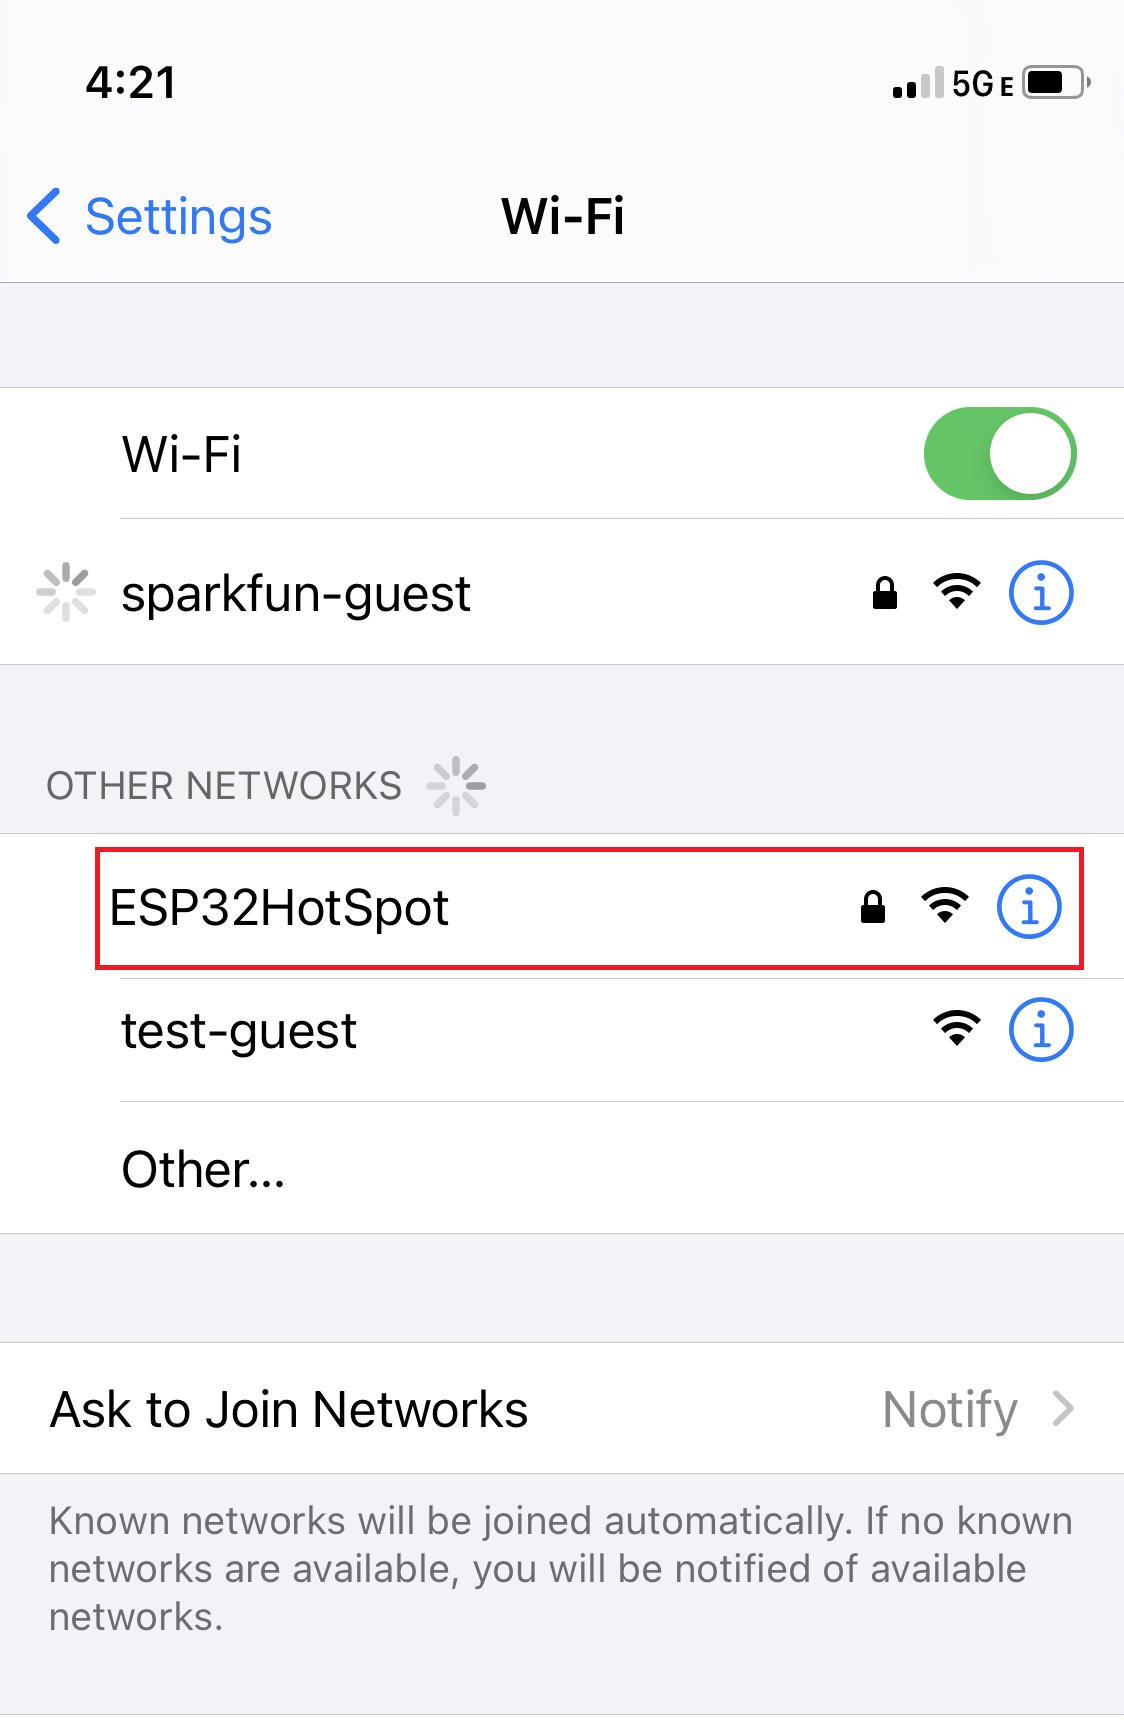
From your phone, computer, or mobile device, navigate to the WiFi networks. Choose the name of the network you created on the ESP32 - I called this the ESP32HotSpot. Connect to that network!
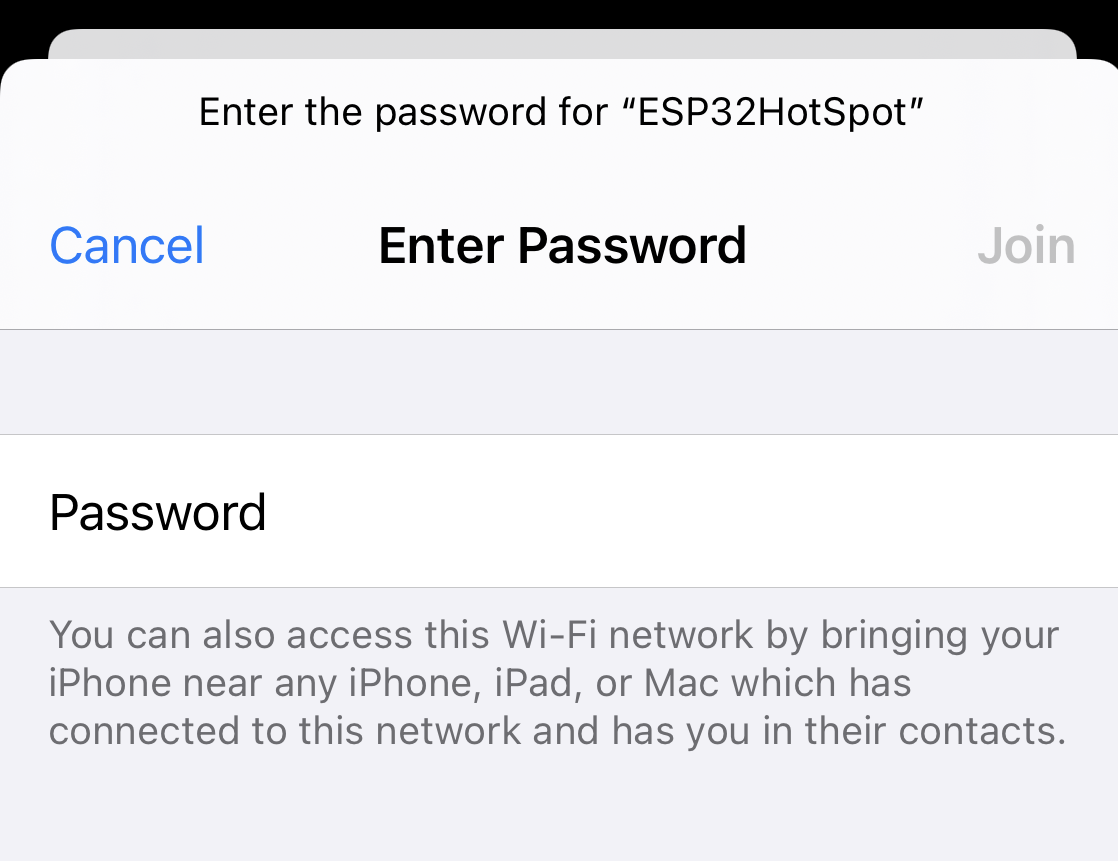
Enter your password:
Navigate to 192.168.4.1 in a web browser. You should see the following:

Play with the links to turn LED 18 on and off!