Installing Arduino IDE
 bboyho,
  b_e_n
b_e_n 
Windows
This page will show you how to install and test the Arduino software with a Windows operating system (Windows 10, Windows 7, Vista, and XP).
Go to the Arduino download page and download the latest version of the Arduino software for Windows if you have not already.
Installer
The Windows version of Arduino is offered in two options: an installer or a zip file. The installer is the easier of the two options, just download that, and run the executable file to begin the installation.

When you're prompted to install a driver during installation, select "Install". This will install drivers for Arduino specific boards (like the Uno, Nano, etc.) that you may use in the future.
ZIP
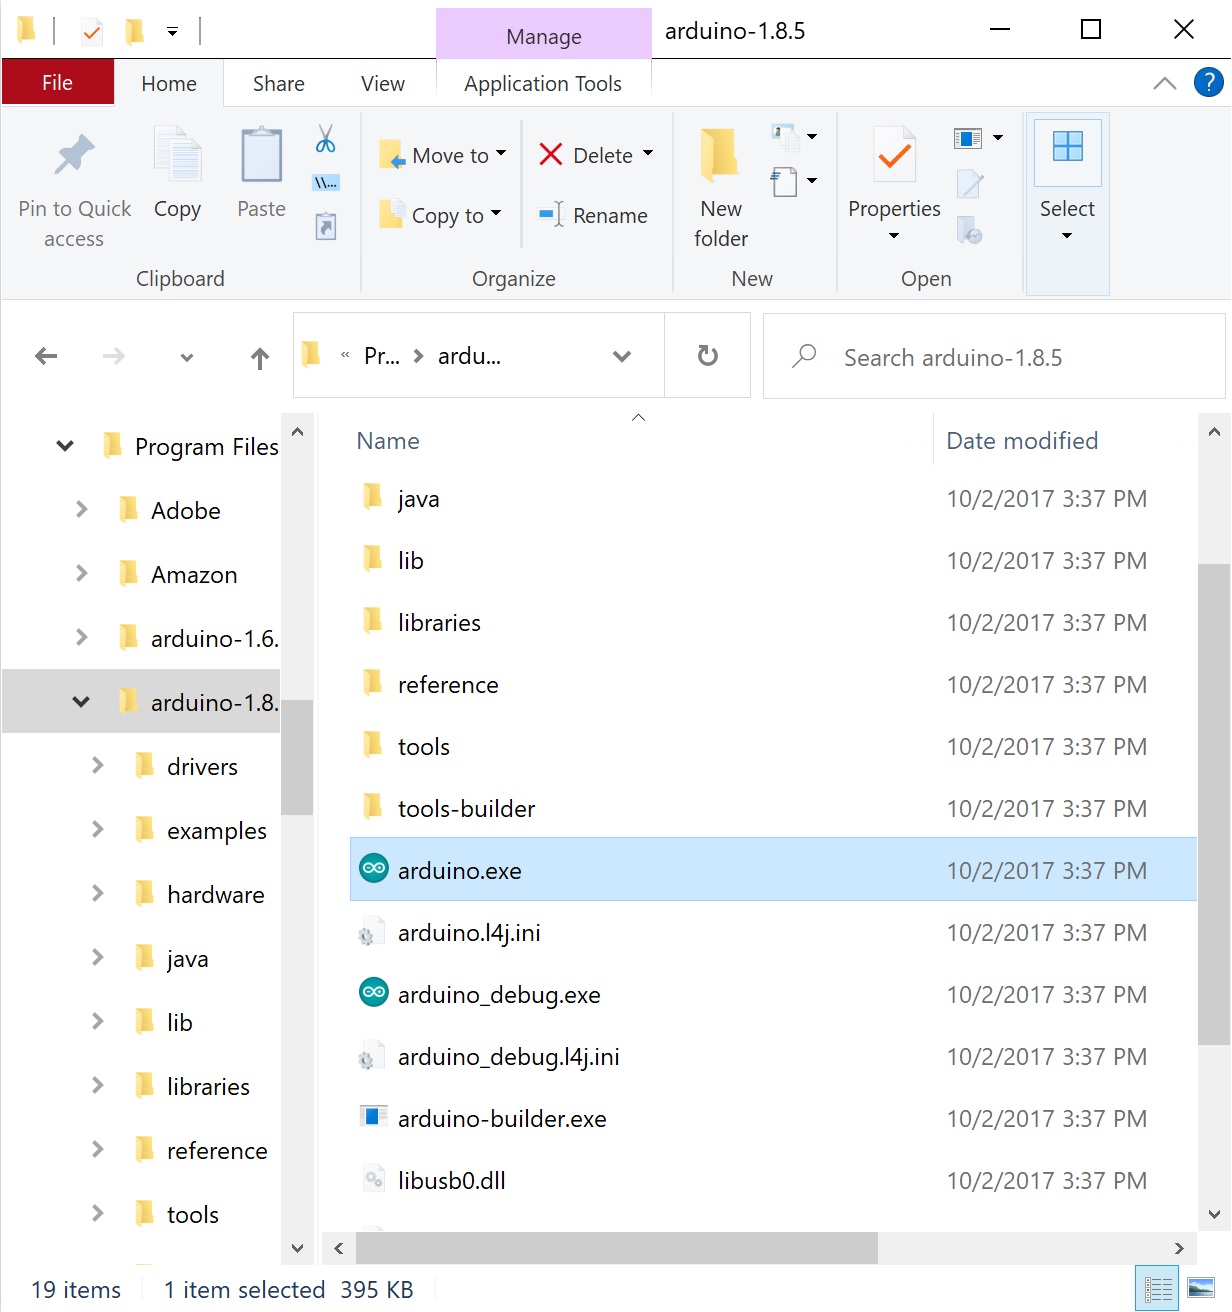
If you choose to download the zip file version of Arduino, you'll need to extract the files yourself. Don't forget which folder you extract the files into! You will need to run the executable Arduino file in the folder to start the Arduino IDE.
When the download is finished, un-zip it and open up the Arduino folder to confirm that yes, there are indeed some files and sub-folders inside. The file structure is important so don't be moving any files around unless you really know what you're doing.
Connecting Your Arduino
Power up your Arduino by connecting your Arduino board to your computer with a USB cable (or FTDI cable if you're using an Arduino Pro). You should see the an LED labeled 'ON' light up. (this diagram shows the placement of the power LED on the UNO).
Drivers for Arduino Uno on Windows
To install the drivers for the Arduino Uno, you will need to plug in your board to your computer's USB port. Once the board is connected, you will need to wait for Windows to begin it's driver installation process. After a few moments, the process will probably fail, despite its best efforts.
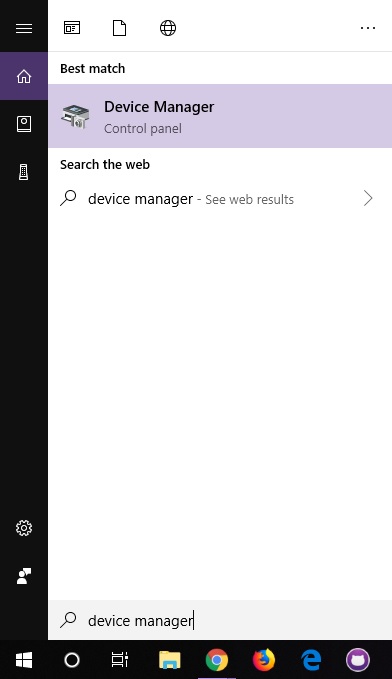
Open up a search, type in Device Manager, and hit ENTER.
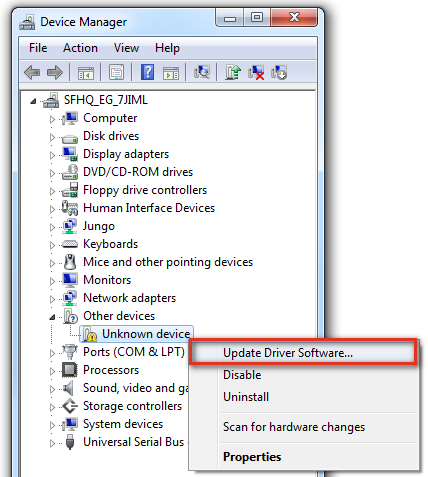
Look under Ports (COM & LPT) tree. You should see an open port named "Arduino UNO (COMxx)". If there is no COM & LPT section, look under "Other devices" for "Unknown Device. Right click on the "Arduino UNO (COMxx)" or "Unknown device" port and choose the "Update Driver Software" option.
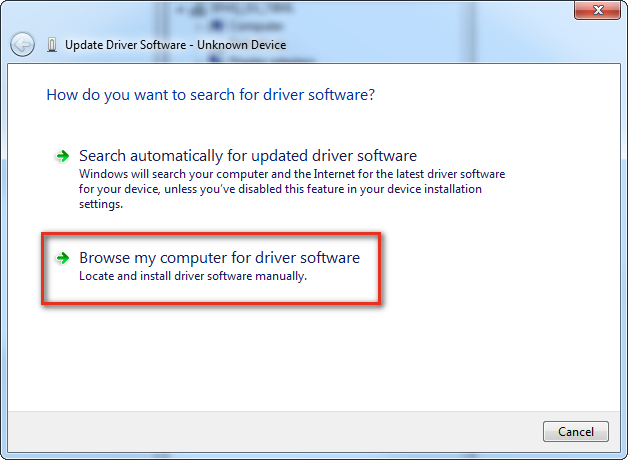
Next, choose the "Browse my computer for Driver software" option
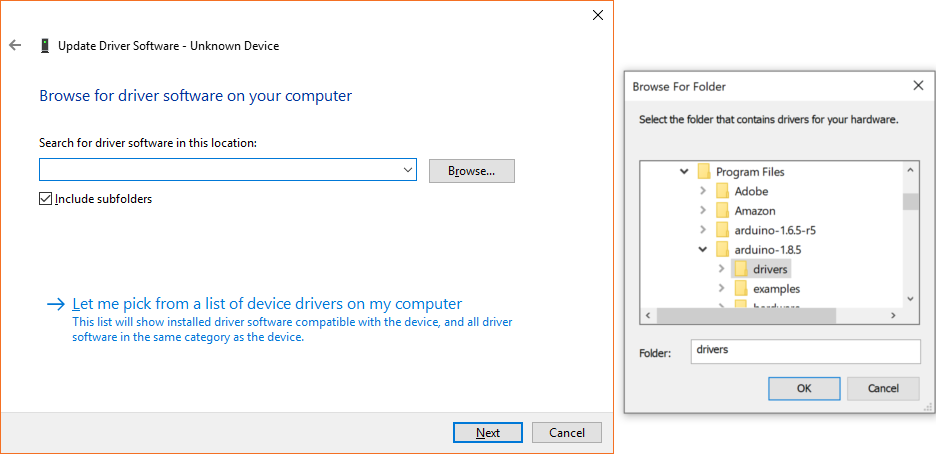
Finally, navigate to the Arduino IDE folder. This should be where you unzipped the Arduino IDE (e.g. it should be similar to the following path with a different version number: C:\Program Files\arduino-1.8.5\drivers). Depending on what version of Windows you have, you may be able to select the Uno's driver file, named "Arduino.inf", located in the "Drivers" folder (not the "FTDI USB Drivers" sub-directory). If you cannot see the *.inf file, it is probably just hidden. You can select the "drivers" folder with the "include sub-folders" option selected instead.
Windows will finish up the driver installation from there! Your computer will enumerate with a COM port. You may see a COM port number depending on what is currently saved in your computer. Try to remember what the number is when uploading. If not, you can always navigate back to the device manager and power cycle the Arduino to determine what number your Arduino enumerated on.

For earlier versions of the Arduino boards (e.g. Arduino Duemilanove, Nano, or Diecimila) check out this page for specific directions.
Drivers for RedBoard on Windows
Depending on your board, there may be different USB-to-serial converters on your board. If you are using a RedBoard you will need to go to the How to Install FTDI Drivers tutorial. If you are using the or RedBoard Qwiic, you will need to go to the How to Install CH340 Drivers tutorial. Make sure to look closely at your board and its respective hookup guide to determine USB-to-serial converter that is on board.
How to Install FTDI Drivers
How to Install CH340 Drivers
Launch and Blink!
After following the appropriate steps for your software install, we are now ready to test your first program with your Arduino board! Launch the Arduino application. If you disconnected your board, plug it back in.
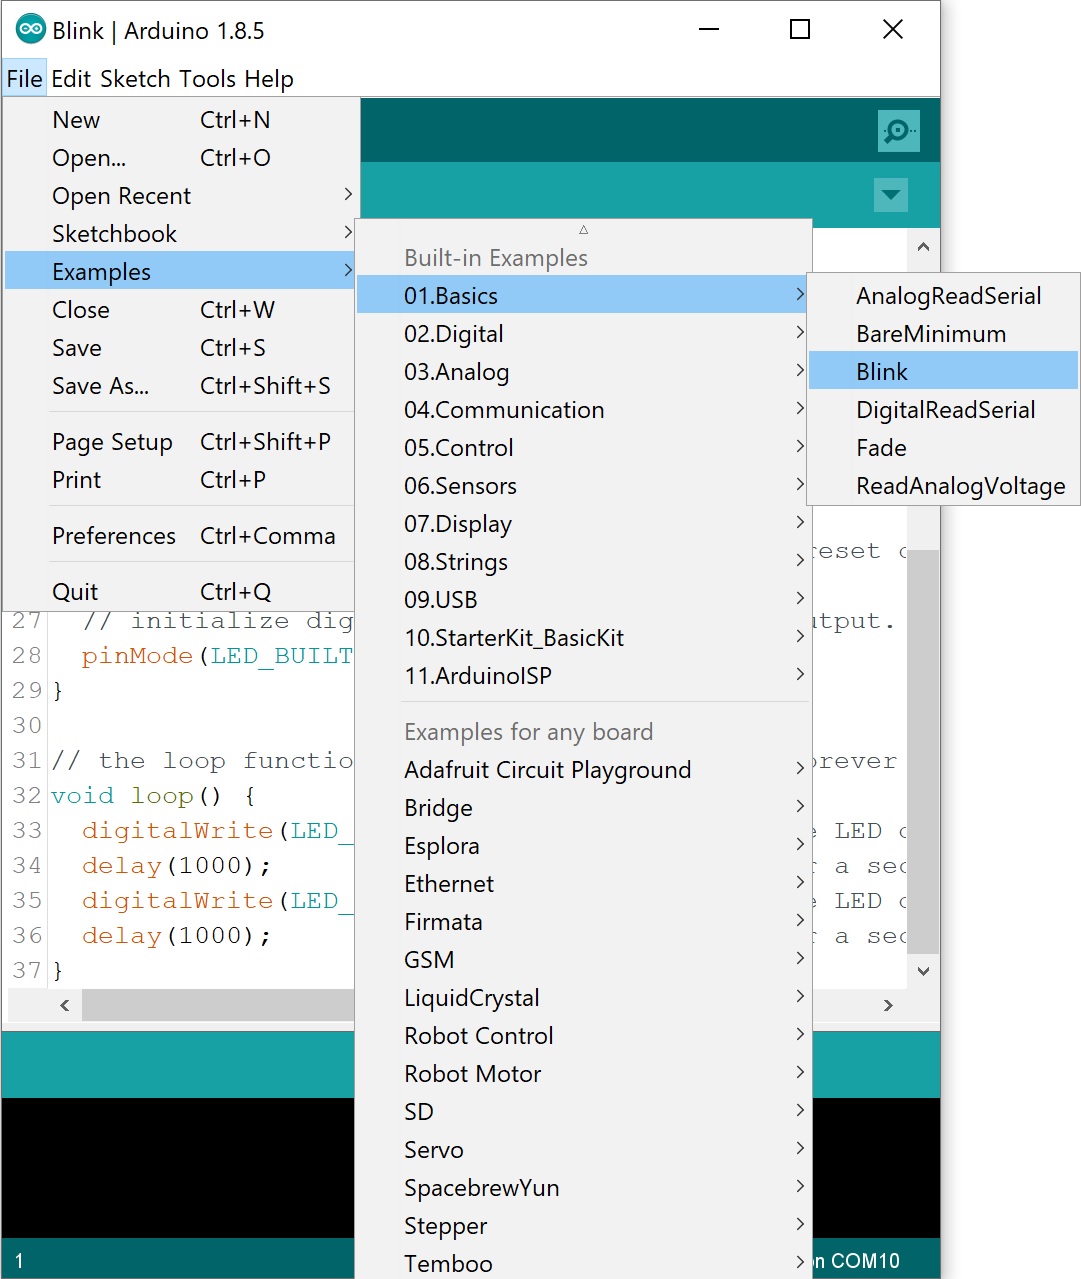
Open the Blink example sketch by going to: File > Examples > 01.Basics > Blink.
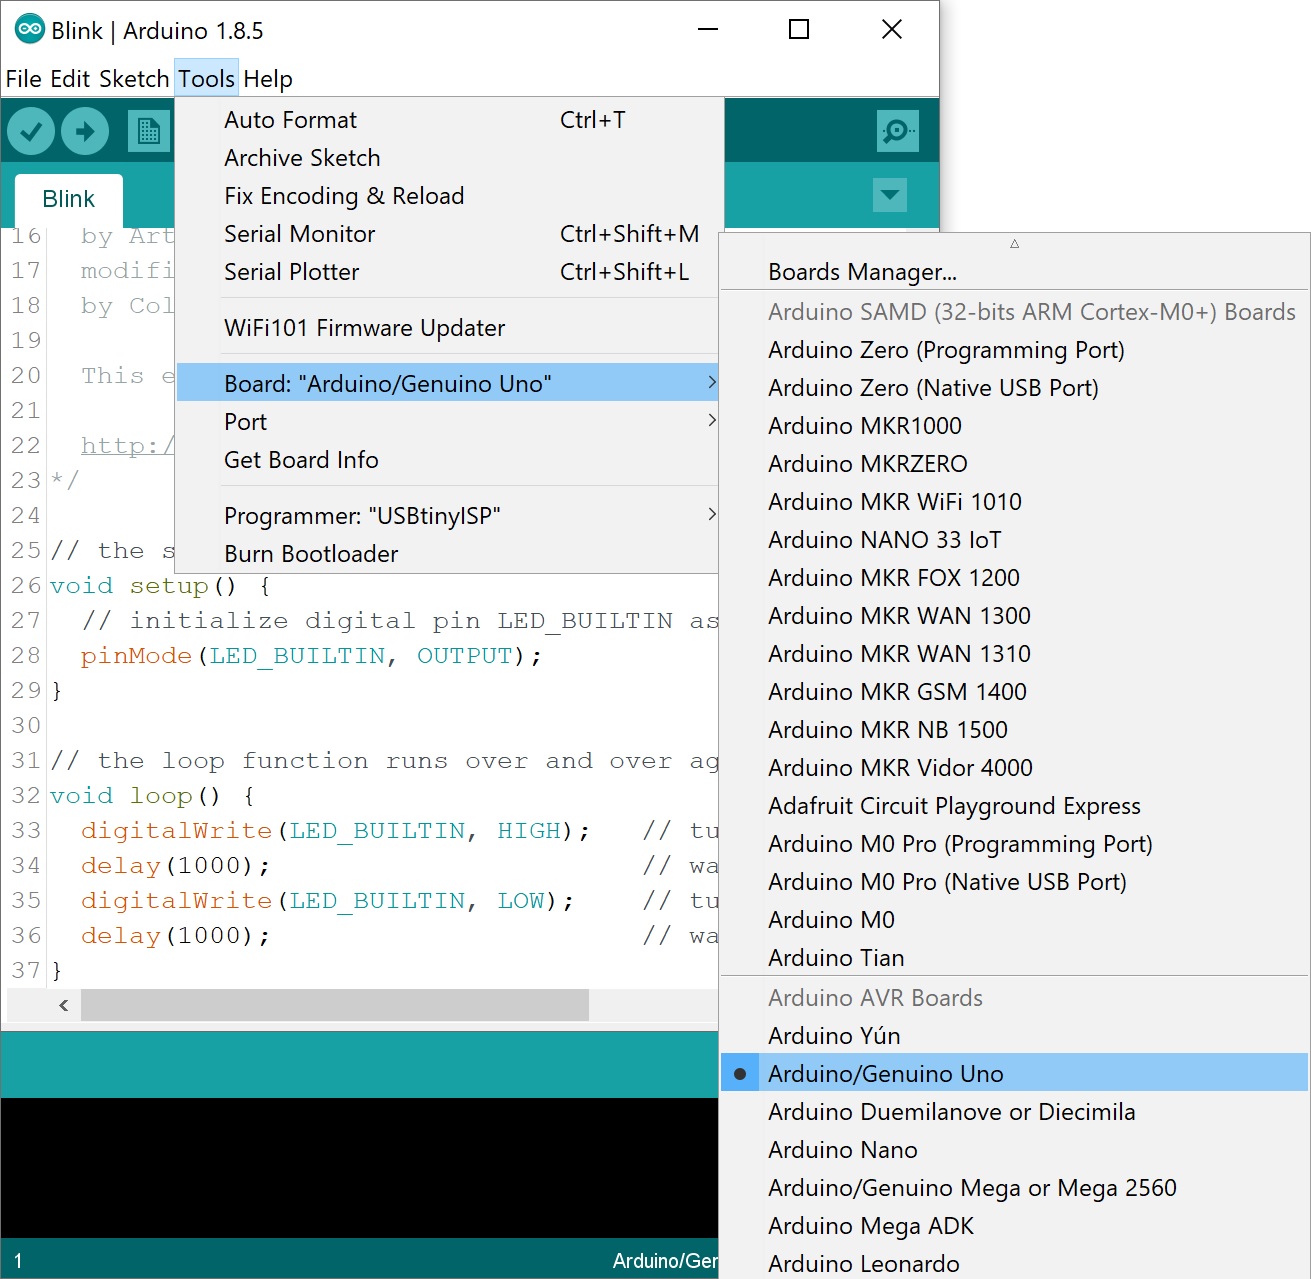
Select the type of Arduino board you're using: Tools > Board > Arduino Uno.
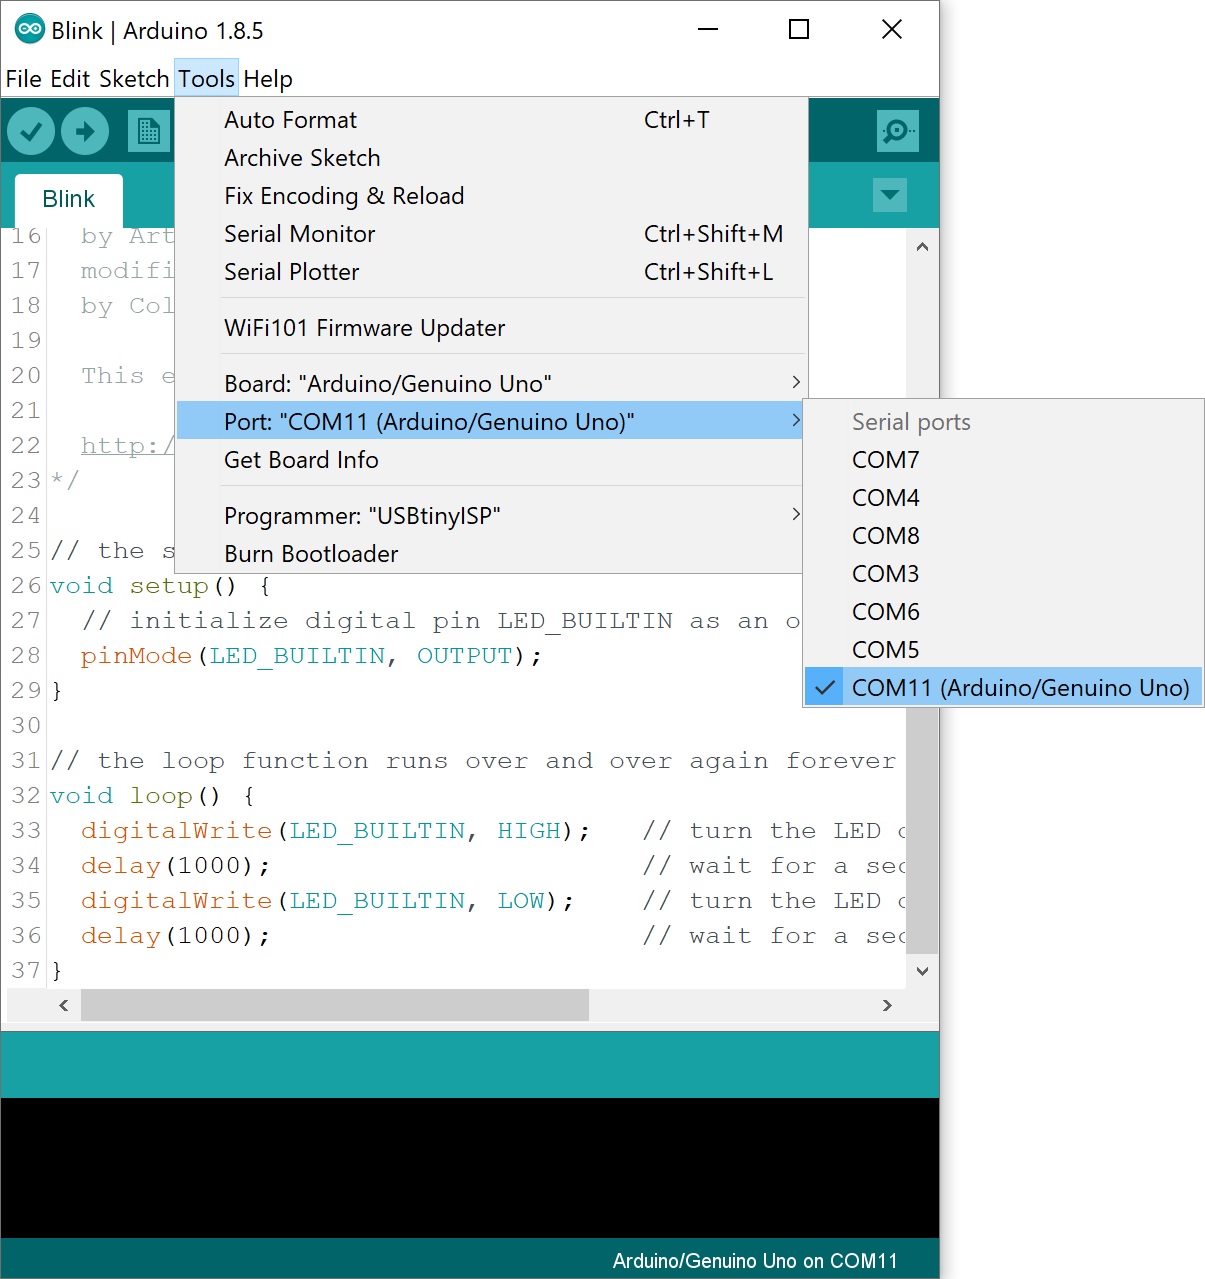
Select the serial/COM port that your Arduino is attached to: Tools > Port > COMxx. In this case it was COM11.
With your Arduino board connected, and the Blink sketch open, press the "Upload" button.

After a second, you should see some LEDs flashing on your Arduino, followed by the message "Done Uploading" in the status bar of the Blink sketch.

If everything worked, the onboard LED on your Arduino should now be blinking! You just programmed your first Arduino!
LED_BUILTIN or pin 13 to a different value before uploading.
Troubleshooting
This guide from Arduino has some more details and troubleshooting tips if you get stuck.