Hackers in Residence - The ElectricBone
Introduction
Before I begin, I'd like to thank SparkFun for having me here and all the nice people that made this Hacker-in-Residence such a great experience. In particular, I'd like to thank Toni Klopfenstein for being there all the time and getting everything I needed for the project. Also, many thanks to Byron Jacquot for all the advice, help and "crash course" on PureData; to Shawn Hymel for introducing me to the RaspberryPi; to Jiffer Harriman (CU) for helping me with PD logic; and of course to Evan Spitler, mech shop wizard, for patiently helping me build my crazy trombone.
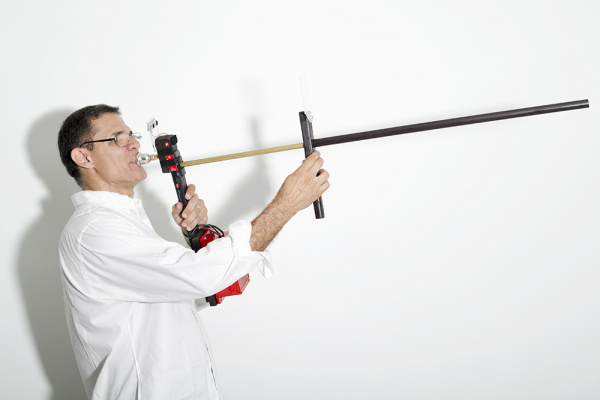
My idea for this project was to use electronics to create a musical instrument that someone could play like a trombone but would produce synthetic sounds. Like any other brass instruments, a trombone is a long open pipe that is played by buzzing one's lips inside it, through a mouthpiece. The instrument then resonates in response, amplifying and modifying the sound. The length of the pipe determines the pitches that can be produced. These are basically harmonic partials starting from a fundamental frequency for each pipe length. What makes the trombone unique among the other brass instruments is that it uses a slide to change the length of the pipe and reach all possible notes. Thus, in order to implement my "trombone interface", I needed to keep track of two things: lip vibration and slide movement.
Covered in this Tutorial
In this tutorial we will go over:
- What electronic hardware worked best for this application
- How to replicate a trombone with mechanical parts
- How to connect everything together with software and embedded firmware
- How to put everything together in one complete package
Suggested Reading
If you plan on following along at home, make sure you are familiar with the following concepts before continuing.
Planning it Out
Measuring the slide positions was fairly straight forward. There are a number of distance sensing technologies available, and during these two weeks at SparkFun, I also learned of some possibilities I'd never heard about. To control the basic shape of the note, I needed to identify its beginning, its end, and its intensity curve, from the lip's vibration. That part turned out pretty easy using the Sound Detector sensor.
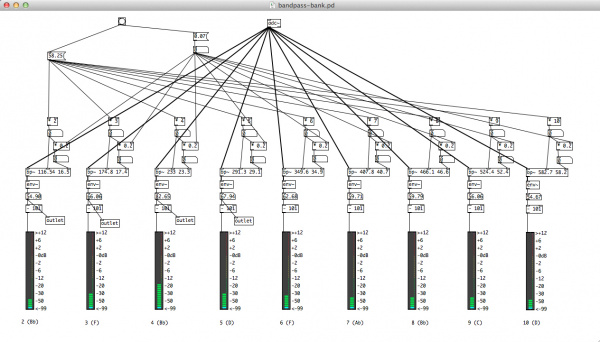
Determining the pitch from that buzzing, however, was a much more challenging task. After considering many suggestions by the engineering folks here at SFE, it became clear that I would need some extra firepower. So on top of an Arduino to control the I/O, the project also included a Raspberry Pi to handle the heavy lifting of pitch detection. We began by modeling the problem in PureData on a regular computer. We created a bank of adjustable bandpass filters to identify the most likely harmonic candidate. The plan was to then install the software on the Pi, however, despite some very promising results with the PD filters, that portion of the project had to be postponed due to time constraints. Instead, I "cheated" by including a Softpot as a hand control for pitch. Also, in this first version, I made the instrument send MIDI commands to an external synthesizer, which in turn produces the actual sounds.
Electronics Assembly
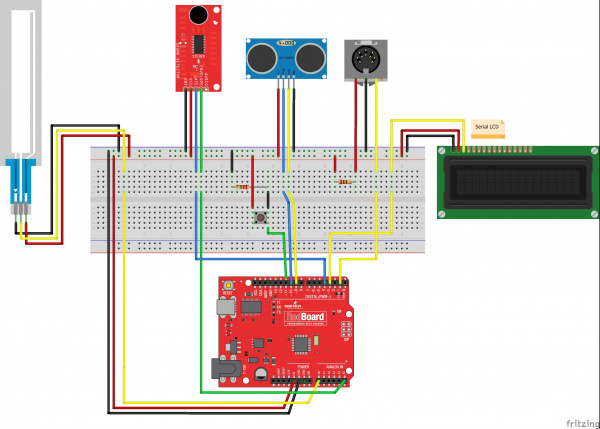
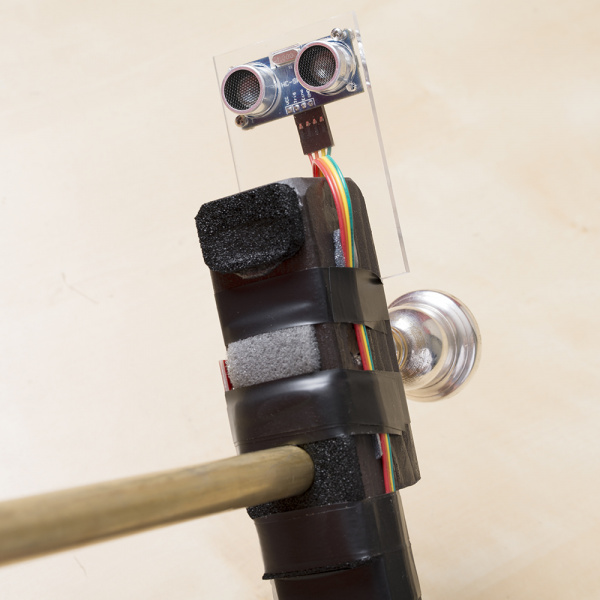
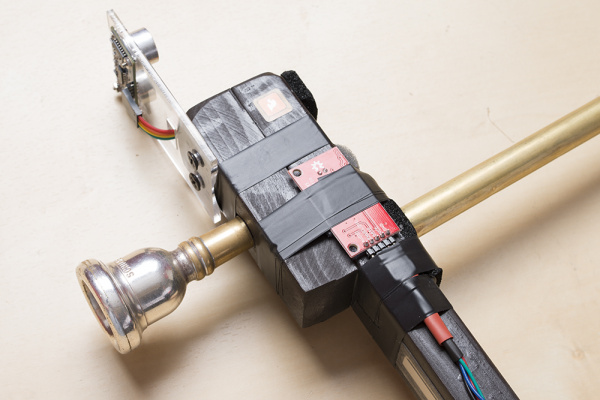
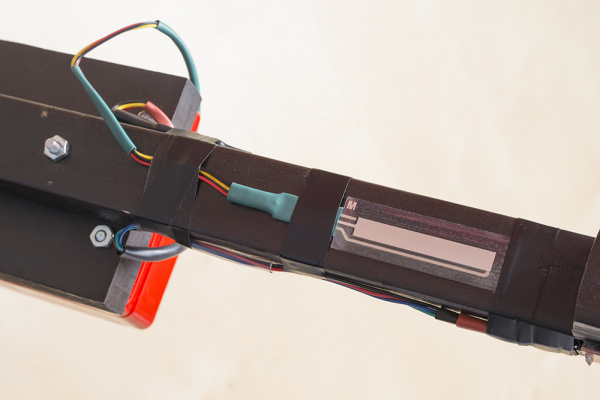
The basic design of the ElectricBone is quite simple. A Redboard controls an ultrasonic distance sensor (HC-RS04), a Sound Detector and a Softpot. The distance sensor uses two digital pins on the microcontroller: one for triggering an ultrasonic pulse and one for receiving the echo. The Sound Detector has three output pins, of which I used two: gate and envelope. The gate pin connects to a digital pin on the Redboard and the envelope connects to an analog pin. The Softpot's output goes on a second analog input. On top of this basic circuit, there are two additional components: a Serial Enabled LCD, using Softserial on a ordinary digital pin, and a MIDI connector attached to the built-in serial ports. Finally there is a button for switching output modes.
The Redboard listens to the gate pin from the Sound Detector to know when the player's lips start to vibrate. If it gets a hit, it starts to track the slide position through the distance sensor and harmonic number with the Softpot, which is operated by the player's left thumb. By combining the two pieces of information (slide position and harmonic), the Redboard can determine which note needs to be played, so it issues a "Note On" message to the MIDI port. After the note start, it begins to track the envelope pin in order to control the intensity of the note. When the gate pin reads low, the Redboard sends out a MIDI "Note Off", and the sound is terminated.
Mechanical Assembly
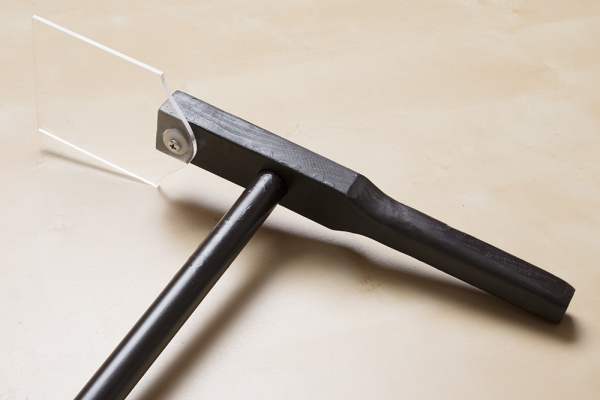
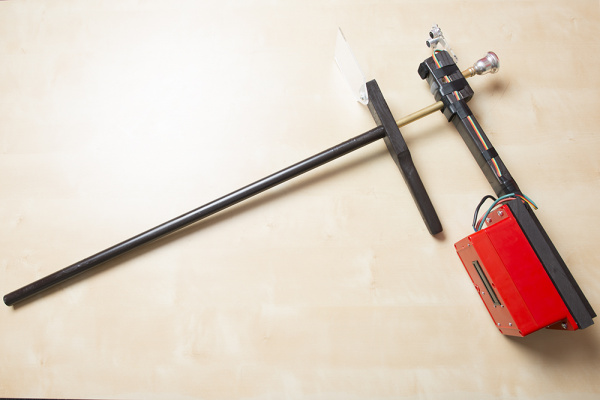
The mechanical structure for the instrument uses a few different materials. The main handle and the slide stay are made of wood. As is the plate for attaching the control box. The slide itself employs two different layers: an inner slide made of brass pipe (9/16") and a piece of PVC pipe (1/2") as the outer slide. Besides these, there are two acrylic plates carved with a laser cutter: one serves as a mounting rack for the ultrasonic sensor and the other as the deflector. All the pieces are assembled with screws or pressure.
The inner slide is attached to the main handle and the outer one to the other handle, both firmly placed into tight holes on the wood. The acrilic plates for the distance sensor go on top of each of these handles. This allows a slide action which is very similar to what a player would get with an actual trombone, plus it keeps the distance sensor at a constant straight angle with the bouncing plate, helping avoid false readings. Besides the slide attachment point, another hole on the other side of the main handle receives the mouthpiece. A third, lateral hole is used to attach the Sound Sensor in the same area, in order to catch the lips' vibration.
Enclosure
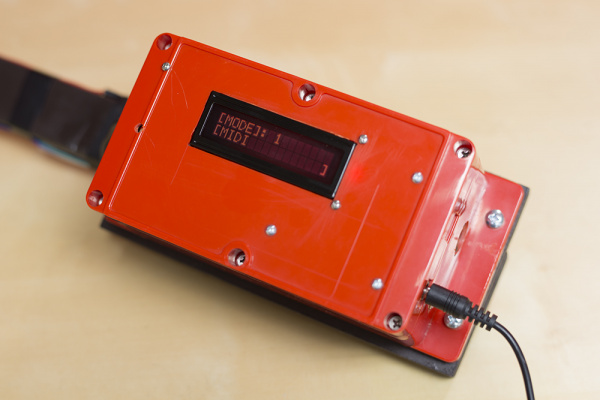
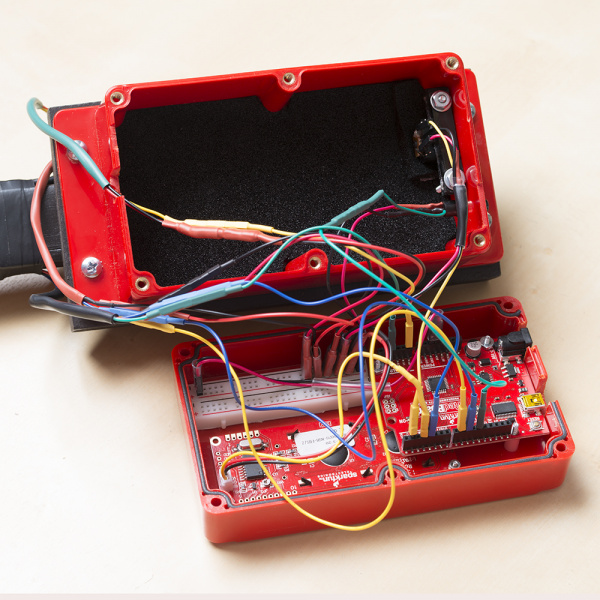
The brains of the project go into a Flanged Red Enclosure. The Redboard and LCD are mounted on the enclosure's lid, leaving lots of room for the future installation of the Raspberry Pi and sound shield, for audio processing. A few openings on the right side of the box expose the MIDI connector and the USB and power connectors from the Redboard. On the other side the box receives all the wires from the sensors.
In general, when mounting a project like this in place, I prefer not to use breadboards, but rather plug the pins directly into the Arduino. However, since every component in this project requires power and ground, I needed somewhere to plug all these pins. The solution was to strip the power rails off a small breadboard and stick them to the box's lid. This left me with lots of power/ground attaching points, without wasting much space. Another trick helped to keep the wire mess to a minimum. All the wires were color-coded and grouped together with heat shrink tubing.
And here is the finished product...
Firmware
The ElectricBone sketch, found here, defines three output modes, which can be toggled by the small button installed on the control box. Of these three modes, only the first one, MIDI Mode, is currently implemented. After a few lines of debouncing code for the mode button, the sketch switches on the selected mode to decide how to produce sounds.
In order to make the Arduino code more manageable, I split it into a few independent blocks which went inside separate functions. This way it is possible to visualize the entire algorithm at once just by glancing at the main loop.
The first of these functions, gateStatus(), returns the current status of the gate pin. If the pin just turned HIGH after being LOW, gateStatus() returns GATE_START. If the pin just turned LOW after being HIGH, the function returns GATE_END. While between a START and an END, gateSatus() will return GATE_ON. When there is no gate activity, the function returns GATE_OFF. Switching on the output of this function consitutes the basic skeleton for the ElectricBone algorithm.
From there, all we have to do is call the other functions to retrieve the current state of the sensors: trackSlide() returns the slide position in cm; slidePosition() calculates the position number for the value received from trackSlide(); harmonic() gets a harmonic number from the current Softpot input; pitchNumber() picks a MIDI note number based on the slide position and harmonic number. Once we have that information we send a message to the MIDI port using sendMIDI(). When gateStatus reports a GATE_END, the code sends Note Off to MIDI.
Interested in learning more about distance sensing?
Learn all about the different technologies distance sensors use and which products would work best for you next project.
Take me there!
Resources and Going Further
This first experiment with trombone simulation was certainly not comprehensive, but served as proof of concept for the project. Obviously, the implementation, even at this early stage calls for many improvements, on which I will work from now on, as time allows. To start with, the sensitivity of the Sound Detector needs to be adjusted to work better with the mouthpiece buzzing. I also need to figure out a meaningful way to associate the envelope information with standard MIDI events, in order to use traditional synthesizers for output. Another improvement on output would be to implement trombone glissandi with pitchbend messages. Then, of course, there is the pitch detection algorithm, which will allow the player to control sound entirely from blowing/buzzing into it. This will involve perfecting the Puredata code, making it work on the Pi, and connecting all that with the Arduino-controlled sensors. Hopefully, with lots of work (and some luck), this prototype will become an actual, expressive musical instrument in the near future... and I can't wait to start making music with it!
For more music related fun, check out these other SparkFun tutorials:
