Getting Started with Walabot
 bboyho
Hardware Overview
Features
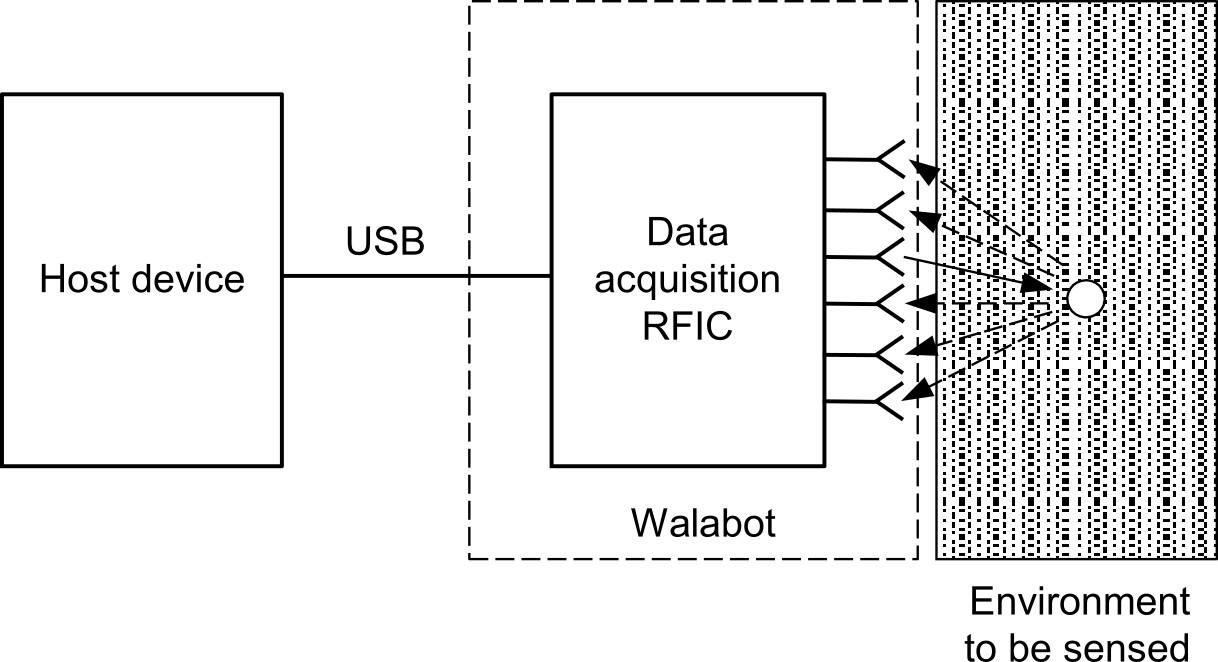
The Walabot utilizes radio frequency technology to sense the environment. An image of the environment is reconstructed using an array of linearly polarized broadband antennas to transmit, receive, and record signals. The data is processed and sent through a USB cable to a host device. The host device can be your computer, single board computer, or even a smartphone!
Depending on the Walabot model, here are a few possible applications:
- In-Room Imaging
- Object Detection, Location, and Tracking
- Motion Sensing (i.e. Breathing Patterns, Gestures)
- Speed Measurement
- In-Wall Imaging
- Dialectric Properties of Materials
Starter vs Developer
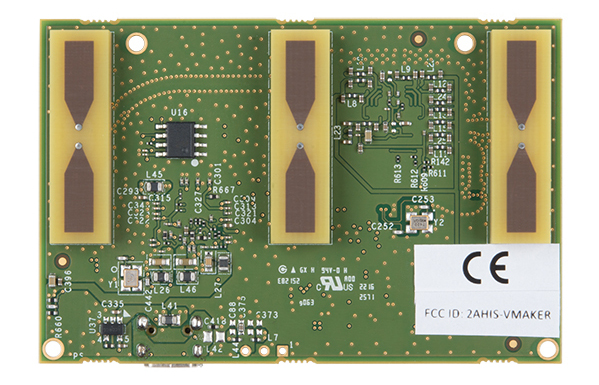
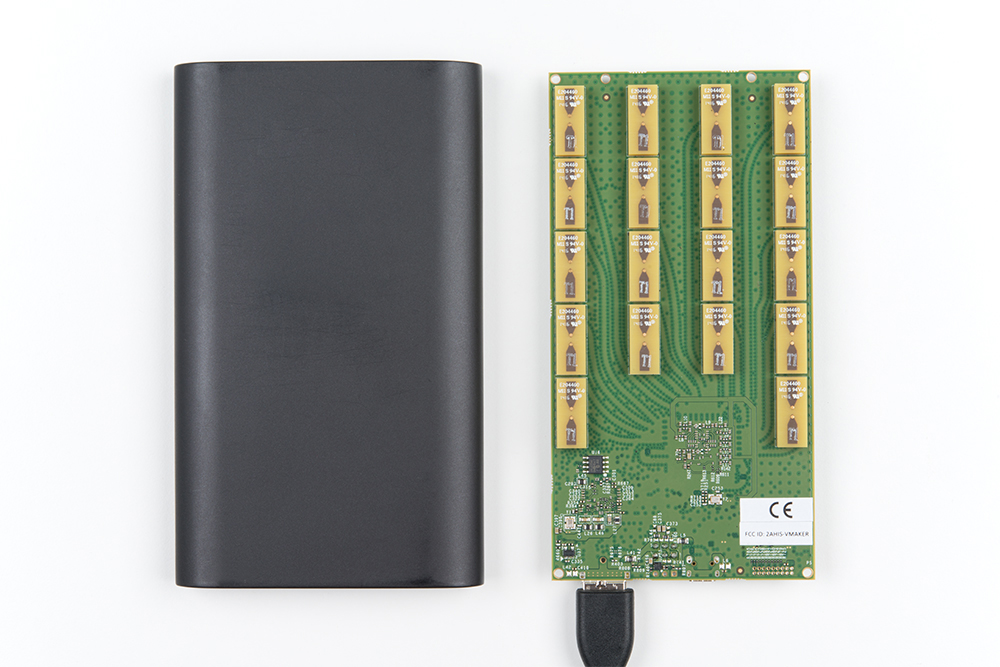
There are three models of the Walabot. For the scope of the tutorial, we will be using the starter and developer to begin. The starter uses 3x antennas as opposed to 18x antennas to detect the environment. The starter is capable of basic range measurements and monitoring breathing patterns. Due to the amount of antennas it has available, it will not be able to sense objects behind a material. The starter also does not come with an enclosure.
The developer has a higher resolution with the 18x antennas. It's capable of the applications listed earlier. However, the developer can consume more power depending on the configuration and it requires a little bit more time to process the data. Below is a comparison taken from the datasheet.
| Capability \ Model | Walabot Starter | Walabot Developer |
|---|---|---|
| Physical Specifications | ||
| Number of Antennas | 3 | 18 |
| Board Size | 72 mm * 48 mm | 72 mm * 140 mm |
| External Powering Option | ✓ | |
| Enclosure | ✓ | |
| Software API Capabilities | ||
| Basic API functions | ✓ | ✓ |
| 2D Acquisition | ✓ | ✓ |
| 3D Acquisition | ✓ | |
| Multiport Recorder (Raw Data) | ✓ | |
| Software Application Capabilities | ||
| Breathing Detection | ✓ | ✓ |
| Object Detection | ✓ | ✓ |
| Short Range Imaging | ✓ | |
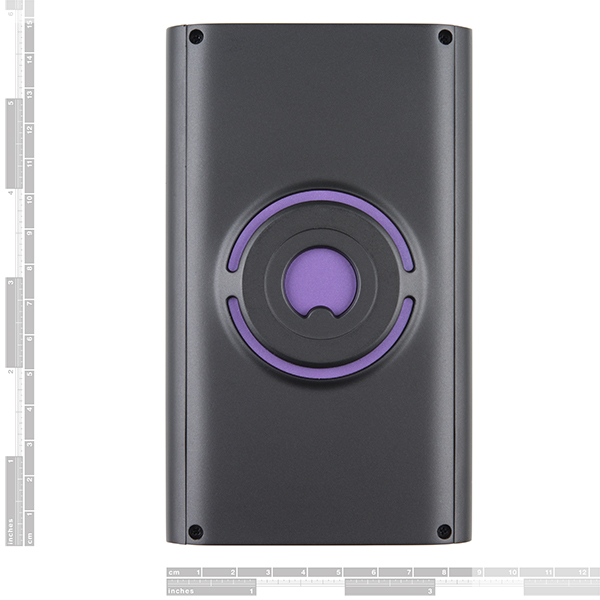
Enclosure
The Walabot Starter does not come in an enclosure. To protect the bare board, you could:
Just make sure to adjust the size of the enclosure for the Walabot Starter.
Walabot w/ Other Wireless Devices
As stated in the datasheet on page 8, the Walabot operates over a range of frequencies. Make sure to configure your device so that it does not interfere with other wireless devices used in projects. The operating frequency of the Walabot is above the following range so there should not be any inteference:
- Bluetooth
- Zigbee
- Cellular
Antennas
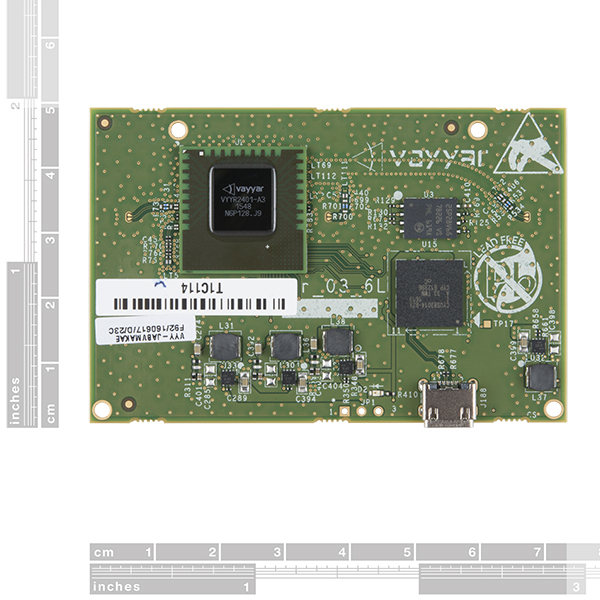
The side with the antennas should be facing out to sense the environment. The image below shows the Walabot Starter's 3x antennas.
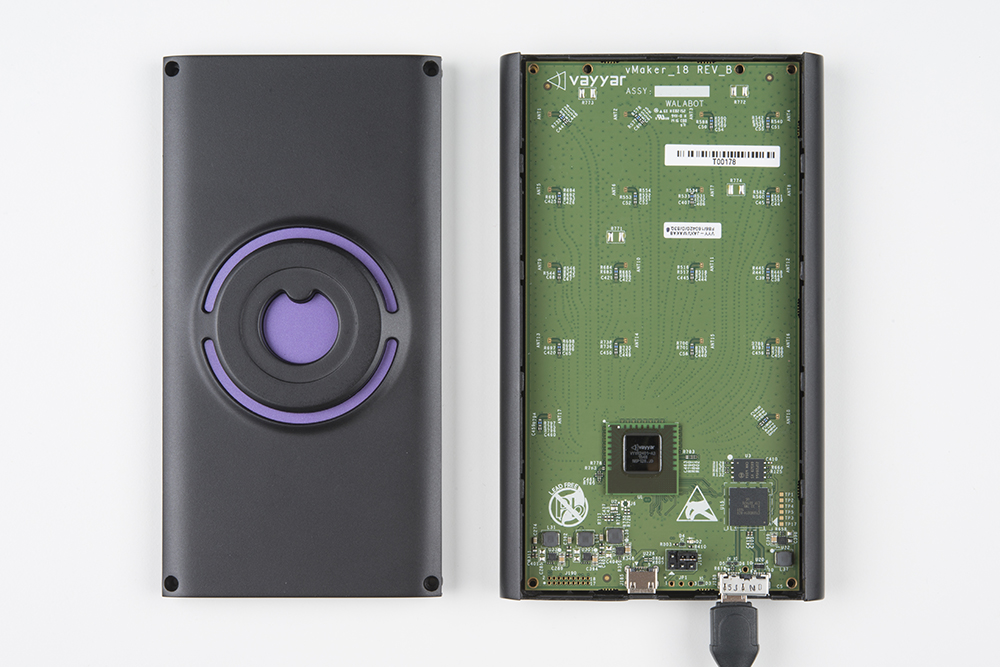
The image below shows the Walabot Developer's 18x antennas populated on the board. Make sure the flat side of the enclosure is facing out to sense the environment.
Power Consumption
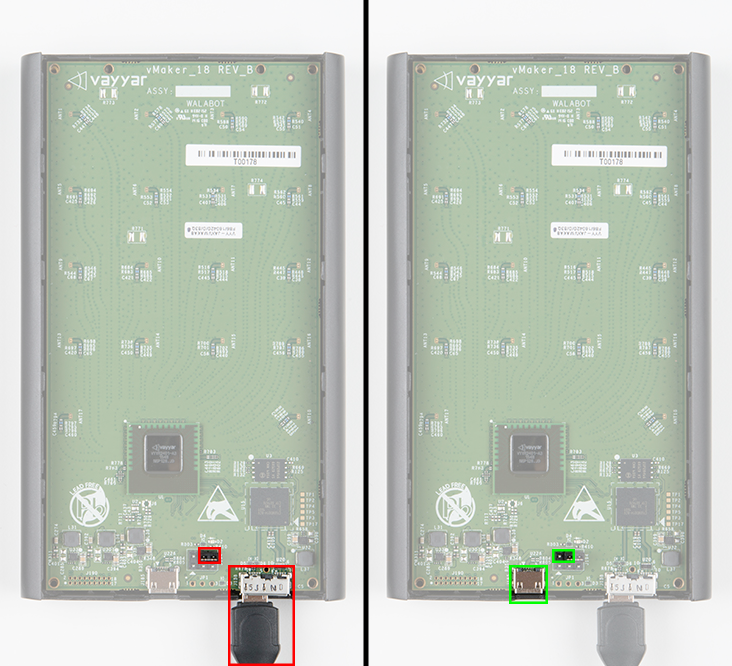
The Walabot requires a 5V (+/-10%) power supply. The board can be powered using a USB port. Depending on the application and operation profile, the Walabot may consume up to 0.4A to 0.9A. You may need an additional power source for the Walabot Developer. If necessary, open the Walabot enclosure with a Phillips precision screw driver.
Highlighted in red is the default jumper position for data transfer and powering the Walabot. To power the board with an external power supply, move the jumper to the left side and connect an additional power source to the USB port highlighted in green. The USB connector is only for power so you would still need a USB cable connected on the right connector.