Getting Started with Walabot
 bboyho
Example SDK
Once you install the Walabot SDK, there should be a shortcut on the desktop. Click on the "WalabotSDK.WalabotAPItutorial.exe" icon on your desktop to open the program. If you have not already, plug the device to your computer's COM port.
Sensor - Target Detection
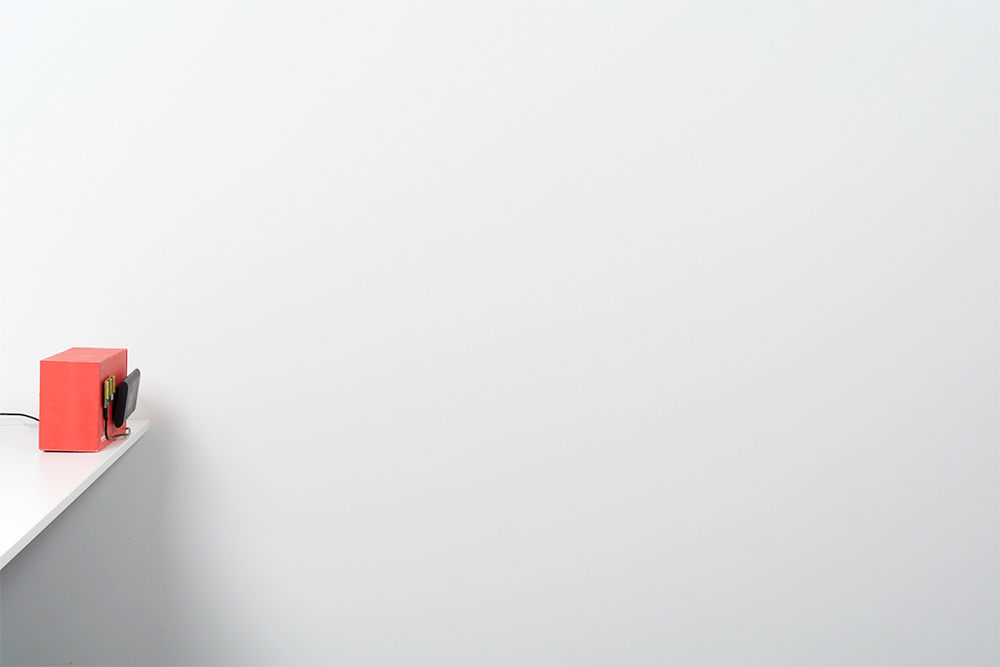
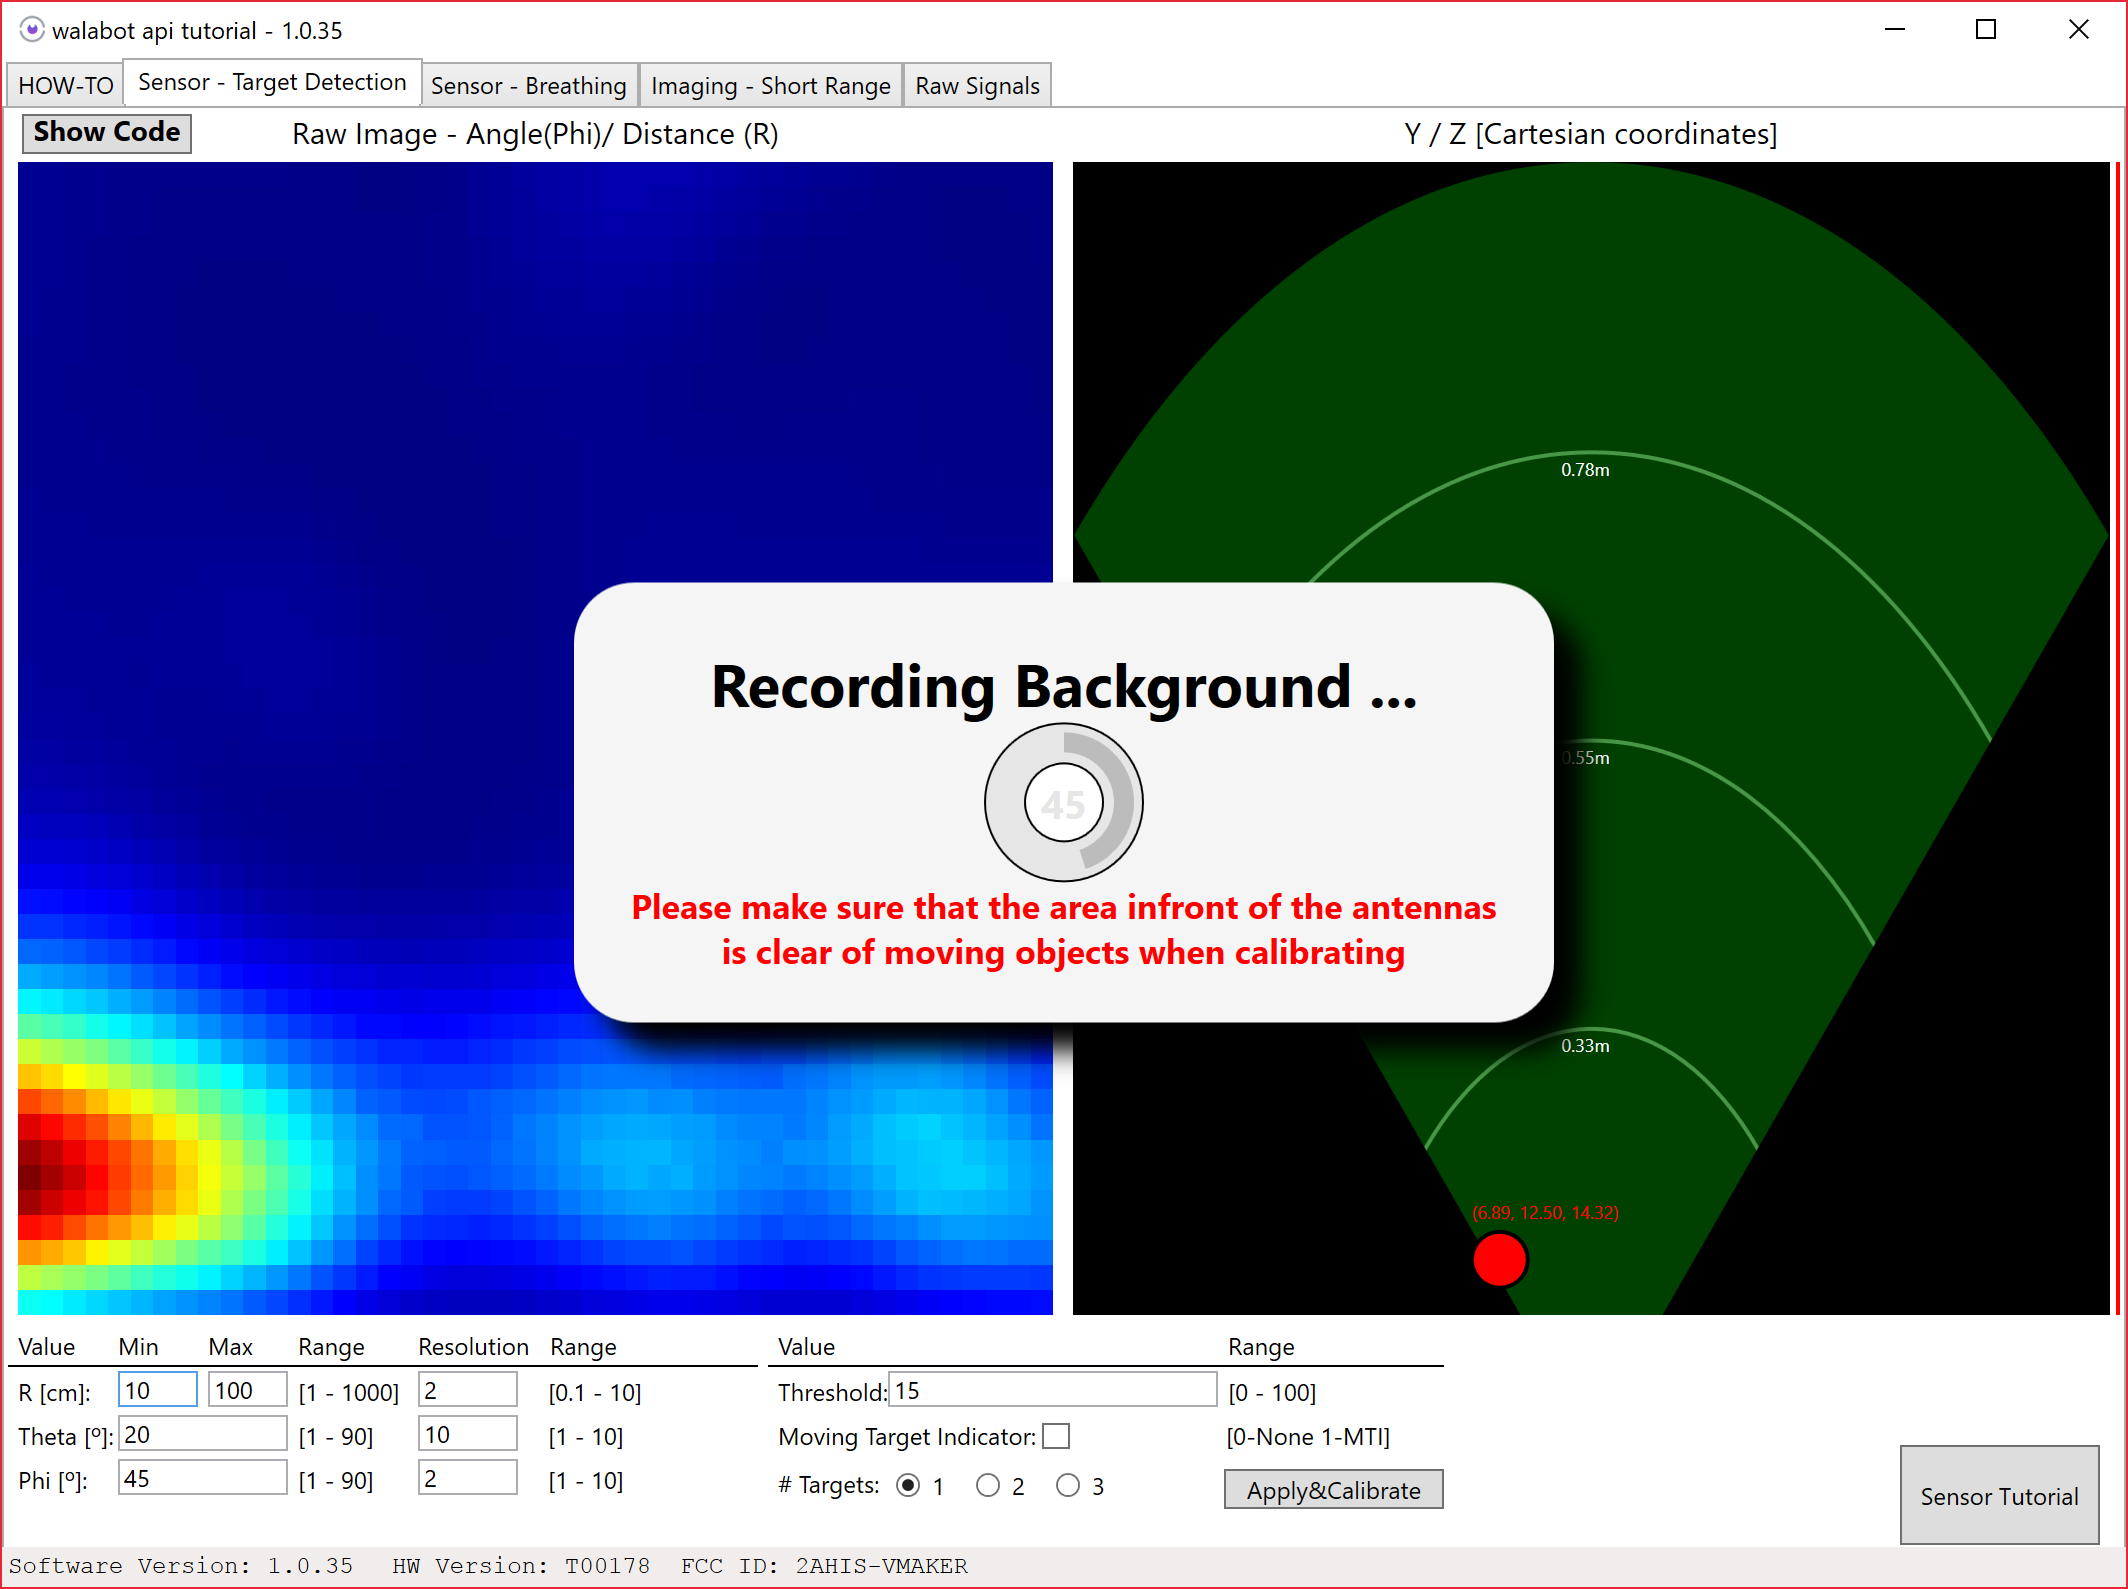
The first demo application looks for objects in front of the Walabot. Before we start, make sure that there are no moving objects in front of the sensor. The sensor was mounted to a box in the following example.
Click on the tab labeled "Sensor - Target Detection" in the SDK. The Walabot will begin calibrating. The range seemed a bit small so the arena size for R [cm] was increased to 200cm. Once adjusted, click on the Apply&Calibrate button to recalibrate.
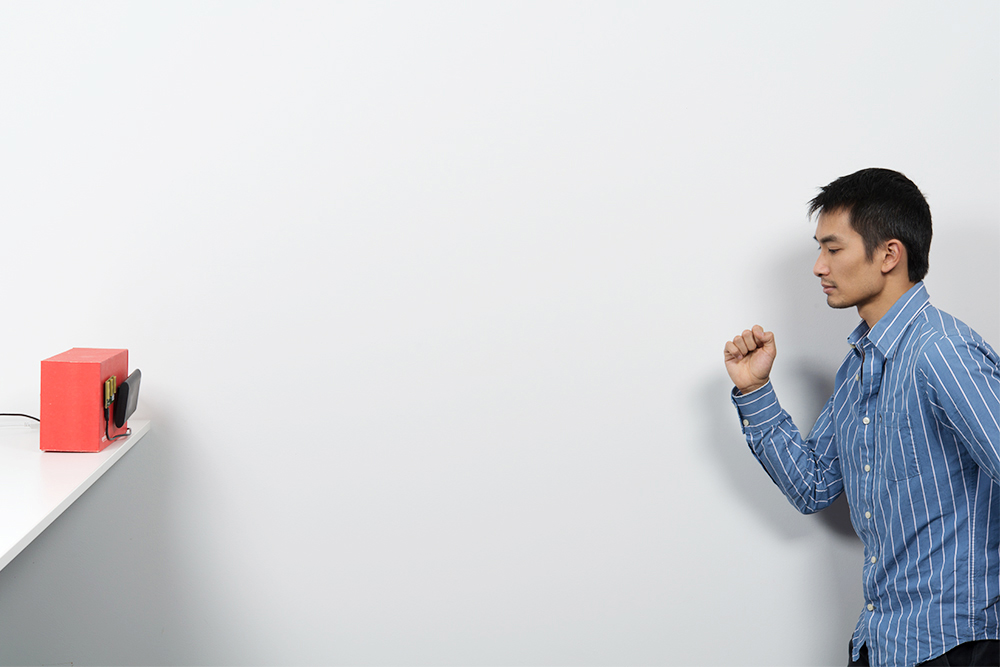
Once calibrated, try moving an object in front of the sensor. For this example, try testing the Walabot by standing at a distance away from the sensor. For simplicity, stand directly in front of the Walabot until the sensor detects you.
Here's how it may look when an object is at a distance in the SDK.
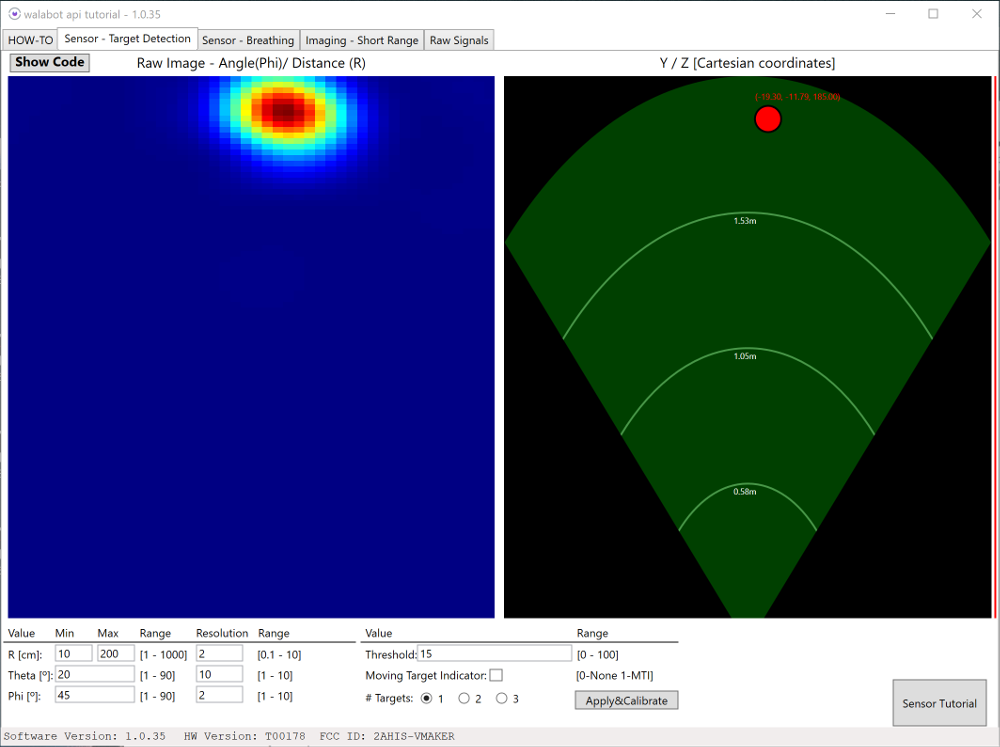
Then try moving closer to the Walabot.

Here's how it may look when an object is closer in the SDK.
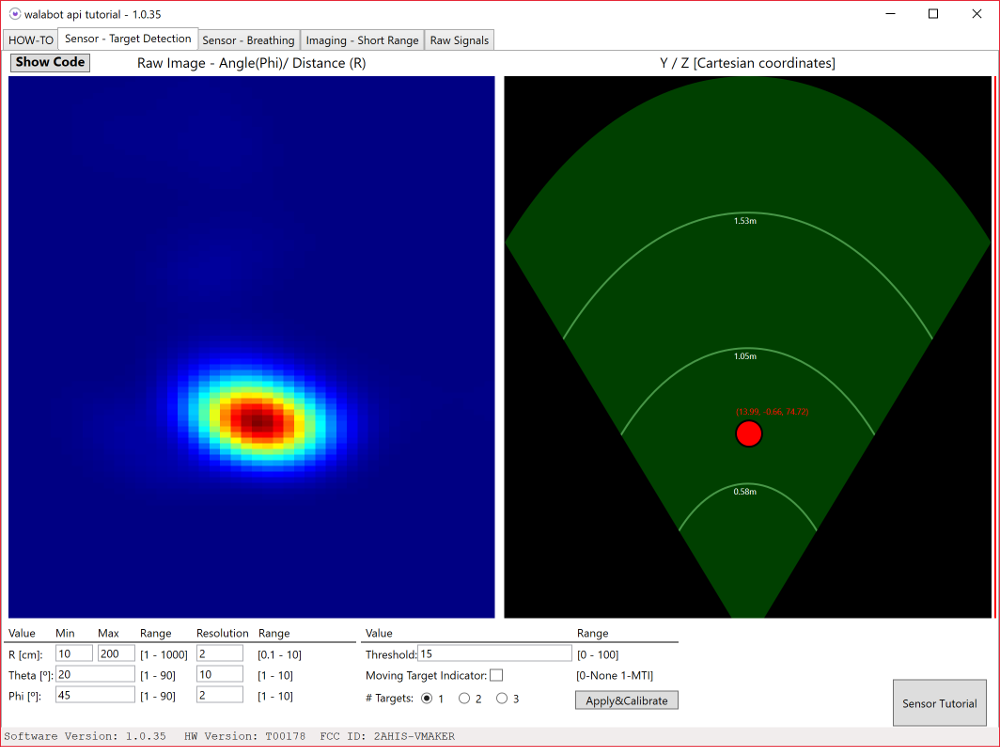
By comparison, you will notice that the SDK will update in real time with any object in range. Try adjusting the range to see how far the sensor can detect targets! You can also adjust the amount of targets to view!
Sensor - Breathing
The second demo application monitors breathing patterns and graphs the readings. You need to be at a certain distance away from the sensor to read. The default is between 20cm to 80cm. Click on the tab labeled "Sensor - Breathing" in the SDK.
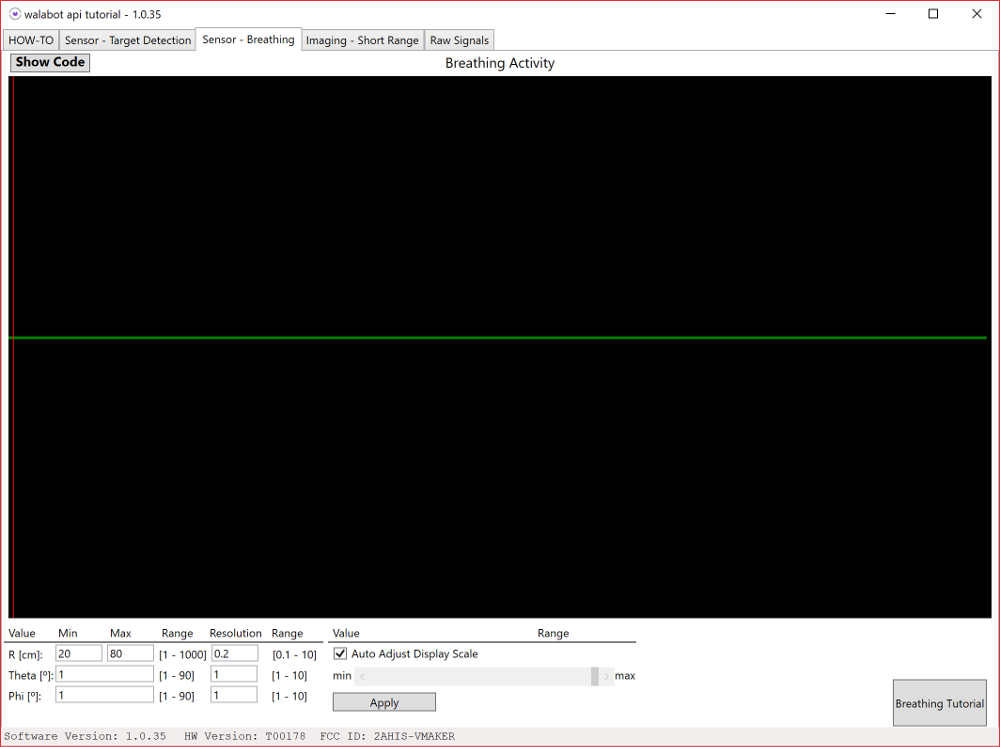
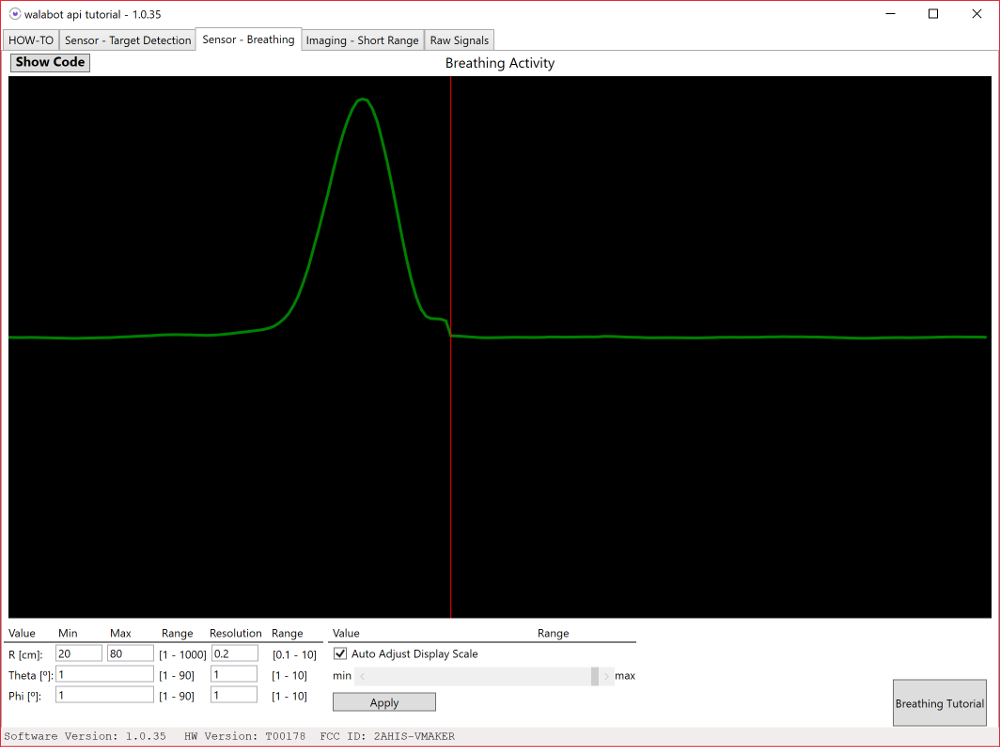
Stand in front of the sensor and inhale some air.

The graph will update in real time as you inhale. As you breathe, the graph should rise. Here's how it may look when you take a deep breath in the SDK.
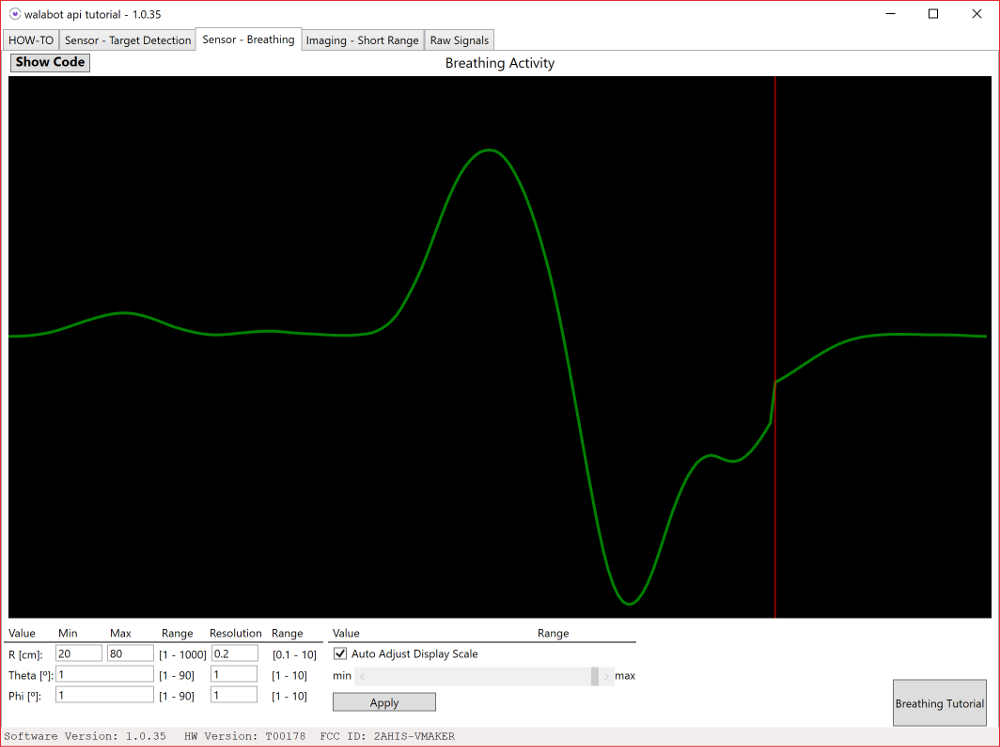
While still standing in front, exhale the air that you gathered in your lungs.

As you exhale, the graph will dip. Here's how it may look when you exhale in the SDK.
Try adjusting the range to see how far the Walabot can sense your breathing!
Imaging - Short Range
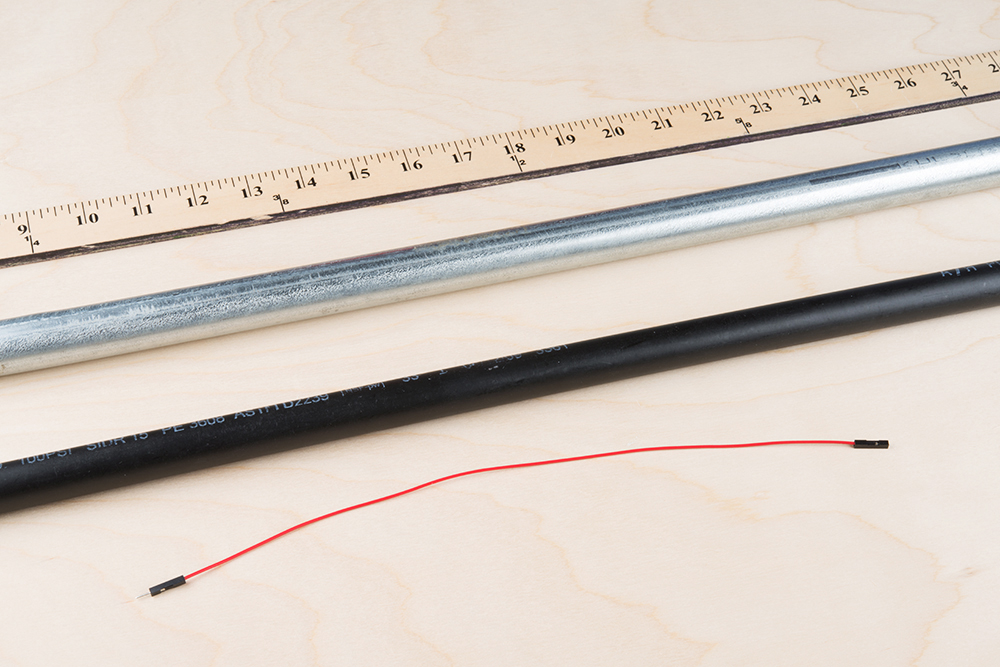
The third demo lets you view objects behind a wall. Since we are dealing with RF signals, make sure that the wall is not made of metal. For a quick test, let's try viewing a material behind a flat table. Grab a wooden yard stick, metal pipe, a PVC, or a piece of wire to test.
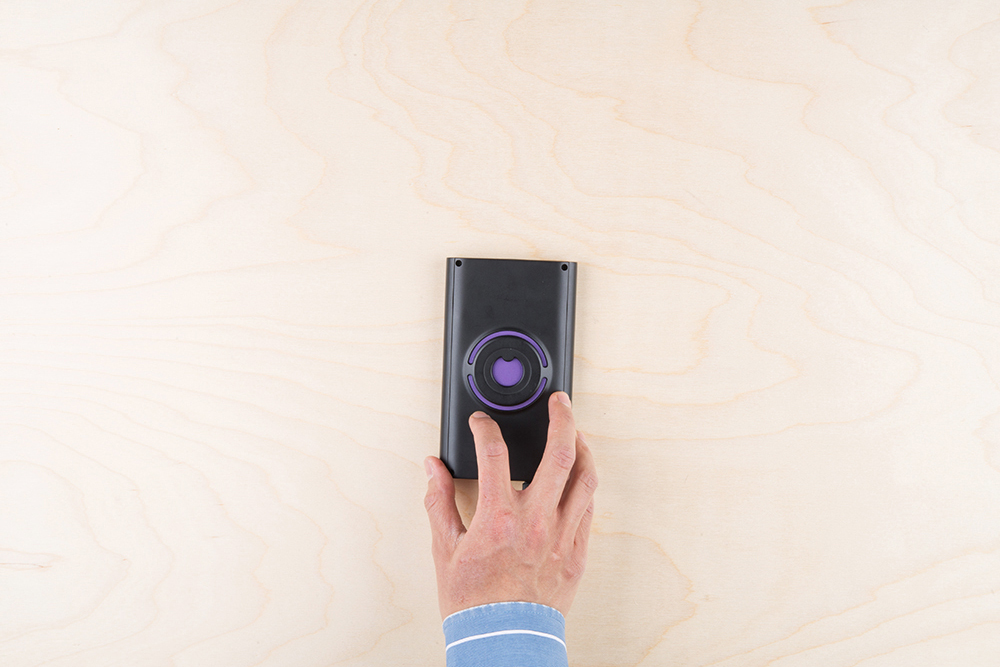
The sensor will need to view the material that it is looking through. Place the Walabot on a flat table.
Click on the tab labeled "Imaging - Short Range".
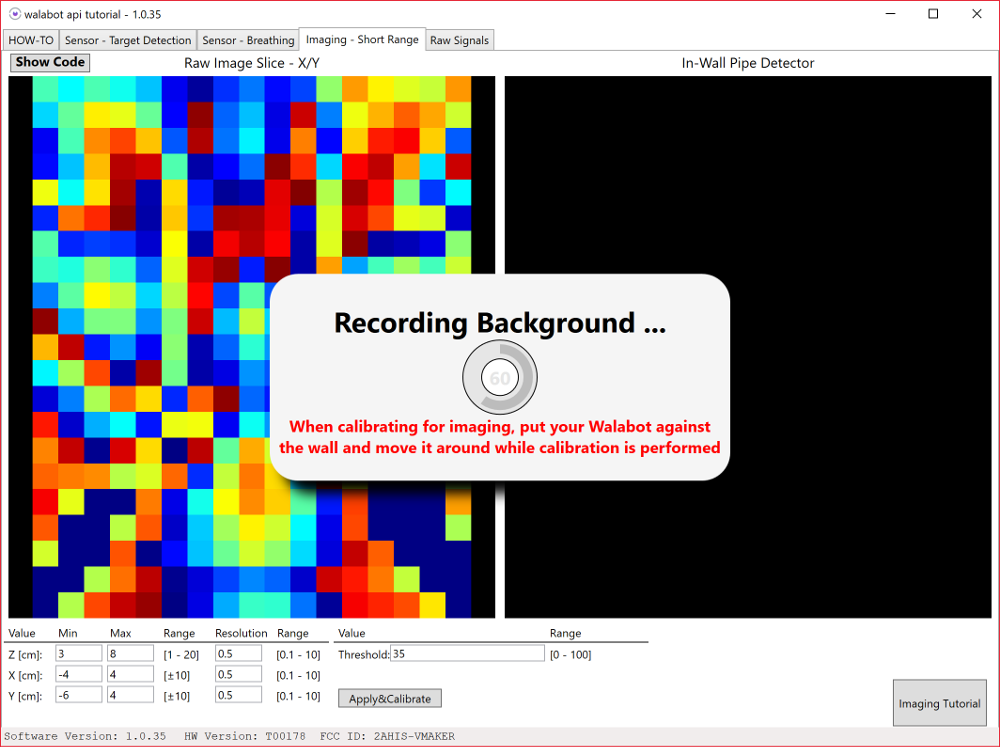
The sensor will begin calibrating. It is recommended to move the Walabot slowly in a circular motion for this calibration.
 |
 |
 |
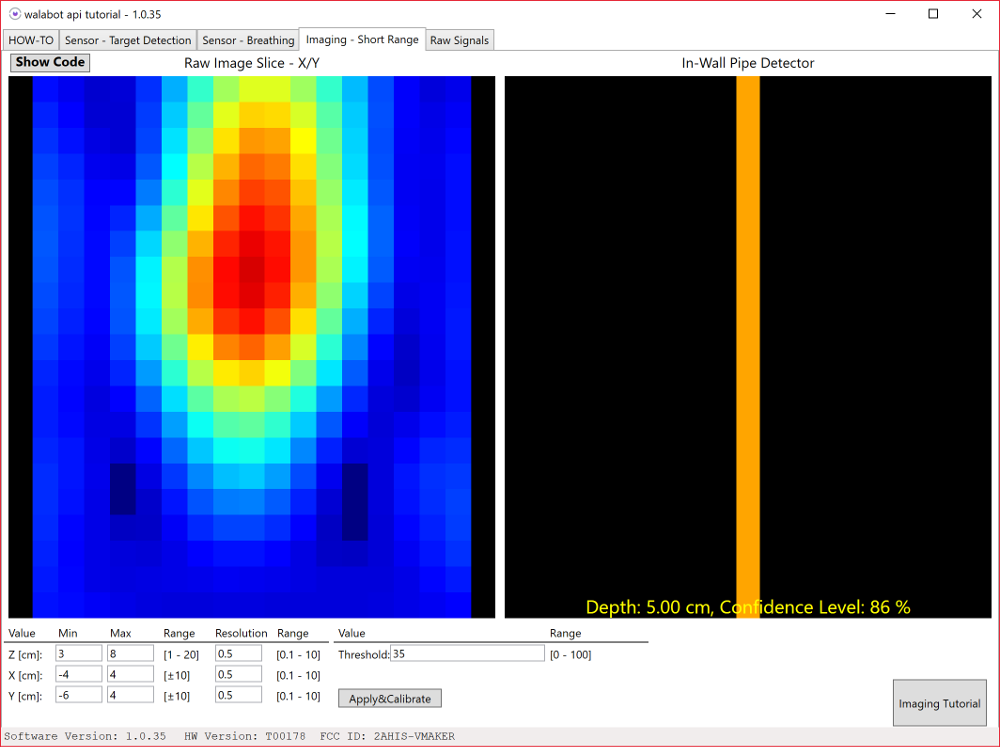
Once calibrated, try placing the material behind the table.
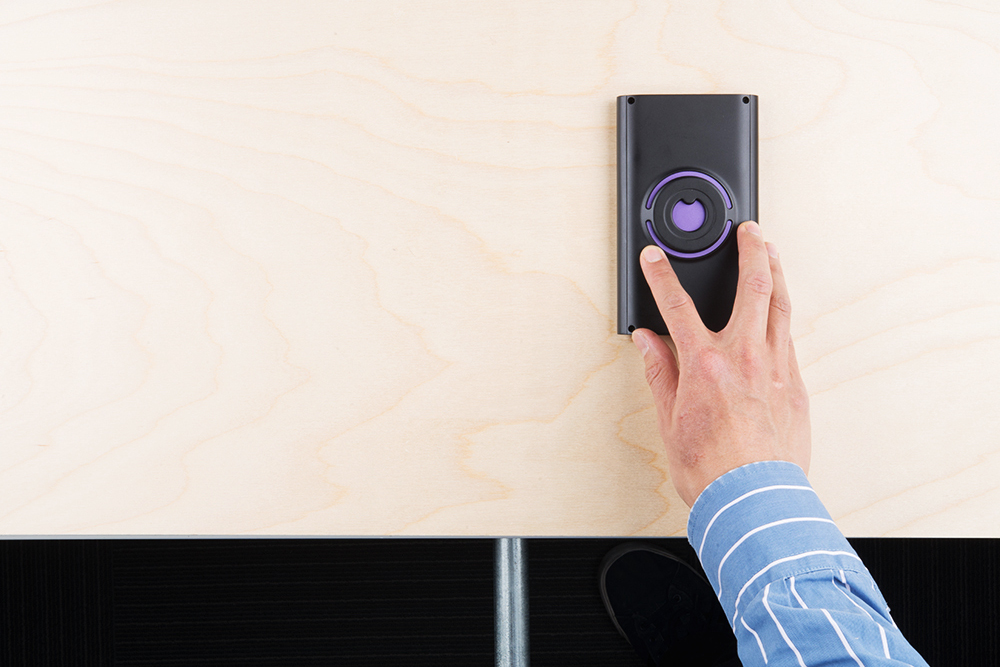
Move the Walabot over the material.

The In-Wall Pipe Detector should display a graphic and indicate the orientation of the pipe behind the table. The material thickness of the wall (in this case it is a table) and probability that there is an object there is displayed as the Depth and Confidence Level.
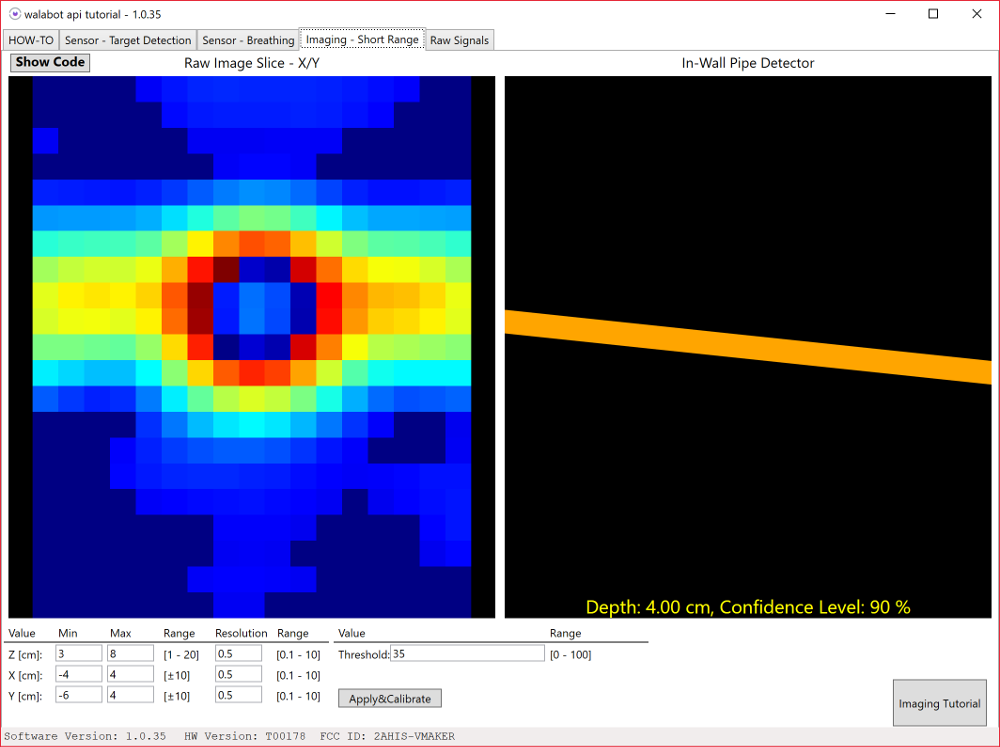
Rotate the Walabot.

The In-Wall Pipe Detector will respond by showing the material rotated.
Now try testing it with a wall to see if you can find a stud or a bundle of wires leading to a wall outlet! The Walabot Developer can see up to about ~4 inches (~10cm) behind a material!
Raw Signals
The fourth demo controls the antenna arrays. It is useful for visualizing a waveform for specific applications. Click on the tab labeled “Raw Signals”.
Using the default antenna pairs in open air, the signals will look like the graph on the right.
 |
 |
| Walabot measuring in open air | Raw signal with antenna pairs 7 -> 6 in open air. |
Let's try a little paper, rock, scissors to see how well the Walabot can recognize small changes in gestures. By placing your hand directly over the Walabot in the shape of a rock, the signal should look like the graph on the right.
 |
 |
| Walabot measuring rock. | Raw signal with antenna pairs 7 -> 6 with rock. |
Opening your had in the shape of a paper, you will notice a significant change in the graph.
 |
 |
| Walabot measuring paper. | Raw signal with antenna pairs 7 -> 6 with paper. |
Changing the shape of your hand to scissors, you should notice small changes in amplitude throughout the signal.
 |
 |
| Walabot measuring scissors. | Raw signal with antenna pairs 7 -> 6 with scissors. |
Try experimenting with different antenna pairs to see what works best when writing code for your custom application!
Walabot's Demo Video
Here's an explanation using the Walabot with the SDK for Windows.
Walabot API Library
The pseudocode for each example used in the Walabot SDK can be viewed by pressing the Show Code button. There is also a tutorial button that offers an explanation about the graphs relative to the Walabot. Head over to the Walabot API library for more information on the functions, parameters, and error codes when developing applications for Windows.