Getting Started with the micro:bit
MakeCode Extension
If you have used Arduino before, you probably know about a thing called a library; which is a collection of code that extends the functionality of the core programming language. MakeCode extensions work the same way.
There are some amazing differences between Arduino libraries and MakeCode extensions. One of them is that MakeCode extensions include JavaScript functions, which you can use when programming in text, as well as all of the blocks you need to program using the block method. This makes learning and using new extensions straightforward and shortens the time to awesome when setting out to build the project of your dreams.
There are several MakeCode extensions that are available. The following instructions takes advantage of the Controller:bit's MakeCode extension but you can follow along to add other extensions as well.
Installing a MakeCode Extension
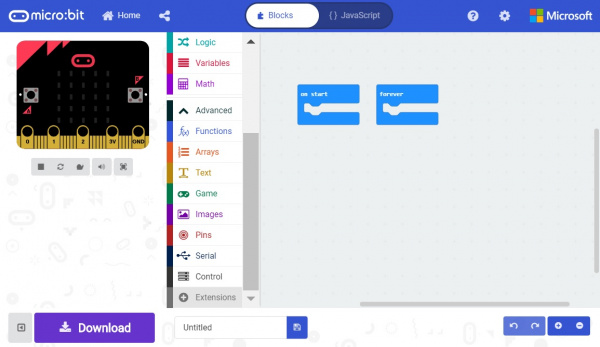
To install or add a new extension to your MakeCode toolbox (the list of different block groups), click on "Advanced" and then on "Add Extension."
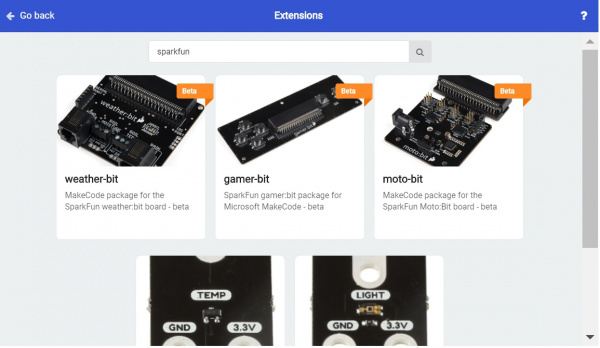
From here you can search for "SparkFun" or "SparkFun gamer-bit," and it should show up as a public extension in the list. Go ahead and click on it.
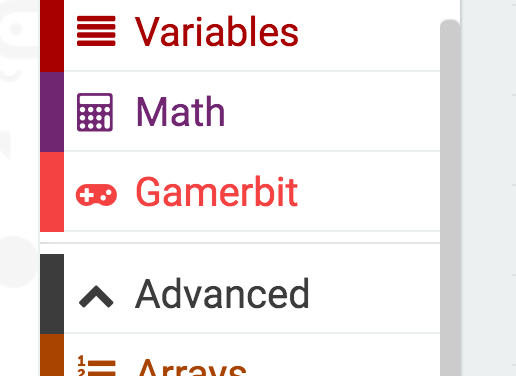
This will add all of the blocks to your toolbox. In general, this is a bit tricky as, depending on how the extension was written, it may either have its own toolbox or just add blocks to the existing ones. Take a look at your toolbox; for the gamer:bit you should see...
Great! You have now installed the gamer:bit extension! If you bought the micro:arcade kit, you are ready to use the board as well as the components that came in the kit. As a side note, for every new MakeCode project that you make, you will have to load extensions over again. Not a big deal, but noteworthy!
Updating Extensions
Published example codes and *.hex files that are saved use archived versions of extensions. Occasionally, there are updates to either MakeCode editor or the extensions. If you need to update an extension to the latest due to a compile error or new features, there are two methods of updating your extensions. One method is to remove all instances of the blocks provided by the extension and reinstalling the extension as outlined above. This can be tedious if there are several blocks sandwiched together and the length of your code. The second method is to update the version number in the Javascript View. The benefit is that users do not have to manually remove blocks that are sandwiched together.
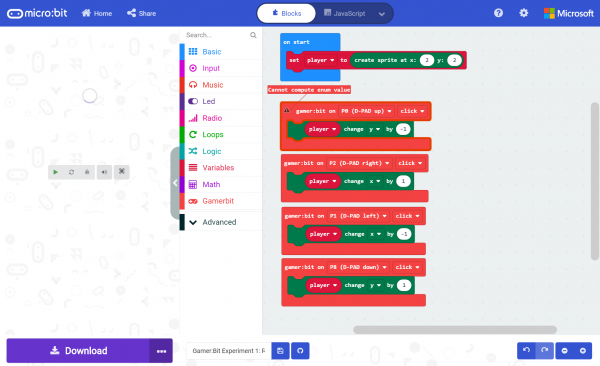
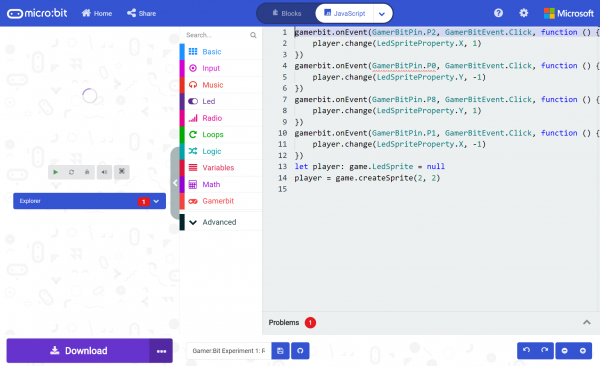
Below is a published example where a previous gamer:bit extension was able to compile. An update to the MakeCode editor caused an error due to a bug in the gamer:bit extension that was ignored in previous versions of the MakeCode editor. A patch was eventually applied to the gamer:bit extension so we want to update the example to pull in the latest version to fix the error.
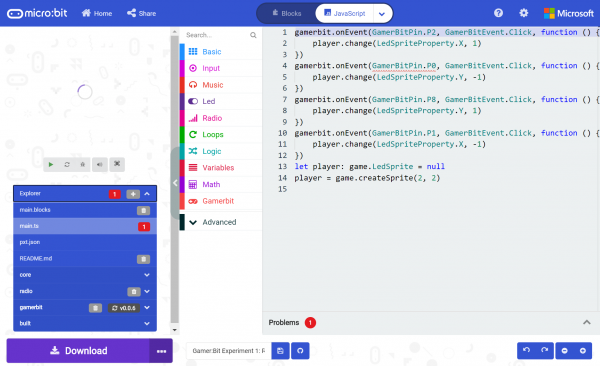
Toggle the JavaScript button at the top to switch to the JavaScript view. On the left hand side, you will notice the Explorer Menu. Click on the arrow to expand the menu.
Scroll down to the MakeCode extension's version number. Here you can delete or update the extension version. We'll want to update the version number since the code relies on the gamer:bit extension. Click the button with the refresh symbol and version number.
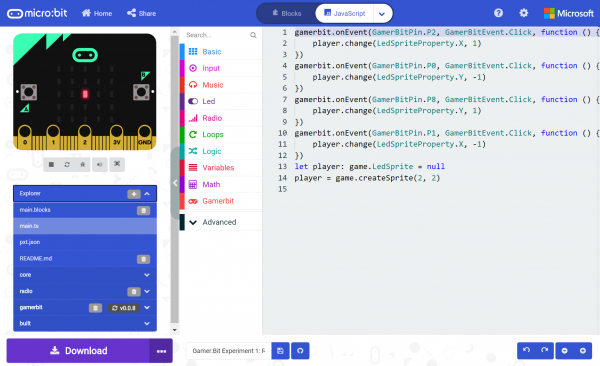
At this point, give it a few seconds to pull in the latest version number from the cloud. Then re-open the Explorer menu. If there was an update, this will refresh the extension and use the latest version. In this case, there was an update so it pulled in version v0.0.8! You'll notice that the red box with the number (which indicates the number of issues with the code) went away as well.
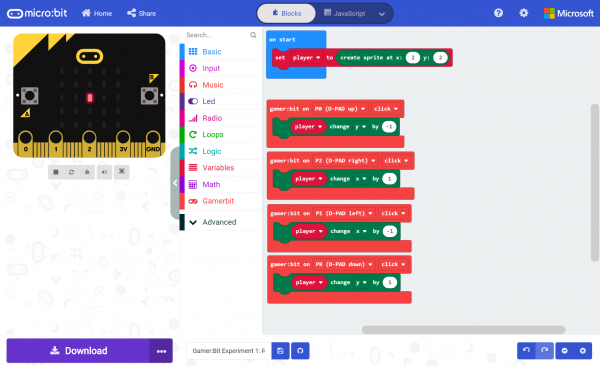
Just to make sure everything is going smoothly. Head back to the Blocks view, the error indicated by a triangle went away. Sweet! We have successfully updated the MakeCode extension so that we can get back to coding!
