Getting Started with the Artemis Development Kit
Software Overview
Drivers
As mentioned in the hardware section, a driver is not required for any of the recommended operating systems (Mac OSX, Linux, Windows 10). However, there is a serial port driver available for Windows 7 (only), which is provided by Mbed™. We will not be providing support for Windows 7; a forum is available from Mbed™, for users that run into issues with their driver.
Integrated Development Environments (IDEs)
The Artemis DK was designed to be utilized with three primary development environments. The Apollo3 MCU in the Artemis module is now fully supported in the Arduino IDE, including it's BLE functionality. In order to implement compatibility with the Arduino's built-in BLE library, we needed to
Artemis Development with the Arduino IDE
Artemis Development on Arm® Mbed™ OS (Beta)
Using SparkFun Edge Board with Ambiq Apollo3 SDK
Installation Requirements
Depending on the application (i.e. development environment) users want to work with, there may be additional software required. Below, is a list of additional software that we recommend installing for each development environment:
- Arduino IDE
- Install Arduino IDE
- Install the SparkFun Apollo3 Boards Board Definitions
- Install the ArduinoBLE Arduino Library
- Install the SparkFun LIS2DH12 Arduino Library
- Install Arduino IDE
- Ambiq SDK
- Python 3 (required for install)
- GCC Arm® Toolchain (version: 8-2018-q4-major)
- (compiling source code)
- Make (building projects)
Bash (Windows Only)
Although a Bash isn't required, it is a user friendly interface to pull GitHub repositories and navigate through a file system. For those that are unfamiliar, Bash is a Unix Shell (i.e. a command-line interpreter or shell that provides a command line user interface for Unix-like operating systems).
On most Mac and Linux computers, the Terminal program uses bash by default; otherwise, if you are accessing the shell, it is bash. For Windows computers, users will need to install a Bash shell emulator that has access to your file system.
We highly recommend Git Bash. For more information, please check out the following resources to get started with installing and utilizing Git Bash.
bash, users will need to add it to the operating system's file path.Make
Make is an automated build tool - you give it information about source locations and dependencies and it will automatically call a sequence of commands to compile or re-compile your project based only on the changed files. This can speed up compilation significantly in large projects. Make is a time-tested tool.
make, users will need to add it to the operating system's file path.Python 3
Users will need to install Python 3 to utilize the pyOCD debugging package; as well as, to install Mbed™ OS and AmbiqSDK development environments. For more information, please check out the following resources from the Python Software Foundation to get started with installing and utilizing Python 3.
Python Package Installer
pip3 is the package installer for Python 3. It should be natively installed with Python 3. For more information Python Package Installer, check out the online documentation.
GNU Arm® Embedded Toolchain
The GNU Arm® Embedded Toolchain is an open-source suite of tools for C, C++ and assembly programming. Designed to program target Arm® Cortex®-A, Arm® Cortex®-M, and Arm® Cortex®-R processors, the toolchain includes the GNU Compiler (GCC) and and other tools necessary for bare-metal software development. The GNU Arm® Embedded Toolchain is provided by Arm® for embedded software development on Windows, Linux, and Mac OS X operating systems.
gcc, users will need to add it to the operating system's file path.Arduino IDE
Most users will be familiar with the Arduino IDE and it's use. As a point of reference for professional developers who aren't aware, the Arduino IDE is an open-source development environment, written in Java, that makes it easy to write code and upload it to a supported board. For more details, feel free to check out the Arduino website.
To get started with the Arduino IDE, check out the following tutorials:
Installing an Arduino Library
What is an Arduino?
Installing Arduino IDE
Installing Board Definitions in the Arduino IDE
Software Dependencies
- Install the SparkFun Apollo3 Boards Board Definitions in the Arduino IDE
Installing Board Definitions in the Arduino IDE
Note: Users will need to install the board definitions for our development boards with an Artemis module.
For more instructions, users can follow this tutorial on Installing Additional Cores provided by Arduino. Users will also the .json file for the SparkFun Ambiq Apollo3 Arduino Core:
https://raw.githubusercontent.com/sparkfun/Arduino_Apollo3/master/package_sparkfun_apollo3_index.json
- Install the associated Arduino libraries for the board's features:
- The ArduinoBLE Arduino Library
- The SparkFun LIS2DH12 Arduino Library
Installing an Arduino Library
AmbiqSuite SDK
The Ambiq Suite SDK is a collection of software enablement for the Apollo, Apollo2, Apollo2-Blue, and Apollo3-Blue MCUs. The SDK includes a hardware abstraction layer (HAL), device drivers, and example applications to speed the understanding of the operation of the MCUs. Third party software including Arm®’s Cordio BLE Host stack and FreeRTOS v10.1.1 and v9.0 are distributed along with debugging tools and other support. This is the most ‘raw’ option - you can write C or C++ code that runs pretty close to ‘bare metal’ in a ‘professional’ software development kit.
For more information on the Apollo3 MCU and the AmbiqSDK, check out the resources below:
- Apollo MCU Product Page
- Apollo 3 Blue Product Page (used in Artemis module)
- Ambiq Documentation
- AmbiqSuite SDK Getting Started Guide (v1.1 June 2017)
- AmbiqSDK maintained by SparkFun
Software Dependencies
- Python (uploading code to board)
- Make (building projects)
- GCC Arm® Toolchain (compiling source code)
- Git (sort of - you could just download a ZIP from github)
Programming the Board
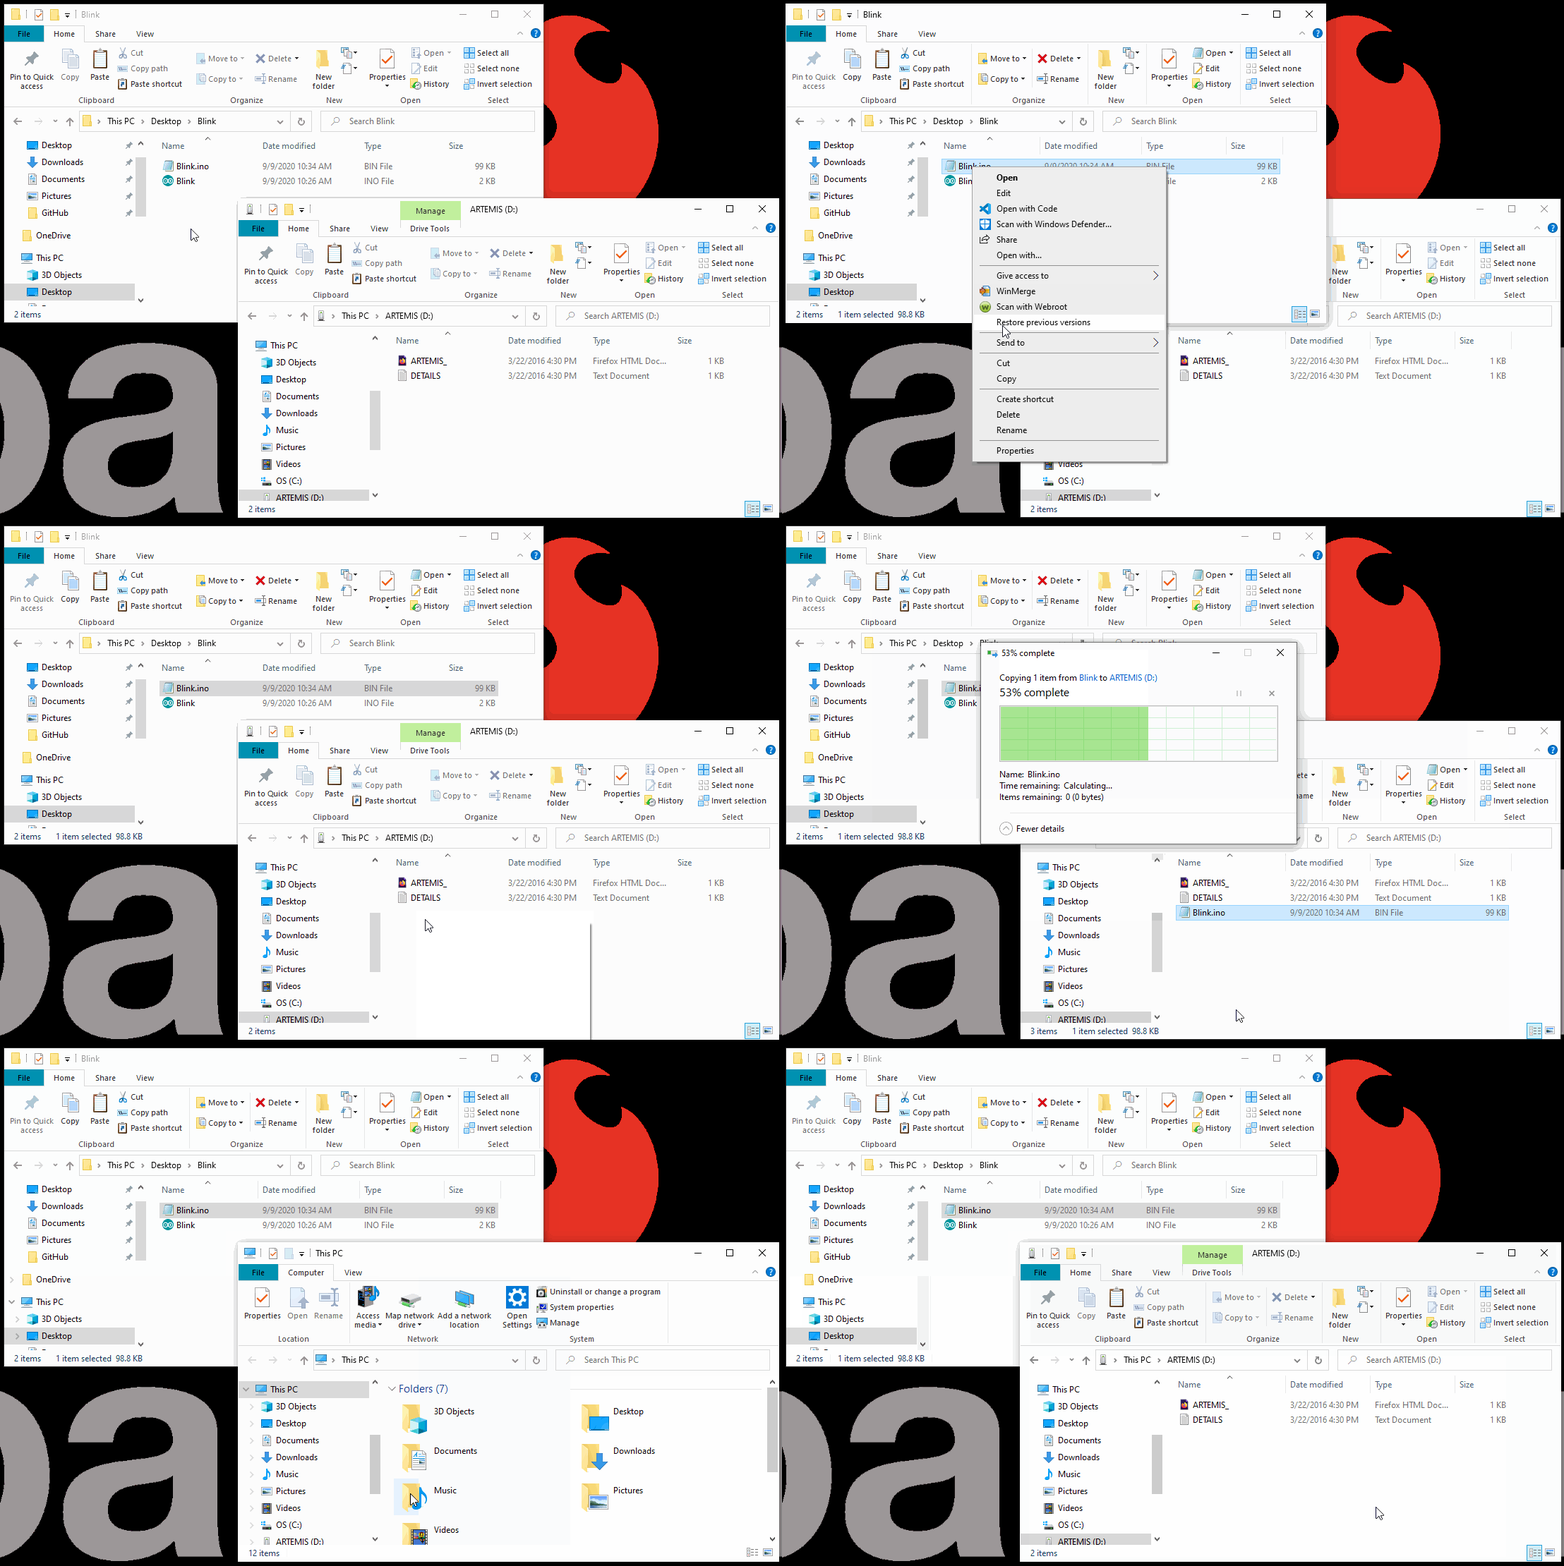
The programming process for the Artemis DK is straight forward. Once users build or compile a binary file for their code with the Artemis DK as the target, the file can be dragged-and-dropped (or copied) into the ARTEMIS mass storage drive on the computer.


