Galileo Unread Email Counter
This Tutorial is Retired!
This tutorial covers concepts or technologies that are no longer current. It's still here for you to read and enjoy, but may not be as useful as our newest tutorials.
 jimblom
Introduction
Does your life revolve around email, or do you need a little nudge once-in-a-while to go check your inbox? If you've ever wanted to check your email without actually checking your email, this is the project for you! An Intel Galileo-based, Python/Arduino hybrid, unread email notifier! This project connects to the Internet over either WiFi or Ethernet, logs into your email account, checks how many unread emails you have, and displays that number onto a 7-segment LED.

This project is an excellent introduction to the Galileo. It takes advantage of the Arduino form-factor, by equipping the powerful single-board computer (SBC) with an Arduino shield, and it also makes use of Python and the Galileo's easy network-connectivity. Plus, of course, all of the coding and action takes place within the comfy confines of an Arduino sketch.
Required Materials
Here is a list of materials you'll need to set this project up:
- Intel Galileo -- The Galileo is the brains of the operation. It'll be running an Arduino sketch, calling a Python script, and updating the display.
- The Galileo already includes a 5V Wall Adapter and Micro-B USB Cable to supply power and a programming interface. If you don't already have them, you'll need both of those.
- OpenSegment Shield -- This serially-controlled display makes interfacing with a large, bright 4-digit 7-segment display super-easy. (Also available in Red, Green, White, and Yellow.)
- µSD Card -- This project requires the "bigger" Linux image, and this card is also used to store a Python script.
To connect your Galileo to the Internet, you'll either need:
- An Ethernet Cable long enough to connect your Galileo to an Internet-connected router.
--or-- - A Mini PCIe WiFi Card based on the Intel Centrino chipset (so it's compatible with the Galileo's drivers). Depending on which card you get, you may need some WiFI antennas connected to it.'
Suggested Reading
Before delving into this tutorial, we recommend you check out the Galileo Getting Started Guide, which will help you get your Galileo set up. You will need the "bigger" Galileo Linux image installed, so follow along with the directions on that part of the tutorial.
In addition to that tutorial, here are some related guides we'd recommend reading:
- Using the Serial 7-Segment Display -- This tutorial provides a good overview of the OpenSegment Shield we'll be using in this project.
- Serial Peripheral Interface (SPI) -- We'll use SPI to communicate between the Galileo and OpenSegment Shield display.
- How to Power Your Project -- If you want to take your project mobile, or use something other than the 5V DC power supply, check out this tutorial.
Taming the Python
Before you upload any Arduino code, or even turn the Galileo on, let's set up the Python unread-email-checker script. This script does most of the heavy lifting, like connecting to an IMAP4 server, authenticating with our login/password, and checking your email.
Configuring the Script
The Python unread-email-checking script is below. Five magical lines of Python is all it takes to check our email:
Click here to download (right-click > Save As...) the script, or copy/paste the above into a file precisely named pyMailCheck.py. Then open it with a plaintext editor (Notepad, TextEdit, etc.).
You'll have to do a bit of editing to customize this script for yourself. It's set up to grab an email count from a Gmail account. If you're using another email service, you'll need to change at least the address of the IMAP4 server on line 5. Depending on your mail server, you may also need to change the port (993 is very standard, though).
Also, on line 6, you'll need to change the login and password values to match your account.
Storing the Script
After following along with the Galileo Getting Started Guide, you should have your Galileo set up with the "bigger" Linux image. This adds Python support, along with WiFi drivers and a list of other fun utilities. We'll store this Python script on that SD card as well.
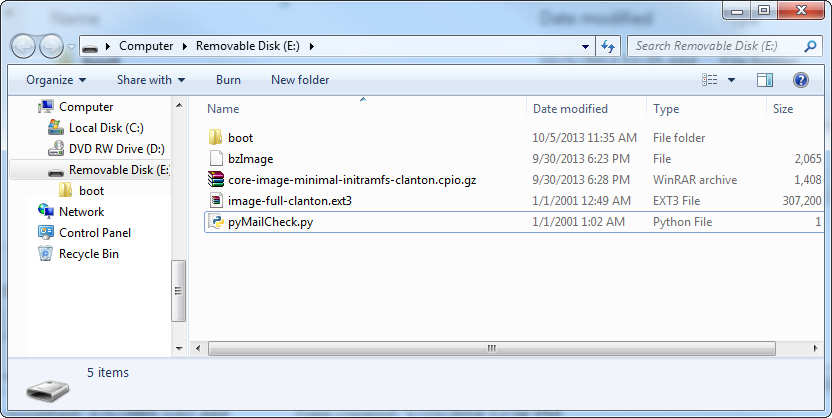
Copy the pyMailCheck.py file that you've edited, and paste it to the top level of your SD card, along with the boot directory, bzImage and other couple of files on the card.
With that, you can remove the SD card from your computer and put it back into your Galileo. Onto the next step -- the Arduino sketch!
The Arduino Sketch
With Python taking care of the email checking, our Arduino sketch is free to update the display and interact with any other hardware. The trick is getting the Arduino sketch to interact with the Python script. We'll use a special function -- system() -- to call the script from our Arduino sketch.
Uploading the Sketch
There are two versions of this Arduino sketch -- one for WiFi and another for Ethernet. Both achieve the same result, they just include different libraries, and use different interfaces to get there. Download your preferred sketch below:
If you're using the WiFi sketch, there are a couple variables you'll have to edit to connect to your WiFi network. On line 23 you'll need to set the ssid[] variable to your network SSID (network name). And, if your network has a password, on the line below you'll need to modify the pass[] variable as well.
For both sketches, you can modify the emailUpdateRate variable above setup() to adjust the frequency of your mail checks. At 10000, it'll check your mail every 10 seconds. We don't recommend checking more often than that.
Once you've made your fine tunings, upload the sketch to your Galileo.
Running the Sketch
For debug purposes, the Arduino sketch will print a handful of messages to the serial monitor (9600 bps). This is especially handy if you don't have a display attached -- the unread email count will be printed here too.
If you do have a OpenSegment Shield attached, you should initially see the display turn to "0000". Every 10 seconds, as the email checker runs, you may see that value change. Try sending yourself an email! Does the counter go up? Read the email. Does it go down?
Now you'll never be the last to see the latest silly email thread!
Dissecting the Sketch
There are a few key lines of code here that you'd never see on an Arduino Uno, Mega, or the like. First and foremost to that are the system() function calls.
System Calls
The system(const char * command) function is a standard C function which is used to issue a command to your operating system's command processor. With this function, your Arudino sketch can interact with Linux, just as you might through a terminal, over the command line.
Each system function takes a single parameter: an array of char's (i.e. a string of characters). The character array can be any system function -- you could stick something like "mkdir foo" in the system function, and your Arduino would ask the Linux kernel to make a directory called "foo".
In this sketch, we use the system function to run our Python script. The first system call is in the getEmailCount() function:
language:c
// Send a system call to run our python script and route the
// output of the script to a file.
system("python /media/realroot/pyMailCheck.py > /media/realroot/emails");
This is a call to run the pyMailCheck.py script, and route the output to a file called "emails". So instead of printing the number of unread emails to the terminal, our script will place that value in a file. The "/media/realroot/" directory is where the Linux kernel finds the "top level" of our SD card.
Reading the SD Card
To read the unread email count returned by the Python script, all we need to do is read the contents of the "emails" file. This can be done with the included Arduino SD library.
To read from the SD card, simply open the "emails" file with the SD.open function, and read to the end with the File.read function. A little bit of parsing and converting is required to turn the string of characters to an integer value.
SPI-ing to the Display
The OpenSegment supports all sorts of communication standards -- serial, I2C, and SPI. All are supported by the Galileo, but SPI was the only one that didn't seem to require any extra modification to the shield.
To interface with the display, the SPI library (included with Arduino) is used. Check the bottom of the sketch to see a couple of helper functions, which can write a single byte or a string of bytes to the display.
Resources and Going Further
This tutorial barely scratches the surface of what the Galileo is capable of. With Python and access to the Internet, there endless project possibilities: you can monitor Twitter, solve difficult math problems, even invent your own games. Plus the Galileo has other hardware that we haven't made use of either: analog inputs, PWM output, and USB host functionality, which could support USB keyboards, mice, webcams and more.
What project will you make with the Galileo? We'd love to hear about it! Let us know in the discussion tab.
If you're looking for some more project inspiration, check out these related tutorials:
- Setting Up Raspbian and DOOM! -- How to get started with that other, popular SBC -- the Raspberry Pi.
- Raspberry Pi Twitter Monitor -- How to monitor Twitter with Raspberry Pi and Python. This'd be easy to port over to Galileo!
- pcDuino Crowdsource Kiosk -- How to create a crowdsourced, candy-vending kiosk, using the pcDuino.