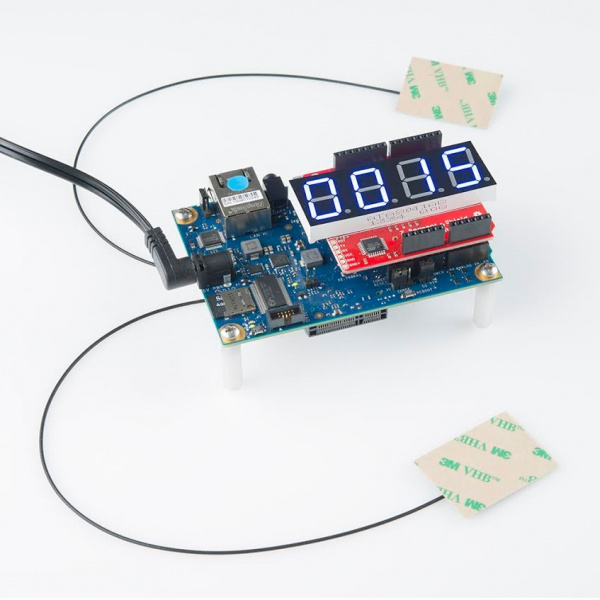
Galileo Unread Email Counter
This Tutorial is Retired!
This tutorial covers concepts or technologies that are no longer current. It's still here for you to read and enjoy, but may not be as useful as our newest tutorials.
Introduction
Does your life revolve around email, or do you need a little nudge once-in-a-while to go check your inbox? If you've ever wanted to check your email without actually checking your email, this is the project for you! An Intel Galileo-based, Python/Arduino hybrid, unread email notifier! This project connects to the Internet over either WiFi or Ethernet, logs into your email account, checks how many unread emails you have, and displays that number onto a 7-segment LED.
This project is an excellent introduction to the Galileo. It takes advantage of the Arduino form-factor, by equipping the powerful single-board computer (SBC) with an Arduino shield, and it also makes use of Python and the Galileo's easy network-connectivity. Plus, of course, all of the coding and action takes place within the comfy confines of an Arduino sketch.
Required Materials
Here is a list of materials you'll need to set this project up:
- Intel Galileo -- The Galileo is the brains of the operation. It'll be running an Arduino sketch, calling a Python script, and updating the display.
- The Galileo already includes a 5V Wall Adapter and Micro-B USB Cable to supply power and a programming interface. If you don't already have them, you'll need both of those.
- OpenSegment Shield -- This serially-controlled display makes interfacing with a large, bright 4-digit 7-segment display super-easy. (Also available in Red, Green, White, and Yellow.)
- µSD Card -- This project requires the "bigger" Linux image, and this card is also used to store a Python script.
To connect your Galileo to the Internet, you'll either need:
- An Ethernet Cable long enough to connect your Galileo to an Internet-connected router.
--or-- - A Mini PCIe WiFi Card based on the Intel Centrino chipset (so it's compatible with the Galileo's drivers). Depending on which card you get, you may need some WiFI antennas connected to it.'
Suggested Reading
Before delving into this tutorial, we recommend you check out the Galileo Getting Started Guide, which will help you get your Galileo set up. You will need the "bigger" Galileo Linux image installed, so follow along with the directions on that part of the tutorial.
In addition to that tutorial, here are some related guides we'd recommend reading:
- Using the Serial 7-Segment Display -- This tutorial provides a good overview of the OpenSegment Shield we'll be using in this project.
- Serial Peripheral Interface (SPI) -- We'll use SPI to communicate between the Galileo and OpenSegment Shield display.
- How to Power Your Project -- If you want to take your project mobile, or use something other than the 5V DC power supply, check out this tutorial.
