Experiment Guide for the SparkFun Tinker Kit
This Tutorial is Retired!
This tutorial covers concepts or technologies that are no longer current. It's still here for you to read and enjoy, but may not be as useful as our newest tutorials.
View the updated tutorial: Activity Guide for SparkFun Tinker Kit
Installing FTDI Drivers
Once you have downloaded and installed Arduino, it's time to connect the RedBoard to your computer! Before you can use the board, though, you'll need to install drivers.
Windows Driver Installation
After initially plugging your RedBoard in, your computer will try to search for a compatible driver. It may actually succeed! The FTDI drivers are pretty common, so Windows Update may know a little something about them. If the drivers do automatically install, you should see a little bubble notification saying so:
If your computer failed to find drivers, we'll have to install them manually. Check out our Windows FTDI Driver install guide for driver installation instructions.
Mac Driver Installation
If you're lucky, the FTDI drivers should automatically install on Mac OS X; otherwise you'll have to manually install the drivers. Check out the Mac FTDI Driver install guide for help installing the drivers.
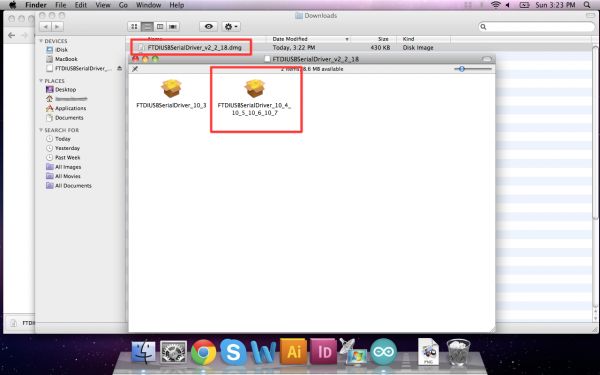
In short, the process involves heading over to the FTDI driver website, and downloading the most up-to-date VCP drivers. Then you'll simply run the "FTDIUSBSerialDriver_v2_2_18.dmg" file you downloaded, and follow the installation prompts.
Linux Driver Installation
Linux is actually pretty good about automatically installing the drivers. If you have any trouble, check out our Linux FTDI Driver install guide.
Now it's time to breathe easy! You'll only have to run through this driver installation process once, the first time you connect the board to your computer. Now it's time to upload a sketch!

