Dungeons and Dragons Dice Gauntlet
 Dia
Dia 
Assembly: Sewing Ground
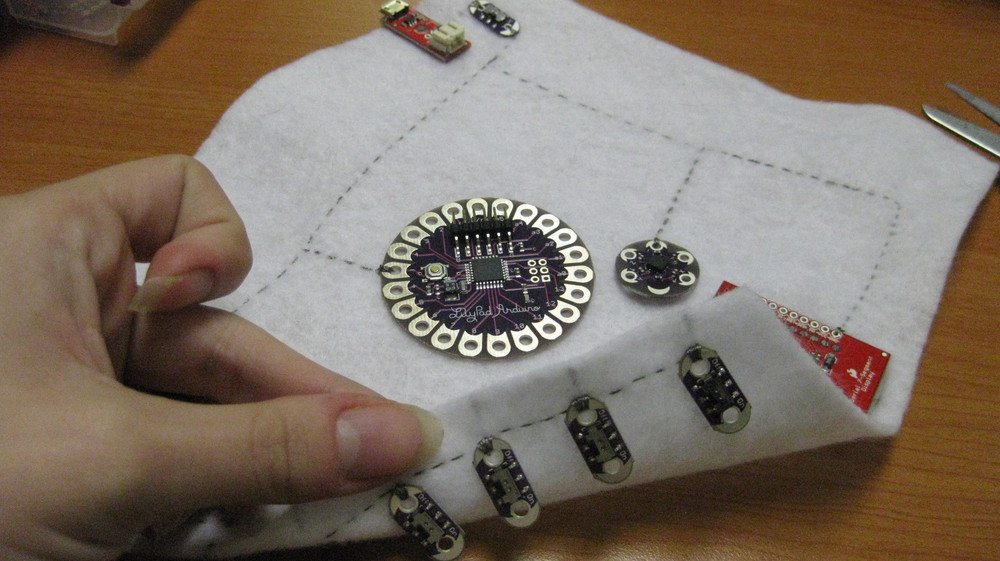
I've traced out the first connections you'll sew here in copper tape. I'm going to start with all of the negative traces. You'll be connecting all of the main components to each other and to ground on your power supply. Remove all of the switches on the right-hand side, leaving only the one next to the power supply, which is your LiPo Charger Basic.
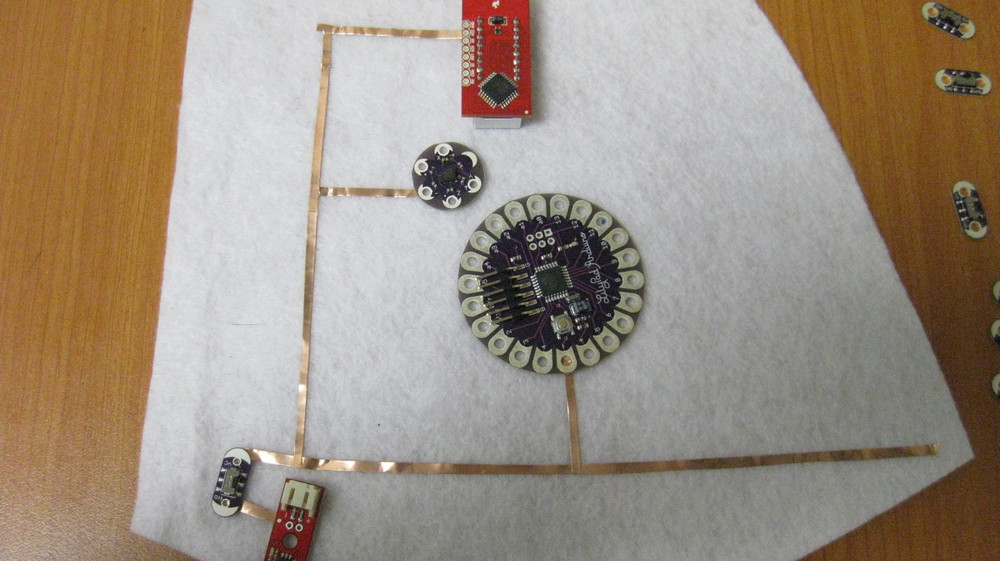
Take a look at these connections. What you are doing is connecting every pin that is labeled either (-) or GND to each other, and then to one side of the power switch. Then connect the other side of the switch to the (-) pin on the power supply. This way, when you toggle this switch, you are creating and breaking the connection between the entire circuit and the power supply. This will be your on/off switch for the whole bracer. One trace goes off to the right side because we will be attaching it to the remaining 7 switches.
Here is a photo of my completed stitching on the negative trace. Feel free to skip to the end and see what all of the finished stitching looks like if you'd like to make changes the the circuit. As long as you leave room for all of the traces you see there, everything should be fine. You can move components into a configuration that works better for you or better fits the shape you have chosen for your bracer.
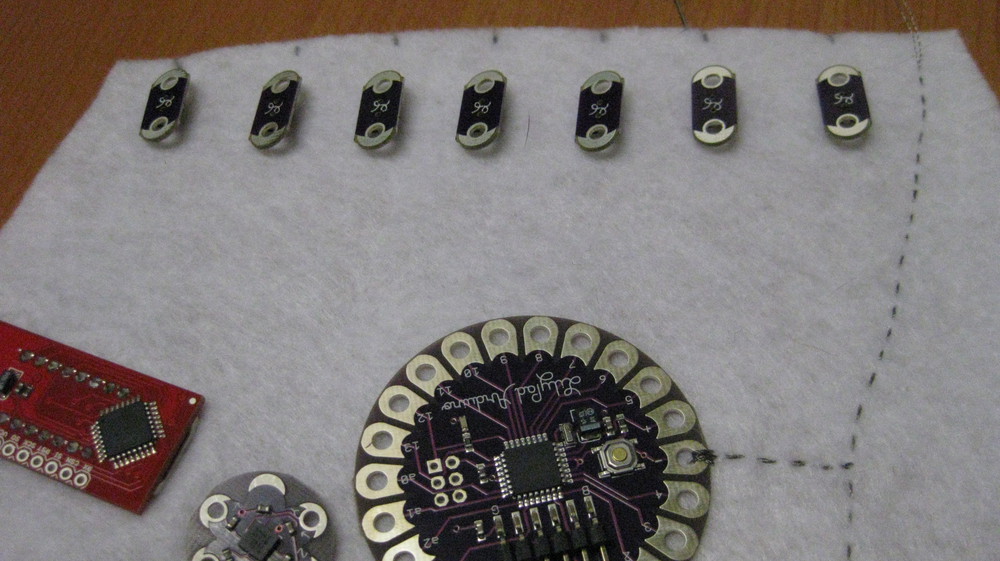
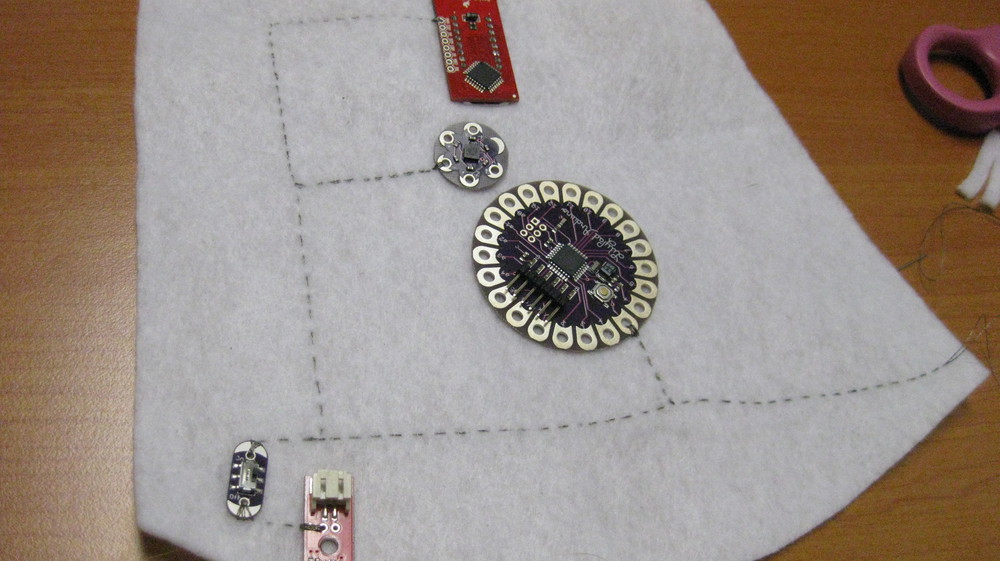
The next step will be adding the remaining switches. Line them up against the edge of the fabric. I tried to keep mine roughly equidistant. You can arrange them however you'd like, so long as you'll be able to connect one to each of the arduino pins 5-11. Mark where each button will go on the front and back side.
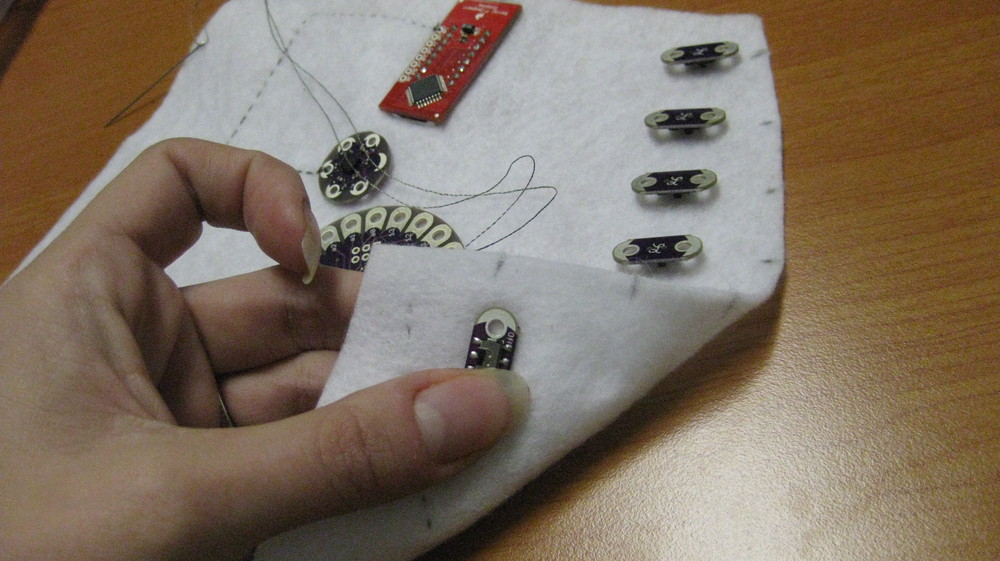
Tie your thread onto the long end you sewed from the negative circuit, and sew a line up the left side of the felt. Using the marks you made, move the button to the top side of the fabric, and sew down the 'Off' side until you have a line of all 7 of these switches sewn to each other and to the negative connections.
Tie off your thread, and start fresh for the next part.