DIY Light Sculpture
Contributors:
 Feldi
Feldi
Introduction
Design and build time: 5 Hours
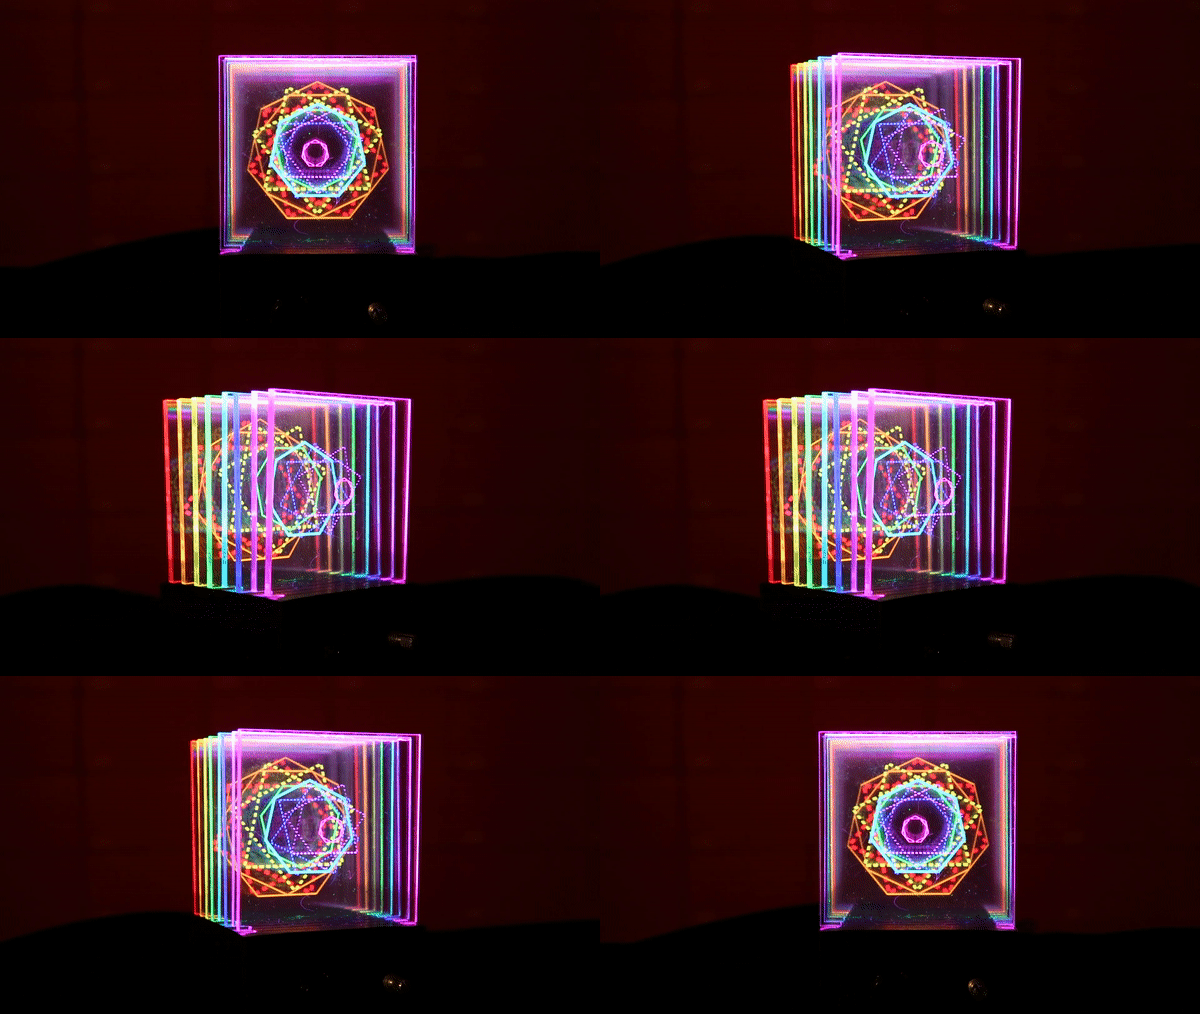
In this project, we’ll create a beautiful desktop light sculpture by edge-lighting laser cut acrylic with addressable LEDs. This project is embedded with a QDuino Mini, 8x8 Adafruit Neopixel Matrix, potentiometer, momentary pushbutton, and switch.
Required Materials
Let's go over all of the things you'll need to put your project together. Depending on what you have, you may not need everything listed here. Add it to your cart, read through the guide, and adjust the cart as necessary.
Tools
You will need a soldering iron, solder, and general soldering accessories as well as a 3D printer and black filament:
ABS Filament 3mm - 1kg (Black)
TOL-12954TAZ 6 3D Printer
TOL-13880You will also need the following items:
- Laser Cutter
- Clear Acrylic (1/8" thick)
- Hot Glue Gun and Glue
Suggested Reading
Before you get started, take some time to familiarize yourself with the following:
How to Solder: Through-Hole Soldering
This tutorial covers everything you need to know about through-hole soldering.
Installing an Arduino Library
How do I install a custom Arduino library? It's easy! This tutorial will go over how to install an Arduino library using the Arduino Library Manager. For libraries not linked with the Arduino IDE, we will also go over manually installing an Arduino library.
Working with Wire
How to strip, crimp, and work with wire.
What is an Arduino?
What is this 'Arduino' thing anyway? This tutorials dives into what an Arduino is and along with Arduino projects and widgets.
Installing Arduino IDE
A step-by-step guide to installing and testing the Arduino software on Windows, Mac, and Linux.
Addressable LED Strip Hookup Guide
Add blinking lights to any holiday decoration with our Holiday Lights Kit using WS2812-based addressable LEDs!


