DIY Light Sculpture
 Feldi
Feldi 
Laser Cutting Your Design
Now that we have the base enclosure completed with the electronics soldered together into a circuit, let's take a look at how to add a decorative flair to your project.
Download Templates
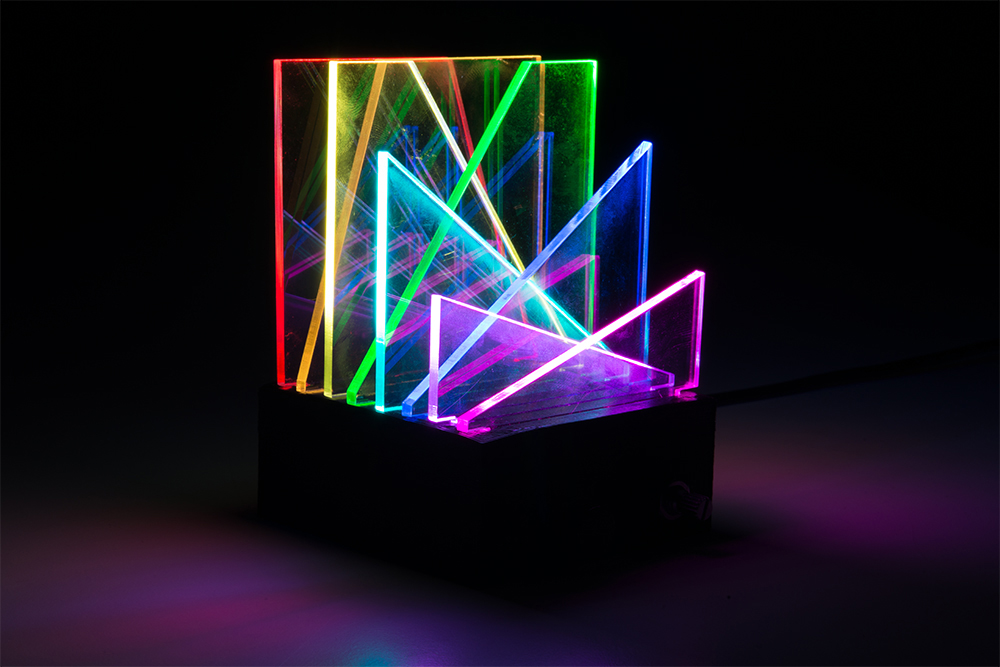
Download the laser cutter template from the project thingiverse page to prepare to cut your acrylic inserts. Open this with illustrator and begin to design your etching and/or cuts. I have found that the light is picked up by both the etched design and the edges of the plastic, so you can use both of these elements to create your final design. There are 8 rows of LEDs on your matrix so you will want to make 8 different acrylic inserts.
Cut Your Designs
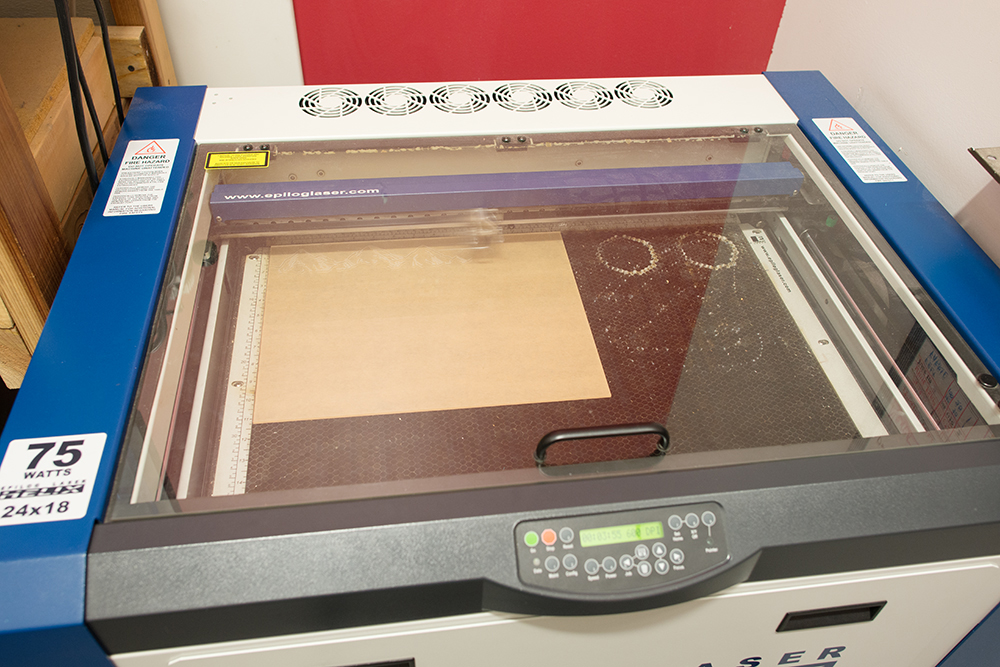
These inserts were cut and the designs rastered on our Epilog 75W laser cutter according to the manufacturer's specifications. If you do not have access to a laser cutter, check out your local library or hackerspace. Alternatively, you can order your designs online at Ponoko.
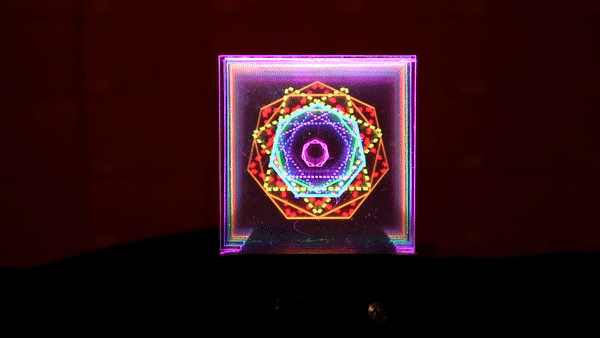
Light up your Life!
Pop the inserts into your enclosure and enjoy!