Addressable LED Strip Hookup Guide
 Nick Poole
 Light Up Your Life
Nothing looks as festive as a bunch of bright, colorful lights concentrated into a tight space. And for that, I heartily recommend an addressable LED strip. It's very bright, super vivid, and easy to hookup. This tutorial covers all of the wiring and code necessary to light up a single string of addressable LEDs with just a RedStick and a AA Battery Pack.
Covered in This Tutorial
Required Materials
To follow along with this tutorial, you will need the following parts:
You will also need to following tools:
- Soldering tools, including an iron and solder
- Wire Strippers
Suggested Reading
If you've never worked with addressable LEDs or with the RedStick, we recommend checking out these other guides first.
Battery Technologies
Light-Emitting Diodes (LEDs)
WS2812 Breakout Hookup Guide
RedStick Hookup Guide
Mean Well LED Switching Power Supply Hookup Guide
Hardware Assembly
For the purposes of this tutorial, I'm going to assume that you have some very basic soldering experience. There are only a handful of connections that you'll need to solder, so this isn't a bad project to start with However, if you are using this as your introduction to soldering, we strongly suggest reading this tutorial first.
How to Solder: Through-Hole Soldering
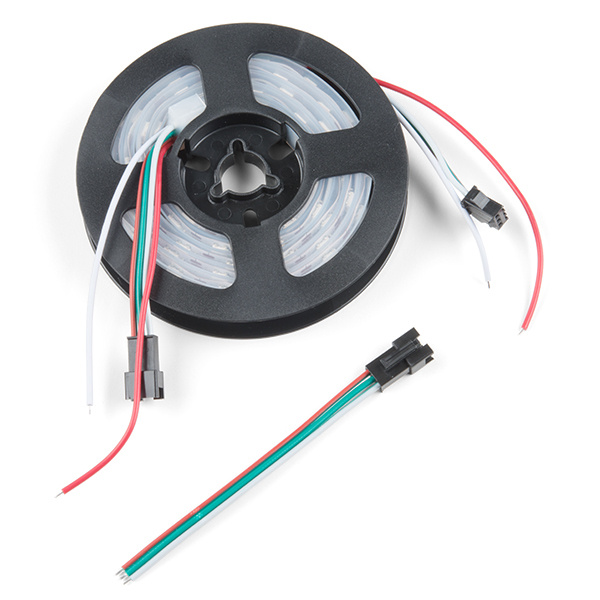
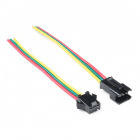
Addressable LED strips, like the one in this tutorial, tend to use a standardized 3-pin connector. This makes it easy to chain multiple LED strips together. Because the battery pack included with this project is not going to support a lot more than the 60 included LEDs, you may find it convenient to cut the female connector off the "out" end of the strip and solder it to the RedStick to make your LEDs detachable.
![]()
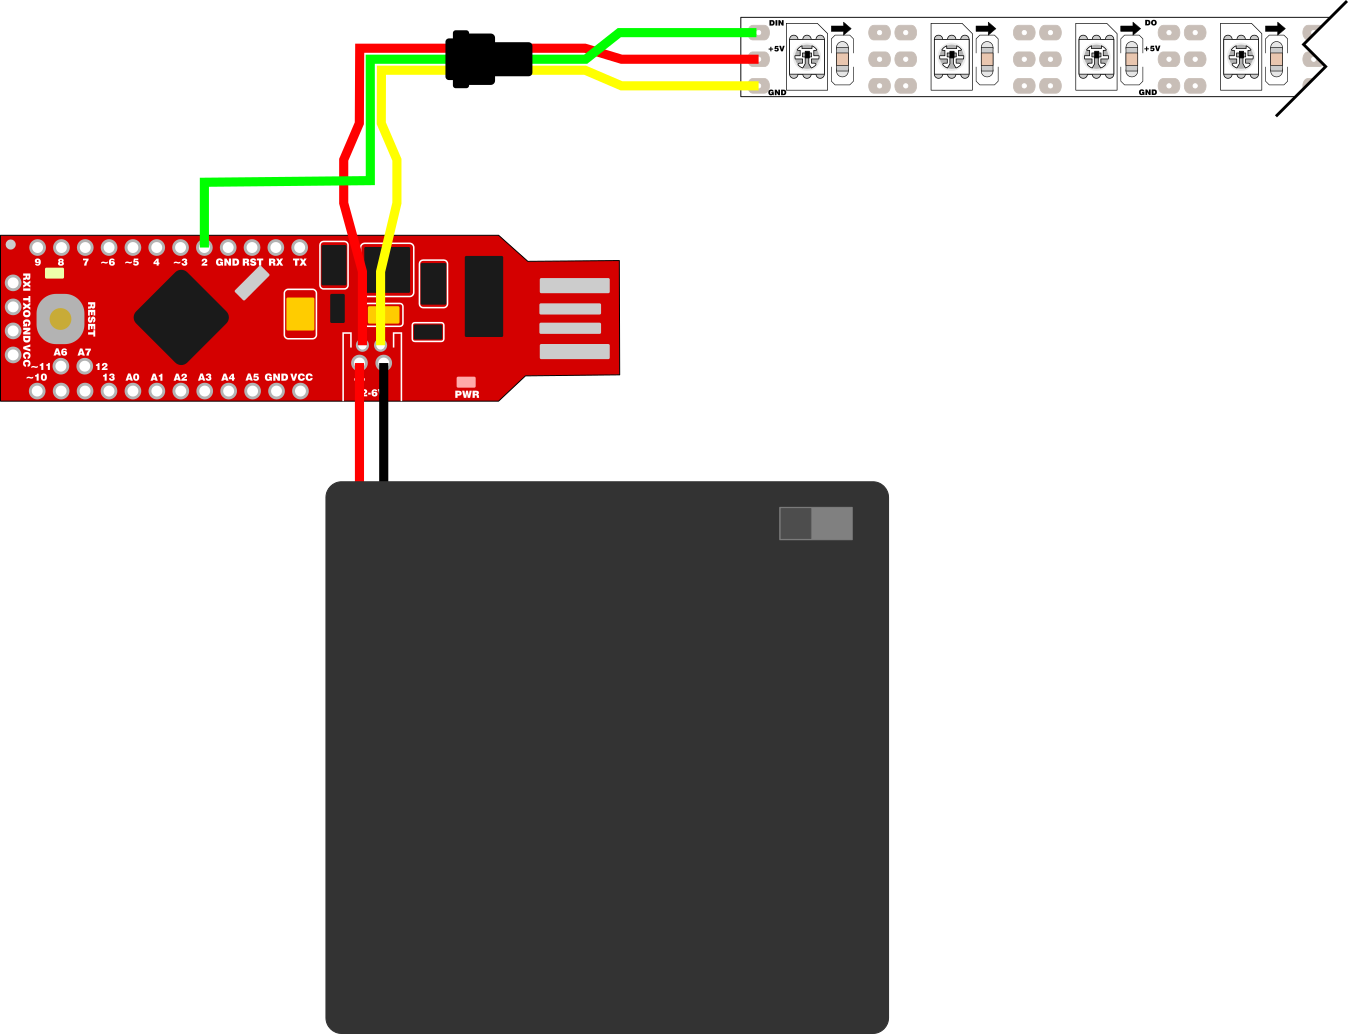
The diagram below illustrates the handful of connections that you'll need to make. You'll notice that the red and yellow wires from the LED strip are connected directly to the battery connector. You may be tempted to connect them to the GND and VCC pins on the RedStick, but don't do that. The VCC pin draws current through the on-board voltage regulator, which isn't rated for the high current that the LEDs require to operate. If powered from VCC, the regulator will definitely get hot and may fail altogether.
Example Code
Once your LED strip is wired up, you can load some Arduino code onto the RedStick to animate the lights! For our example code, we'll be making use of Adafruit's fantastic NeoPixel library.
Click here to download a copy of both the example code, as well as the NeoPixel library. The library is located in the "Adafruit_NeoPixel" folder, and the example code is found in the "WS2812_Breakout_Example" folder.
You'll need to install the library. For help there, check out our installing Arduino libraries tutorial.
We've broken down the example code into a few separate sketches that each have a fun animation. We've taken the liberty of cooking up a few special addition animations as well:
Rainbow Cycle
This one is my favorite of the NeoPixel example animations. It scrolls through the entire rainbow of colors while evenly distributing the color spectrum across the LED strip.
language:c
#include <Adafruit_NeoPixel.h>
#ifdef __AVR__
  #include <avr/power.h>
#endif

#define PIN 2

Adafruit_NeoPixel strip = Adafruit_NeoPixel(60, PIN, NEO_GRB + NEO_KHZ800);

void setup() {
  strip.begin();
  strip.setBrightness(64);
  strip.show(); // Initialize all pixels to 'off'
}

void loop() {
rainbowCycle(20);
}

void rainbowCycle(uint8_t wait) {
  uint16_t i, j;

  for(j=0; j<256*5; j++) { // 5 cycles of all colors on wheel
    for(i=0; i< strip.numPixels(); i++) {
      strip.setPixelColor(i, Wheel(((i * 256 / strip.numPixels()) + j) & 255));
    }
    strip.show();
    delay(wait);
  }
}

// Input a value 0 to 255 to get a color value.
// The colours are a transition r - g - b - back to r.
uint32_t Wheel(byte WheelPos) {
  WheelPos = 255 - WheelPos;
  if(WheelPos < 85) {
    return strip.Color(255 - WheelPos * 3, 0, WheelPos * 3);
  }
  if(WheelPos < 170) {
    WheelPos -= 85;
    return strip.Color(0, WheelPos * 3, 255 - WheelPos * 3);
  }
  WheelPos -= 170;
  return strip.Color(WheelPos * 3, 255 - WheelPos * 3, 0);
}
Candy Chase
This is a little animation that I worked up based on the "Theater Chase" animation included in the NeoPixel example code. It creates a crawling lights effect in red on a white background, like an animated candy cane!
language:c
#include <Adafruit_NeoPixel.h>
#ifdef __AVR__
  #include <avr/power.h>
#endif

#define PIN 2

Adafruit_NeoPixel strip = Adafruit_NeoPixel(60, PIN, NEO_GRB + NEO_KHZ800);

void setup() {
  strip.begin();
  strip.setBrightness(64);
  strip.show(); // Initialize all pixels to 'off'
}

void loop() {
candyChase(100);
}

void candyChase(uint8_t wait) {
  for (int j=0; j<10; j++) {  //do 10 cycles of chasing
    for (int q=0; q < 3; q++) {
      for (uint16_t i=0; i < strip.numPixels(); i++) {
        strip.setPixelColor(i+q, 255,255,255);    //turn every pixel white
      }
      for (uint16_t i=0; i < strip.numPixels(); i=i+3) {
        strip.setPixelColor(i+q, 255,0,0);    //turn every third pixel red
      }
      strip.show();

      delay(wait);

      for (uint16_t i=0; i < strip.numPixels(); i=i+3) {
        strip.setPixelColor(i+q, 0);        //turn every third pixel off
      }
    }
  }
}
Snowflakes
This animation creates an array of randomly twinkling white pixels reminiscent of snowfall.
language:c
#include <Adafruit_NeoPixel.h>
#ifdef __AVR__
  #include <avr/power.h>
#endif

#define PIN 2

Adafruit_NeoPixel strip = Adafruit_NeoPixel(60, PIN, NEO_GRB + NEO_KHZ800);

void setup() {
  strip.begin();
  strip.setBrightness(64);
  strip.show(); // Initialize all pixels to 'off'
}

void loop() {
    snowflakes(100);
}

void snowflakes(uint8_t wait) {

// Setup the pixel array
int pixel[60];
for(int p=0; p<60; p++){
  pixel[p] = random(0,255);
}

// Run some snowflake cycles
for (int j=0; j<200; j++) {

// Every five cycles, light a new pixel
if((j%5)==0){
  strip.setPixelColor(random(0,60), 255,255,255);
}

// Dim all pixels by 10
for(int p=0; p<60; p++){
  strip.setPixelColor(p, pixel[p],pixel[p],pixel[p] );
  pixel[p] =  pixel[p] - 10;
}
   strip.show();
   delay(wait);
}

}
Iceflakes
Not a real thing, I know... It's "Snowflakes" but blue instead of white.
language:c
#include <Adafruit_NeoPixel.h>
#ifdef __AVR__
  #include <avr/power.h>
#endif

#define PIN 2

Adafruit_NeoPixel strip = Adafruit_NeoPixel(60, PIN, NEO_GRB + NEO_KHZ800);

void setup() {
  strip.begin();
  strip.setBrightness(64);
  strip.show(); // Initialize all pixels to 'off'
}

void loop() {
    iceflakes(100);
}

void iceflakes(uint8_t wait) {

// Setup the pixel array
int pixel[60];
for(int p=0; p<60; p++){
  pixel[p] = random(0,255);
}

// Run some snowflake cycles
for (int j=0; j<200; j++) {

// Every five cycles, light a new pixel
if((j%5)==0){
  strip.setPixelColor(random(0,60), 0,0,255);
}

// Dim all pixels by 10
for(int p=0; p<60; p++){
  strip.setPixelColor(p, 0,0,pixel[p] );
  pixel[p] =  pixel[p] - 10;
}
   strip.show();
   delay(wait);
}

}
Extending Battery Life
The 60 LEDs on your addressable LED strip can drain a lot of batteries really fast. At full brightness, the strip will pull over 2 amps!! With a capacity of only 1.5 amp-hours, the AA batteries will only power the strip at full brightness, continuously, for under an hour. If you want to get more bang for your battery-buck, there are a few tricks you can use.
Cap the Brightness
60 LEDs in a linear meter is a lot of LEDs, so running them at full brightness is really... impressive. And mostly unnecessary. Luckily, the NeoPixel library includes a handy function called setBrightness(); which limits the brightness of an LED strip. You'll notice that the examples in this tutorial all include the line strip.setBrightness(64);, which sets the strip brightness to about 25%. You can set it lower before noticing a huge difference in brightness, so play with that number until you find the right balance between brightness and battery life.
Take a Break
Sometimes a cool lighting effect is more impressive if it isn't continuous. Try dropping a delay(); into the main loop so that there's some downtime between animation cycles. Obviously, the less time you leave the LEDs on, the longer your batteries will last.
Cut it Short
Maybe you don't need 60 LEDs. Maybe 30 would do just fine. You can cut a portion off the end of the strip with a pair of standard craft scissors. Just cut across the copper pads in between the LEDs, and now you have another small strip you could use elsewhere. You can always solder them back together if you change your mind!
Resources and Going Further
Now go forth and add lights to everything! It's worth noting that the RedStick is powerful enough to address a lot more than 60 LEDs, but you'll need to beef up the power supply before you start chaining strips together.
Need more LEDs? Check out these other form factors of the WS2812 Addressable LED strips:
Check out our selection of power supplies, if you need to power more LEDs:
Did you cut the strip? Check out the LED Strip pigtail connector to easily connect the cut strips:
For more blinky fun, check out these other great SparkFun tutorials:
LED Light Bar Hookup
Quick Illuminated Boxes
Lumenati Alien Garden
Spectacle Light Kit Hookup Guide
