Hackers in Residence: The Sound Visualizer
 onebeartoe
Introduction
This tutorial shows how to put together a sound visualizer that I created, during my time in the SparkFun HIR program. The end goal for the project was to have a sound reactive LED belt buckle. To accomplish the task of sound visualization, a Raspberry Pi drives and communicates with a Pixel Board over USB. The Pixel takes input from a microphone (or the SparkFun Sound Detector) and passes it back to a Java application running on the Raspberry Pi. The Java application then processes the sound input values and sends commands to the Pixel to drive the RGB LED panel.
Required Materials
Here is a list of SparkFun parts used in this project, if you would like to follow along.
Additional Supplies
Also used in this project is the Pixel Board, which is used to control LED matrices. More info on this product can be found here.
Data Connection
The Raspberry Pi needs a serial connection to the Pixel. A male to male USB cable is needed for this connection.
Power
Often the Raspberry Pi is powered from wall Adapter Power Supplies. However, for this project, I wanted the entire setup to be mobile/wearable. Thus, LiPo batteries were used to power the Raspberry Pi and the Pixel Board in conjunction with some boost circuitry. You could also use a beefy battery pack, such as this one, to power this project on the go.
Suggested Reading
Before diving into this project, you may want to check out these other tutorials first.
Hardware Assembly
Raspberry Pi
If you're new to Raspberry Pi, SparkFun has a Getting Started with Rasbian Guide. There is also plenty of great info to setup your Raspberry Pi on the Raspberry Pi Website . Come on back once you have your Pi booting into Rasbian.
Pixel
Use this quick start guide to get familiar with the Pixel hardware.
Attaching a Microphone
The Pixel board has several ports for attaching input sensors or output components. This project uses the SparkFun microphone or the SparkFun Sound Detector. The Pixel board uses Grove ports, while the SparkFun breakouts do not, so the port housing needs to be removed to attach the microphone. A pair of needle nose pliers can be used to gently remove the port housing.
Using some female to female jumper wires, cut one in half, and solder the bare end directly to the microphone (or Sound Detector). You can also use hookup wire if you do not wish to cut your jumper wires. Then use the female end to connect to header pins on the Pixel board. E6000, or any other adhesive you have around, can be used to better secure the female jumper wire to the Pixel board.
Here is the Pixel board before the port housing is removed:
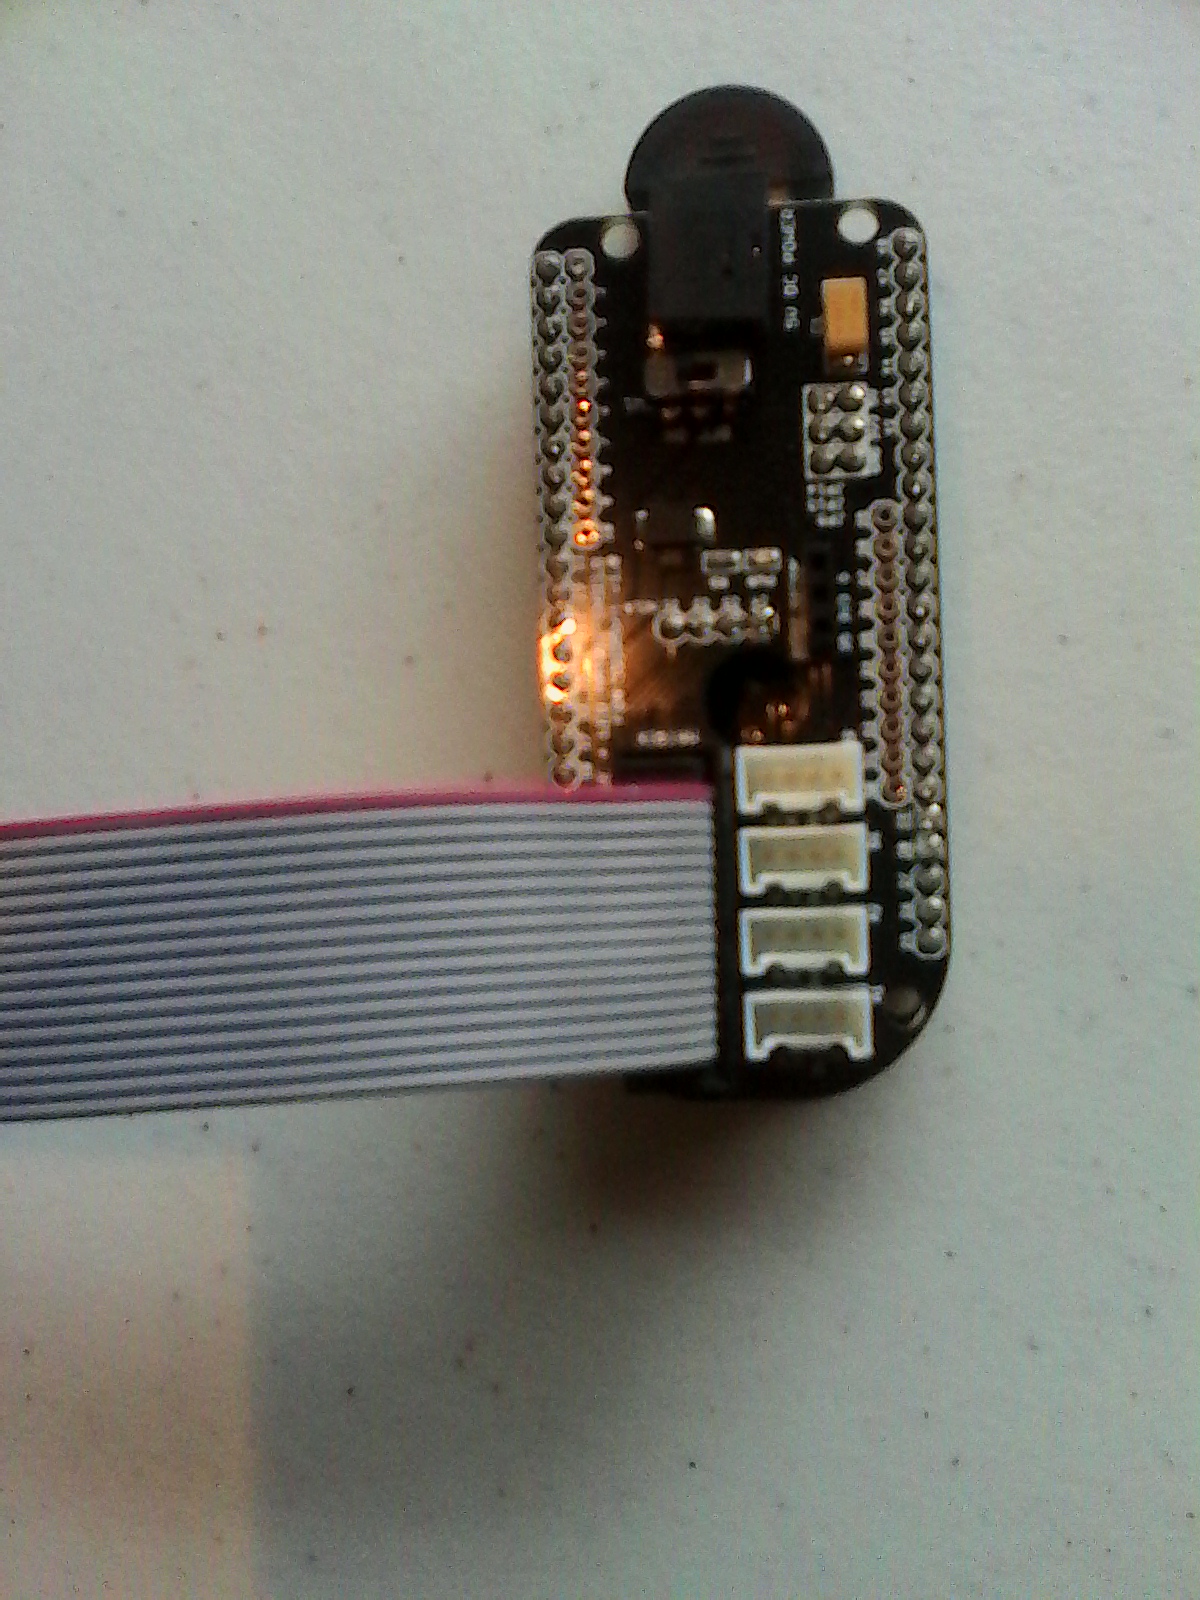
Gently pull on the sides of the port housing until it comes off the board.
On the Pixel board, the microphone port is the one closest to the end of the board. Here is the Pixel board with the housing for the microphone port removed:

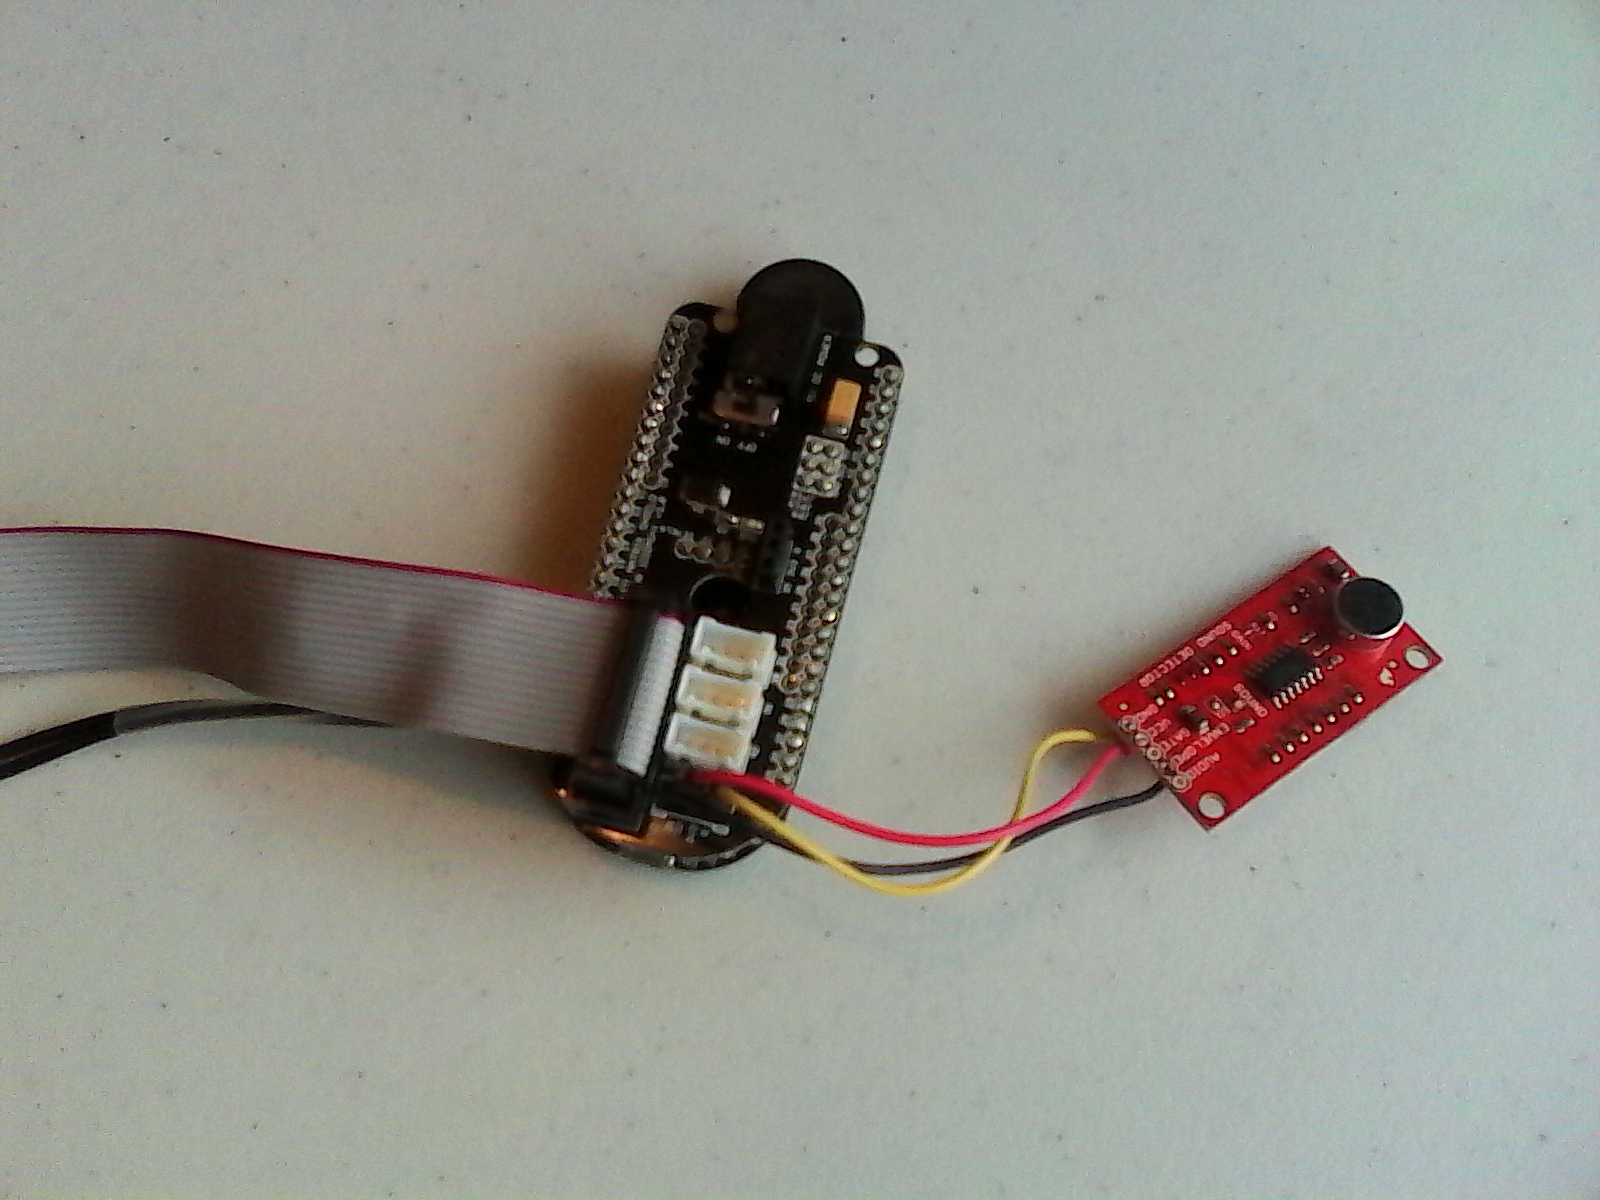
Although the physical port location differs between the V1 and V2 Pixel boards, the SparkFun Sound Detector (or other microphone) is connected to the pin labeled 31 for both versions. Ground is connected to ground, and Vcc is connected to the power pin.
Here is the SparkFun Sound Detector attached to the Pixel board.
Pixel V2
If you are using V2 of the Pixel Board, your setup will look different. For the V2 Pixel board, the microphone port is the middle one of the 5 ports. The following image shows the SparkFun Mic Breakout attached to this port on the Pixel V2.

Powering the Pixel
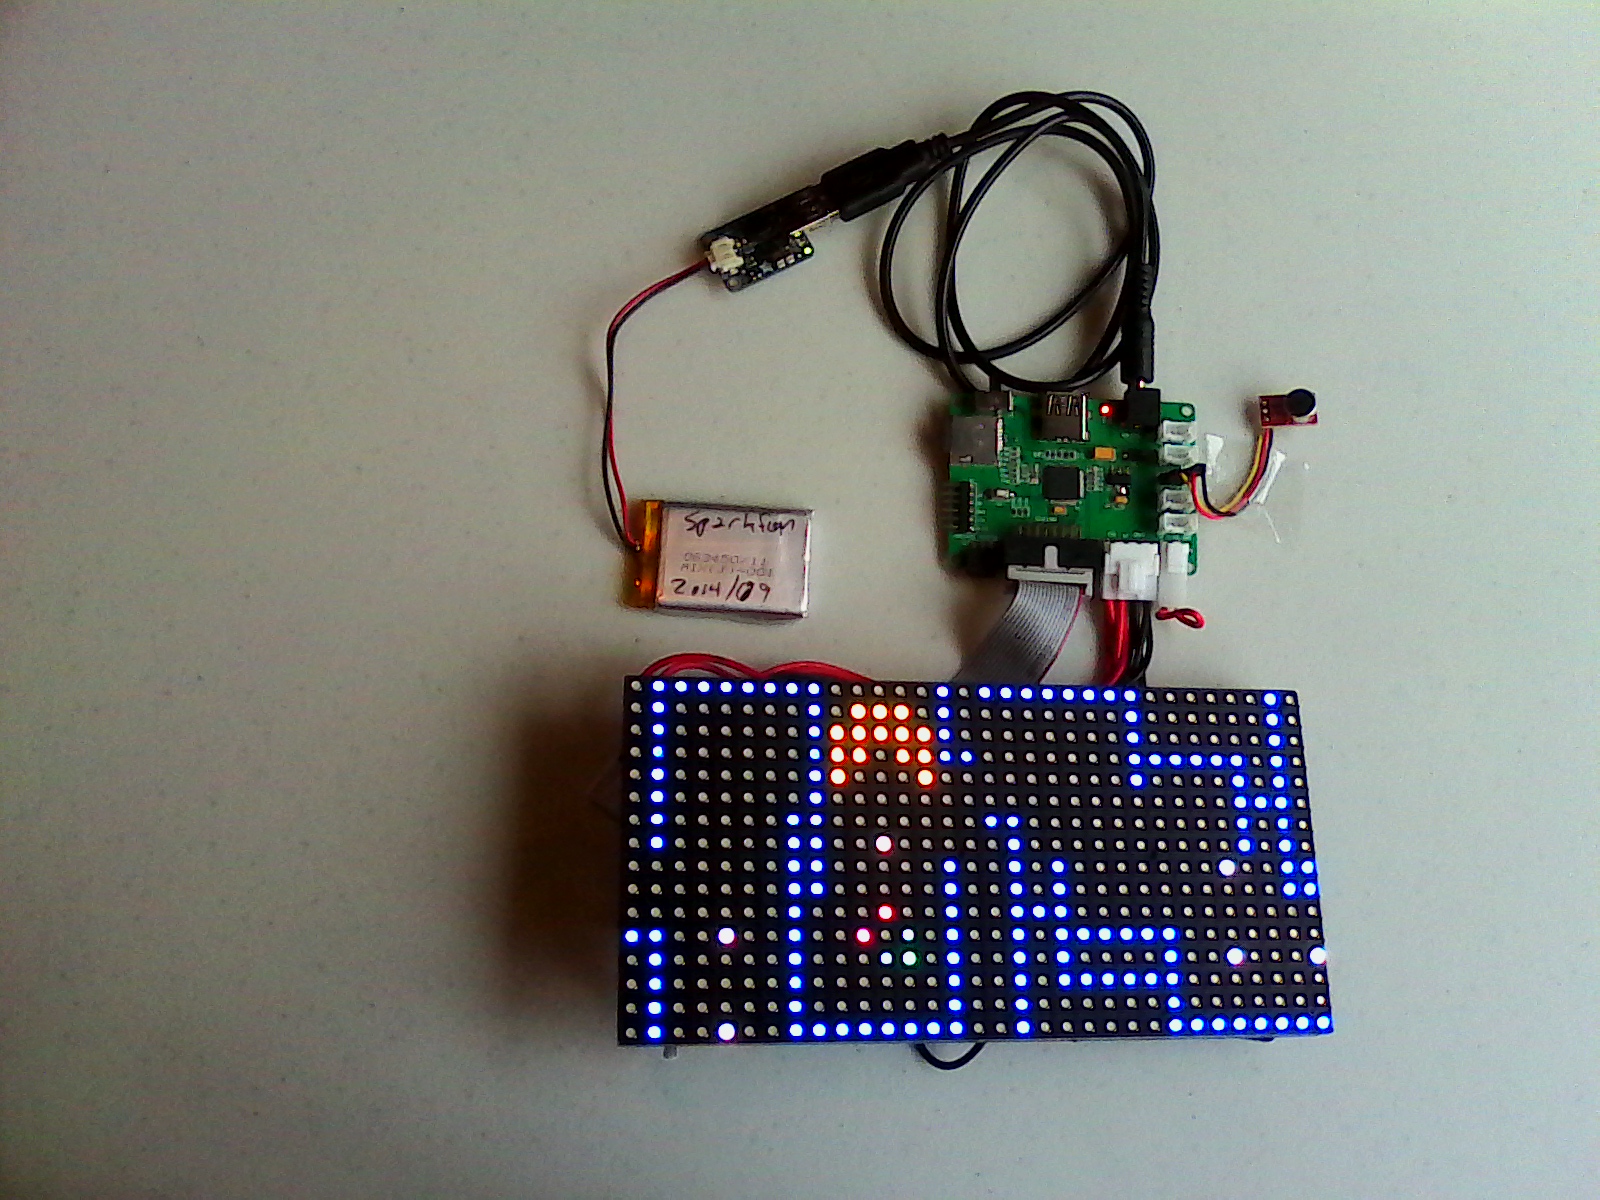
This project powers the Pixel with a PowerBoost 1000 and a LiPo Battery. You could also use a rechargeable battery pack for this. The Pixel connects to the PowerBoost with a USB to barrel jack, as seen in the next photo.
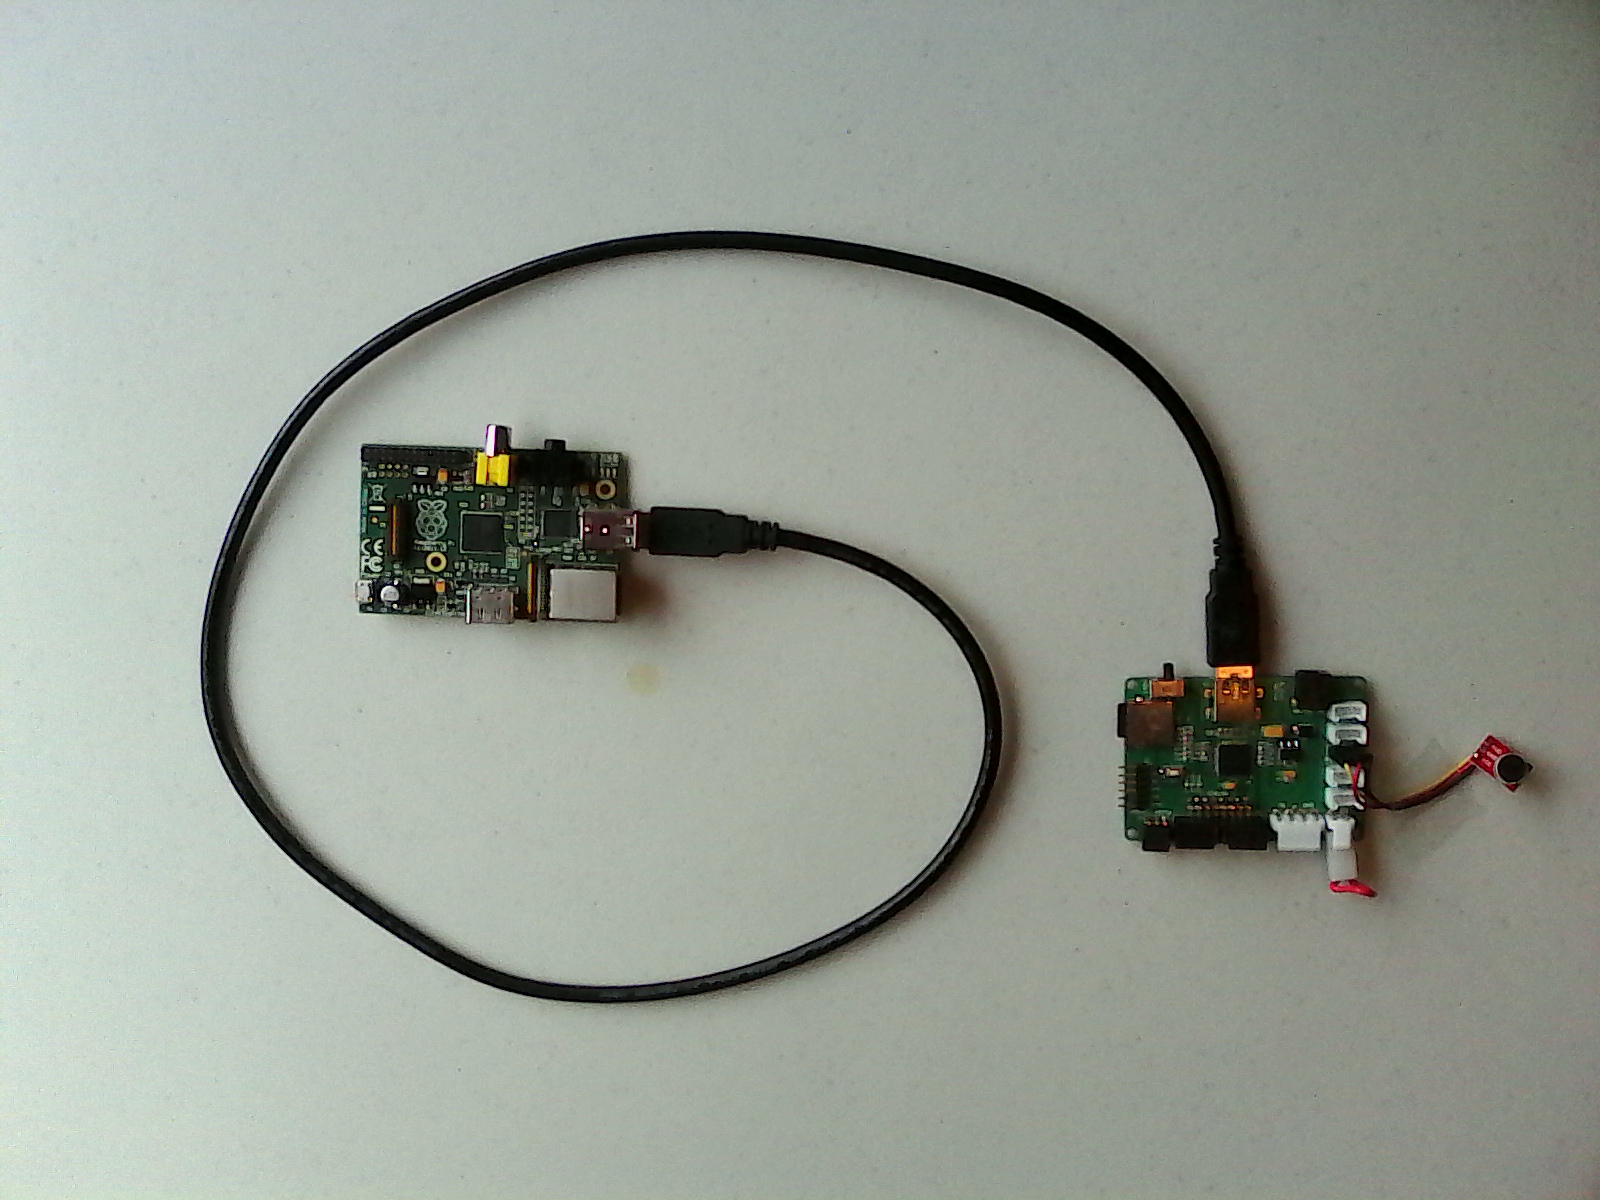
Male to Male USB Connection for Pixel and Raspberry Pi
The Java application used in this project communicates from the Raspberry Pi to the Pixel hardware over a serial USB connection. A male to male USB cable is required for this connection. Here is a photo showing the male to male USB cable connecting the Raspberry Pi to the Pixel board:
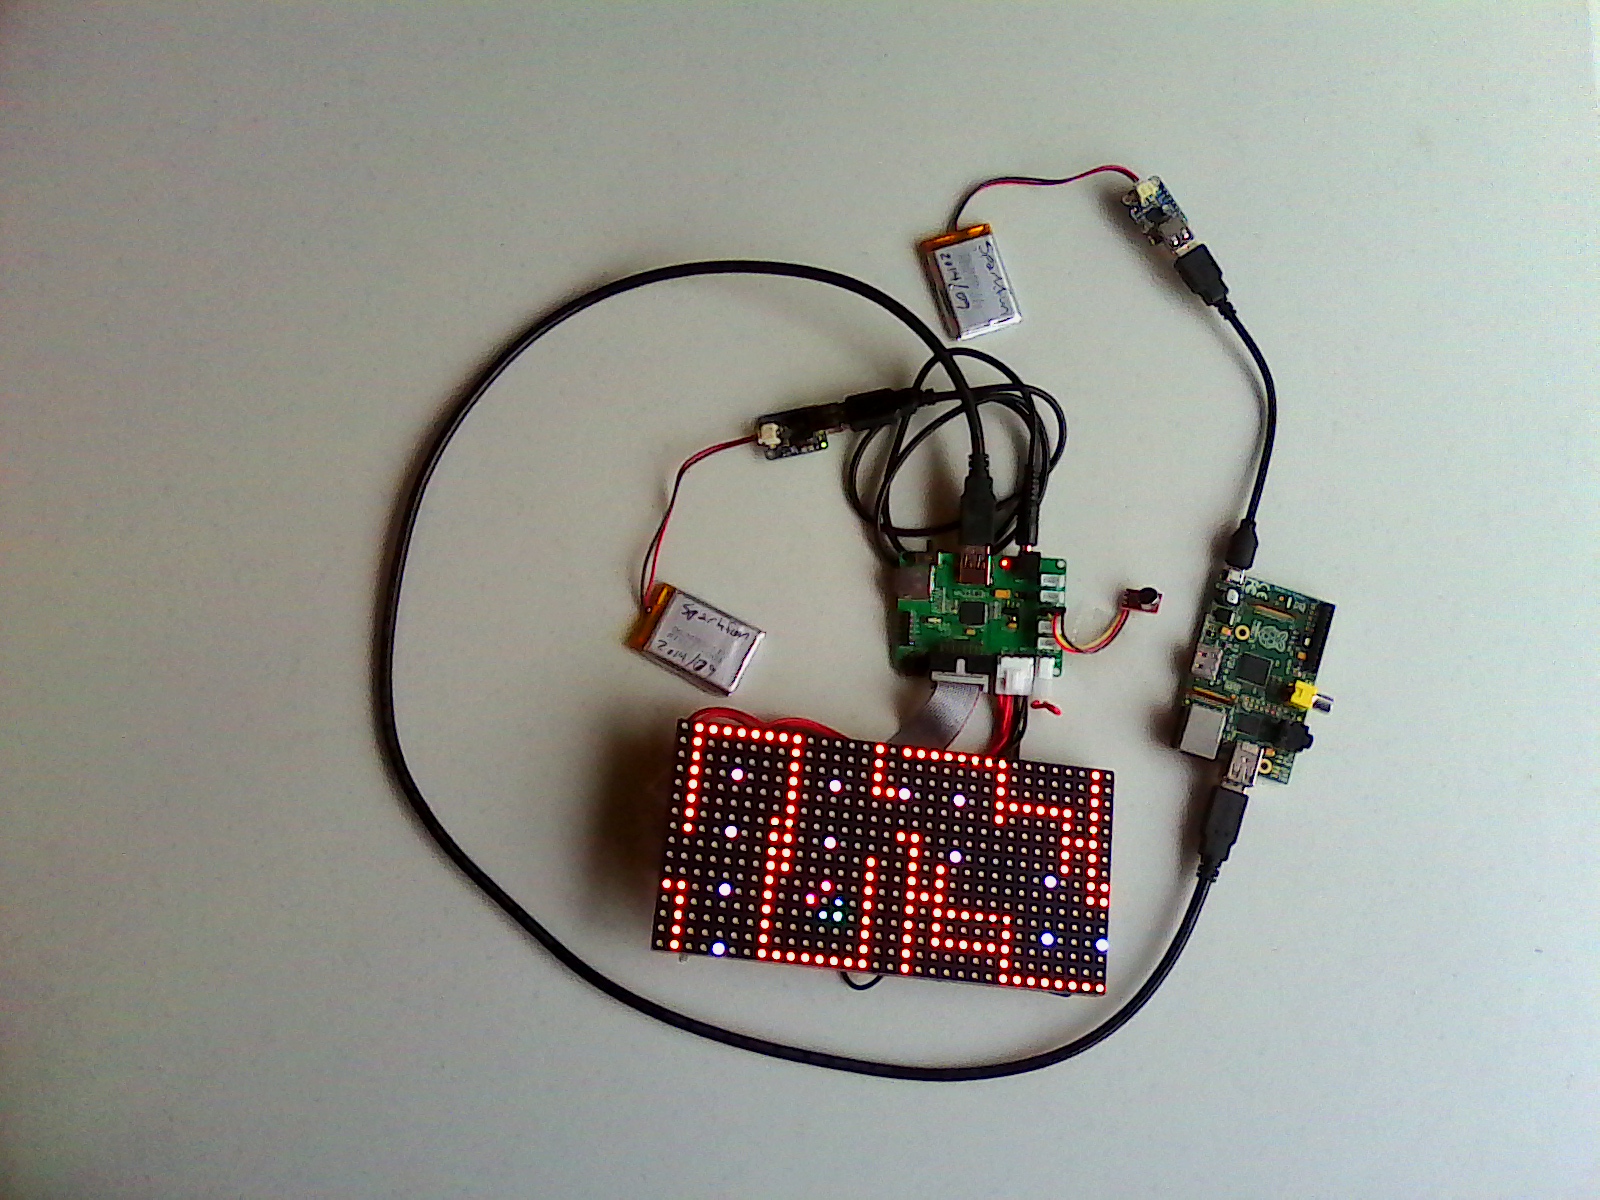
All Together Now
Here is the project with all electronic components connected.
Software Prerequisites and Installation
Before executing the Sound Visualizer code, we need to make sure a few dependencies are installed first.
Raspbian
Again, make sure that you are using the most up to date version of Rasbian and not a different flavor of the Raspberry Pi OS. We cannot guarantee this will work on other distributions of the Pi OS. The Raspberry Pi foundation has great guides to get Raspbian installed on the Raspberry Pi, should you still need to do that.
Java 7
The latest version of Raspbian comes with a Java 7 virtual machine (JVM). If you have an older version of Raspbian installed, then update and install Java.
sudo apt-get update
sudo apt-get install oracle-java-jdk
Java Application
The Java application for this project is distributed as a Java archive file or JAR. Download it with the link below:
Copy the JAR file to the Raspberry Pi. An scp command can do this task:
scp sound-visualizer.jar pi@raspberrypi.local
Software Usage
Now we will discuss how to execute the Sound Visualizer file.
Starting the Application
The SSH program allows you to login to the Raspberry Pi.
ssh pi@raspberrypi.local
Once logged in via ssh, run the application from the JAR file that was copied to the Raspberry Pi. This command runs the application:
java -jar sound-visualizer.jar
Web GUI
With the application running, the Web controls for the the sound visualizer are available at this URL:
http://192.168.1.105:2014/
Here is a screen grab of the Web interface:
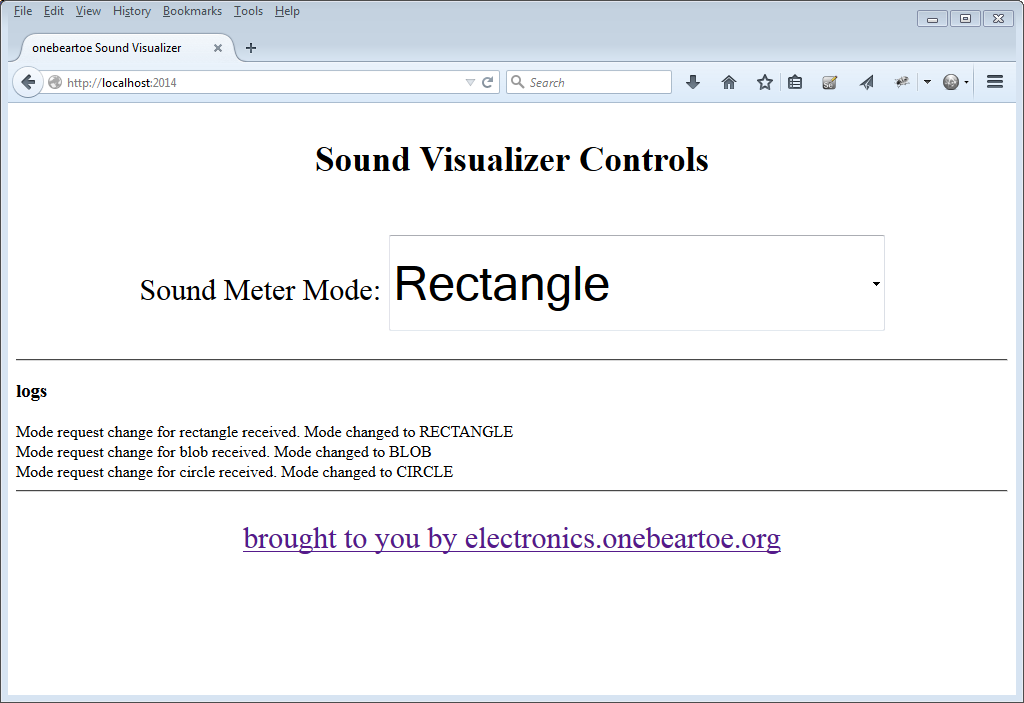
Modes
The application has several modes. The sound visualization mode is controlled by a drop down menu on the Web interface.
- Off - stops all animation
- Blob - like a scatter plot; more sound gives more dots
- Bottom Up - draws lines from the bottom; more sound gives longer lines
- Rectangle - shows concentric rectangles; more sound gives larger rectangles
- Circle - similar to a pie chart with two sections; more sound increases the colored arc’s size
- Wave Graph - similar to the Bottom Up mode, but is centered vertically
Quitting the App
The Java application is terminated by sending it an HTTP request for this URL:
http://192.168.1.105:2014/quit
Again, replace the IP address above with the actual IP or hostname of the Raspberry Pi.
Demonstration Video
Here is a video of the project in action.
Resources and Going Further
If you'd like to explore more information about this project or remix it and implement it yourself, here are some helpful resources and tips for going further with this project.
Initialization Daemon
Having the application run at boot makes for a huge convenience. It avoids having to SSH into the Raspberry Pi to start the app if/when it re-boots. Install an init.d script to have the application start at every reboot.
Modify the Java App
The source code is available on Github Clone both repositories below.
- The main application is in this repository.
- The Pixel APIs are in this repository.
Netbeans is the preferred IDE for PIXEL development. Open the subproject named ‘sound-visualizer’ from the directory where you cloned the main Github project. Open the ‘pixel-commons’ project from the directory where you cloned the Pixel APIs.
- The classes that do the sound visualizations are in the org.onebeartoe.pixel.sound.meter package, in the pixel-commons project.
- Make any changes you would like to see.
Compile and run the app with the F6 key.
Issue the following command to package changes into a new JAR file.
mvn package
Copy the new ‘with-dependencies’ JAR file, found under the target/ directory, to the Raspberry Pi. Now, run the app with the new code changes.
Development Builds
Development builds of the software are available from the continuous integration server.
Going Further
Check out Part 2 of this tutorial to expand this app beyond the Raspberry Pi to a full size PC.