Beginner's Guide to KiCad
 Nate
Nate 
Editing a Schematic
If I get you to do nothing else, I will get you to learn the keyboard shortcuts! Yes, you can click on the equivalent buttons. However, the speed and efficiency of KiCad really shines when muscle memory kicks in so start memorizing. Here are the keyboard shortcuts in KiCad's Eeschema that we will be using frequently in this tutorial:
- a - To add component.
- c - Copy a component when the cursor is over another component.
- w - To wire components.
- v - Edit component value.
- Esc - Escape mode or whatever command in progress and return to normal pointer mode.
- ctrl+z - Undo. Use liberally to undo any mistakes.
- ctrl+s - To save. Make sure to save often!
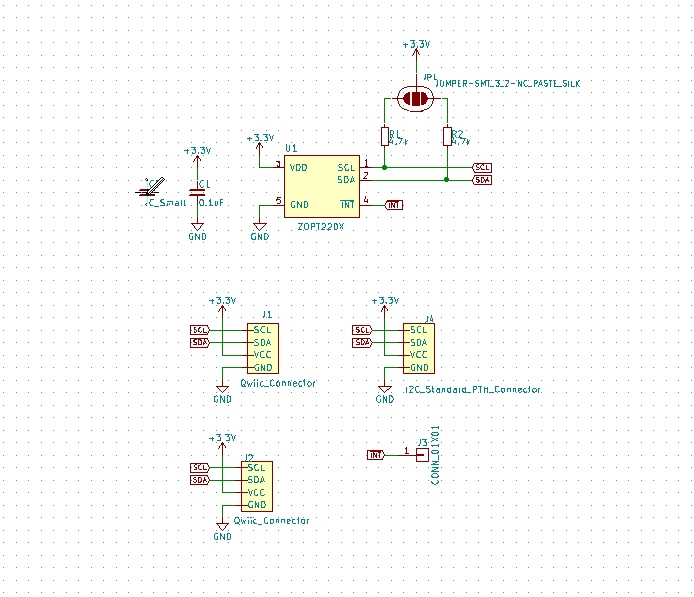
This breakout board needs a larger 4.7uF decoupling cap (because I say so). Let's add it!
Adding Component to Schematic
Press 'a' to add a device to the schematic. This will open the component window. (If you are using a different tool you may need to click on the schematic as well):
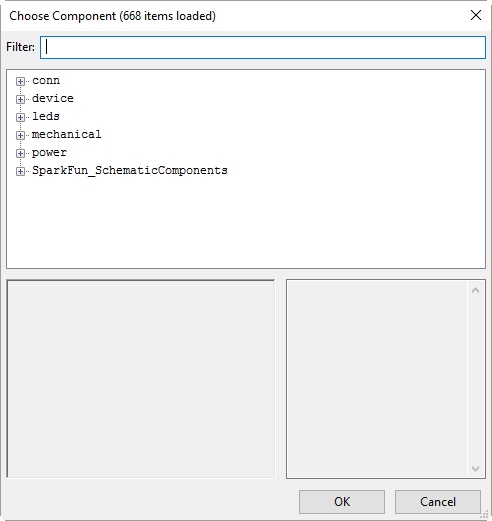
There are hundreds of components (668 items according to the title bar). Feel free to dig around but to quickly find what we need type 'cap' into the field Filter:. Select the device labeled as C_Small from the device library. Then hit enter or click 'OK'.
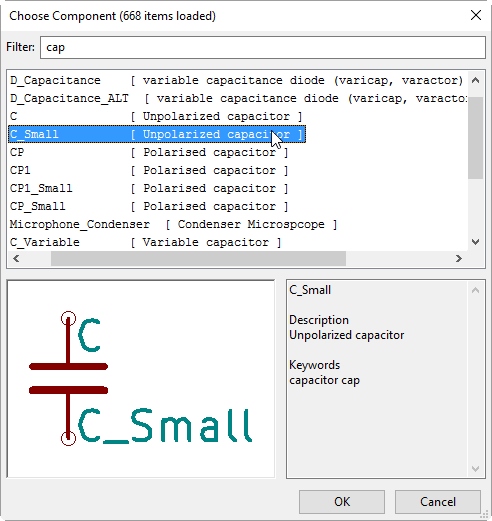
Place it on the schematic next to the 0.1uF cap.
After you place the capacitor, you'll notice you're still in placement mode. Hit the 'Esc' button on your keyboard to return to normal pointer mode. I find myself hitting escape twice a lot just to be sure I'm back in default state.
Copying Component
Once in default state put your mouse pointer on top of the 3.3V marker on the 0.1uF cap. Press 'c' to copy that device and place it above the new capacitor.
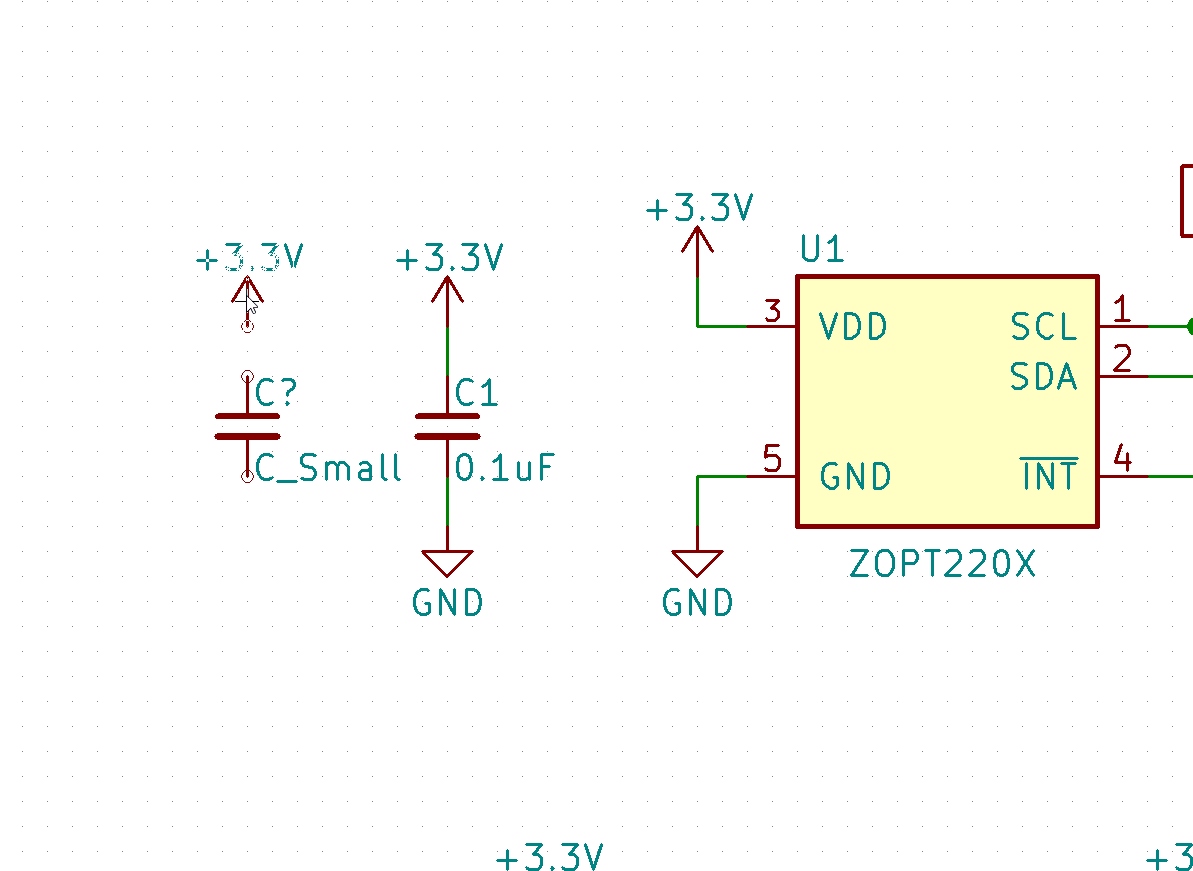
Do the same for the ground marker. Press 'ctrl+s' to save your work.
Wiring Components
Now let's wire them together. You guessed it, press 'w' but here's the catch: have your mouse pointer over one of the bubbles before you press 'w'.

Move your mouse to the other bubble and left click on the mouse to complete the wiring for GND. Remember if you mess up, press 'Esc' once or twice to return to default. Then move your mouse pointer to the bubble you want to connect and press 'w' and begin wiring 3.3V. The shortcut 'w' stands for wire.
Did something go wrong? Use 'ctrl+z' liberally to undo any mistakes.
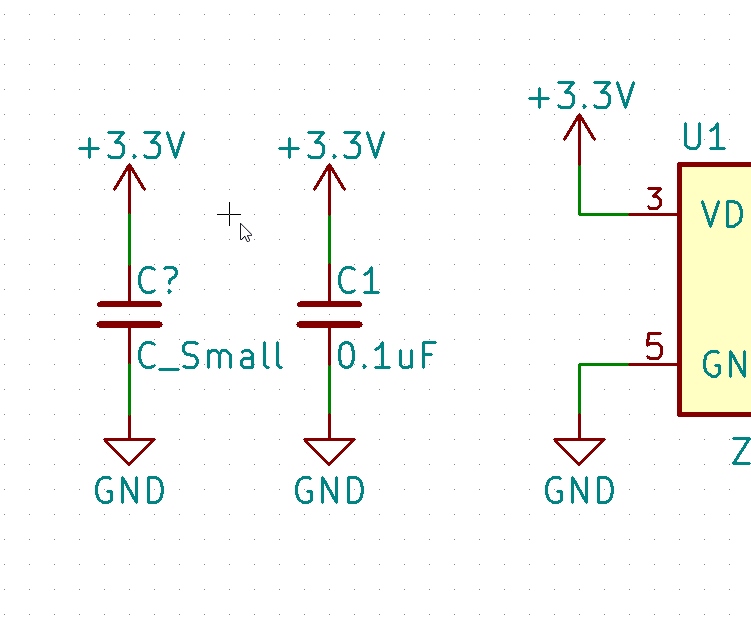
Power and ground are now connected to our capacitor.
Changing a Component Value
Let's change the value from C_Small to 4.7uF. Hover the mouse pointer over C_Small and press 'v' (for value change). Change C_Small in the Text field by typing 4.7uF. Then hit enter or click 'OK'.

Congrats! You've just wired up your first schematic component. Press ctrl+s to save your work.
Annotate Schematic Components
But what about the C? designator?! Don't worry about it! One of the many benefits of KiCad is the ability to auto-annotate a schematic.
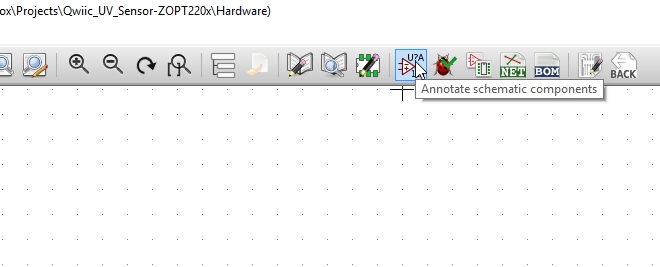
Click on the Annotate schematic components button.
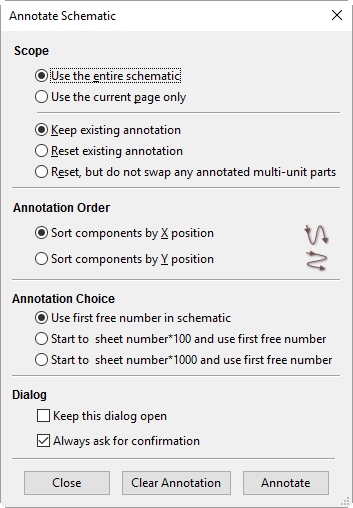
Use the default settings and simply click on Annotate button to confirm.
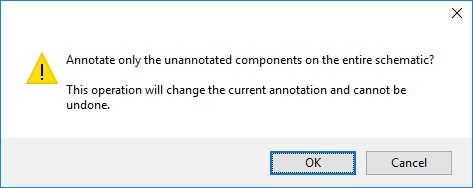
KiCad will ask you if you're sure, simply press return or click 'OK' again.

Capacitor with correct value and designator! We are all set. Time to edit the PCB.