Beginner's Guide to KiCad
 Nate
Nate 
Creating a Custom KiCad Footprint Library
This section will show you how to create your own local custom footprints so that you can use them and connect them to schematic components using CvPcb. We're going to assume you've already been through the previous sections of this tutorial; you should have KiCad downloaded and installed.
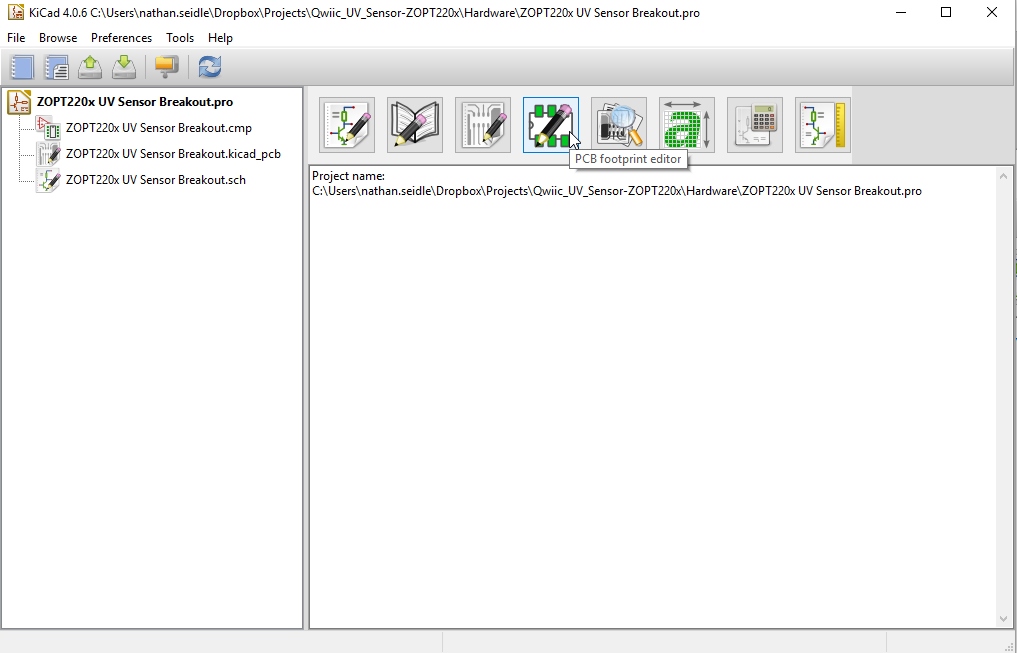
Open KiCad's project manager and then click on the PCB footprint editor button.
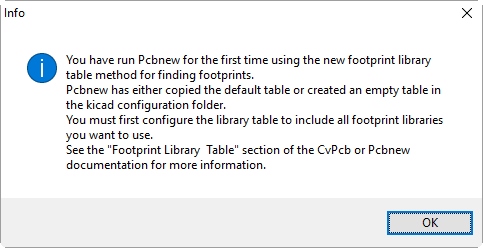
You may get the warning. That's ok, just click through it. This is KiCad's way of telling you it's going to create the default table of libraries that link to KiCad's extensive GitHub repos.
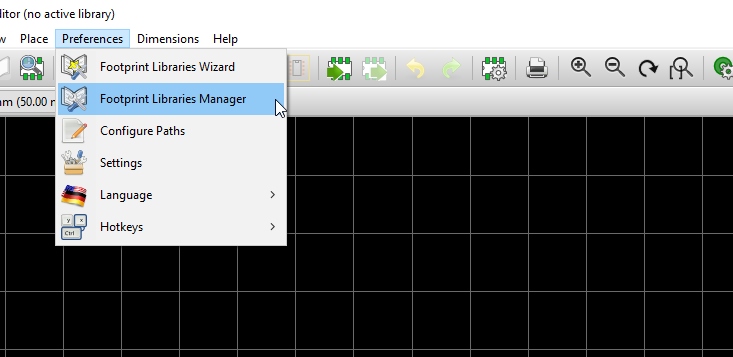
Click Preferences -> Footprint Libraries Manager. This will open the list of all the footprint libraries now accessible to you.
This is a tremendous list of libraries! Click 'OK' to close the manager.

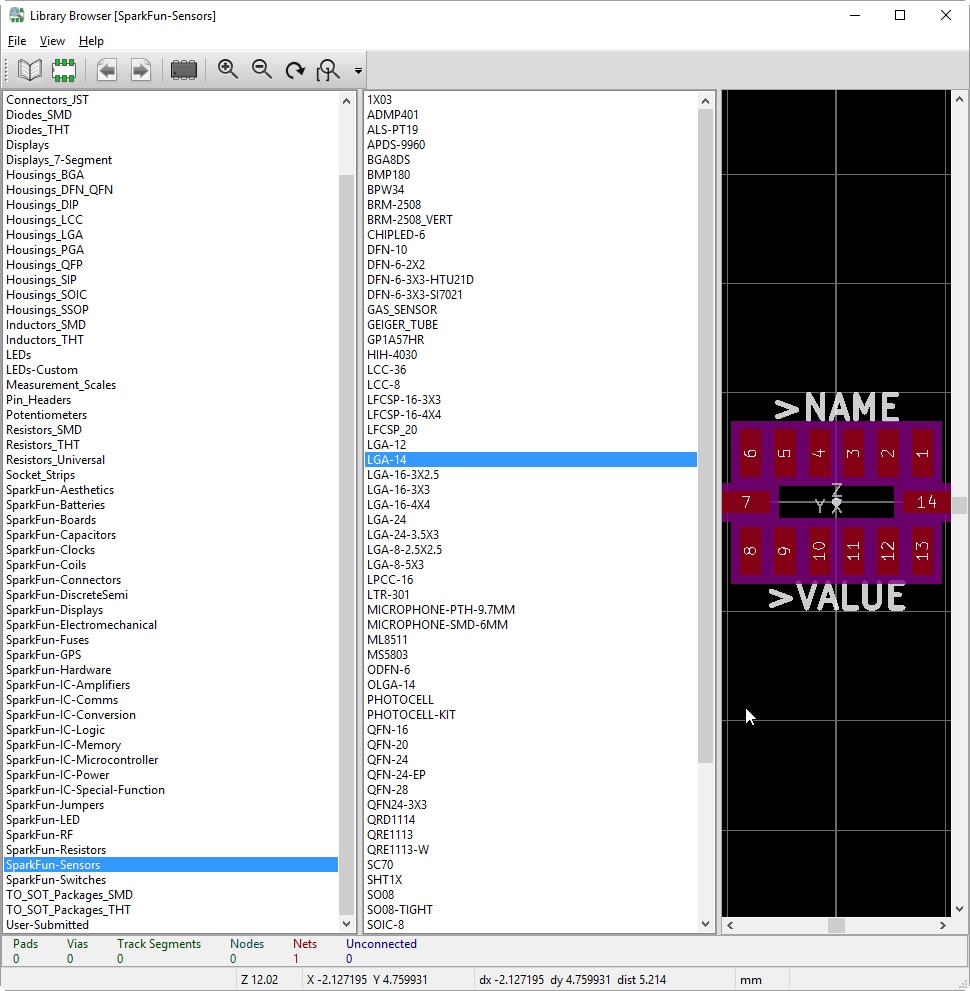
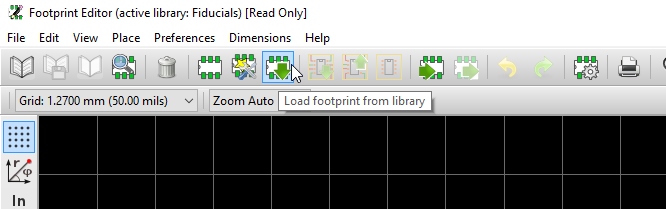
Let's poke around these libraries. Click on 'Load footprint from library' button and then 'Select by Browser'. This is a handy tool for perusing the available footprints.
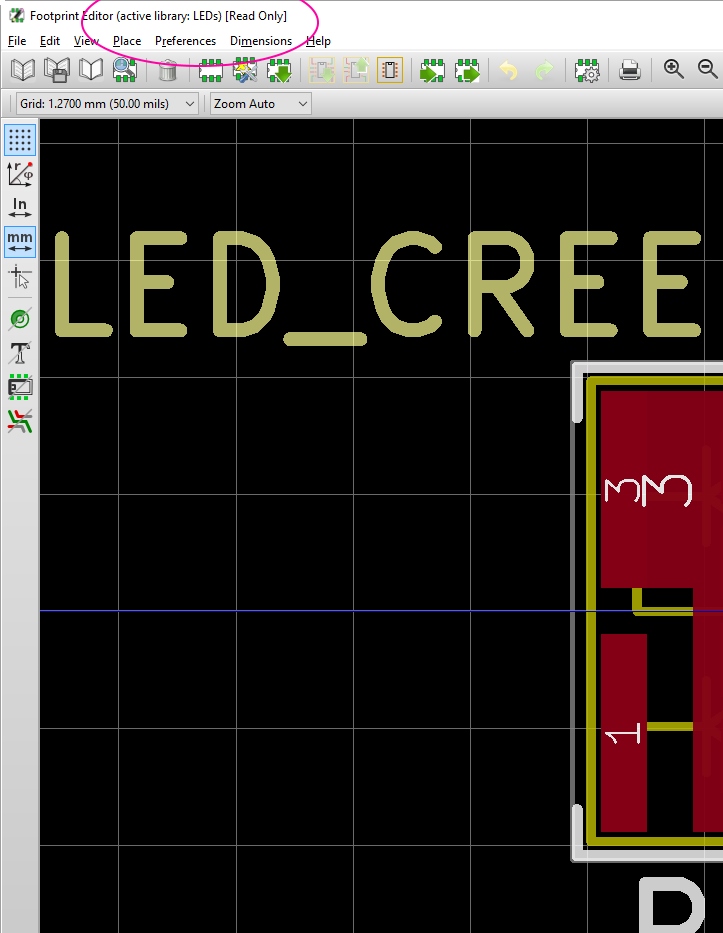
Navigate to the LEDs -> LED_CREE-XHP50_12V footprint. Here is an example footprint in LEDs library. Double click on this footprint to open it up in the editor.

Note the title bar of the editor window has changed. The active library is now LEDs and it is read only. Obviously KiCad wants to control their libraries; not just anyone can save to their repos. If we want to edit this footprint we need our own local copy.
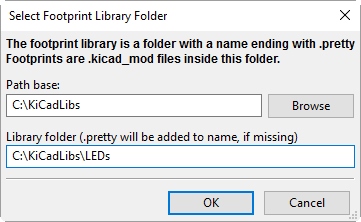
Let's create a local directory to keep all our local footprints. For this tutorial, please create a local folder called 'C:\KiCadLibs\' (or your platform's equivalent).
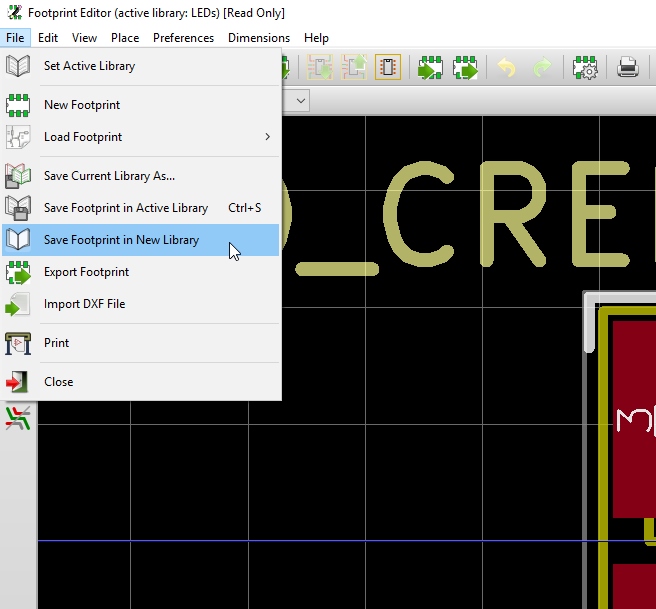
Now click on File->Save Footprint in New Library.
I recommend using different directory names for different sets of footprints (resistors, connectors, LEDs, etc). Select the 'KiCadLibs' folder that was created and then type '\LEDs'. KiCad will create the new 'LEDs.pretty' directory with a file 'C:\KiCadLibs\LEDs.pretty\LED_CREE-XHP50_12V.kicad_mod'. And we're off to the races. Except, not quite yet.
Notice the title bar in the Footprint Editor still states the active library is LEDs and is read only. We need to switch the active directory to our local folder. I'm going to head you off: File->Set Active Directory doesn't work as it only gives you the list of libraries that KiCad ships with. Oh KiCad!
Before we can set our new footprint directory as active, we need to make KiCad aware of it. Re-open the Preferences -> Footprint Libraries Manager.
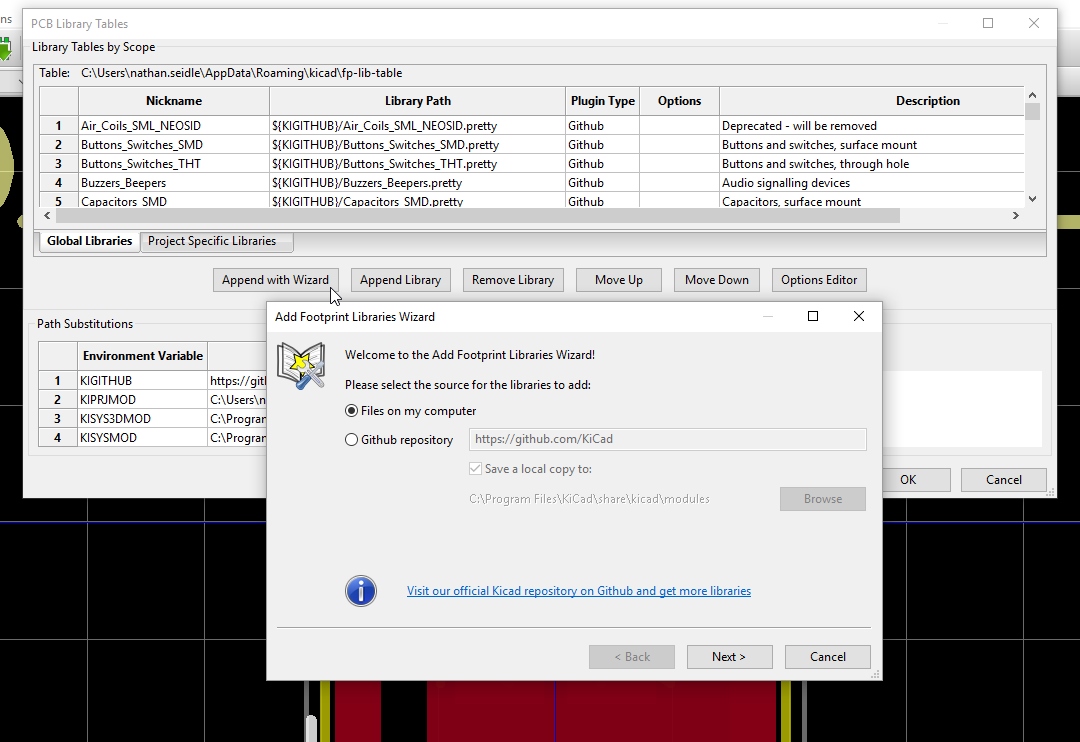
Click on the 'Append with Wizard' button. You'll be asked to locate the directory you want to add. In this case, we want to add the 'Files on my computer'. Click on the 'Next >' button, select the directory we created (i.e. 'C:\KiCadLibs\LEDs.pretty'. Click on 'Next >' a few times. When prompted 'Where do you wish the new libraries to be added', select 'To Global library configuration (visible to all projects)' and click 'Finish'.
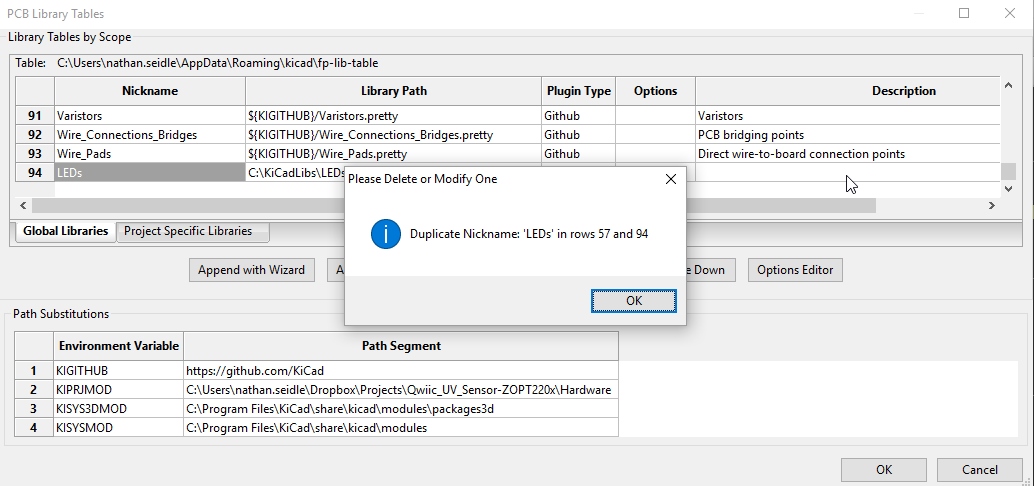
KiCad may throw an error because the 'LEDs' nickname is used twice. I renamed mine to 'LEDs-Custom' then click on 'OK' to close out the Footprint Libraries Manager.
If you inspect the Footprint Editor tool bar again, you'll see the LEDs library is still active and read only. Now we can click on 'File->Set Active Library'. Here is where KiCad shines - the Filter works well. Type LED and select the LEDs-Custom library.
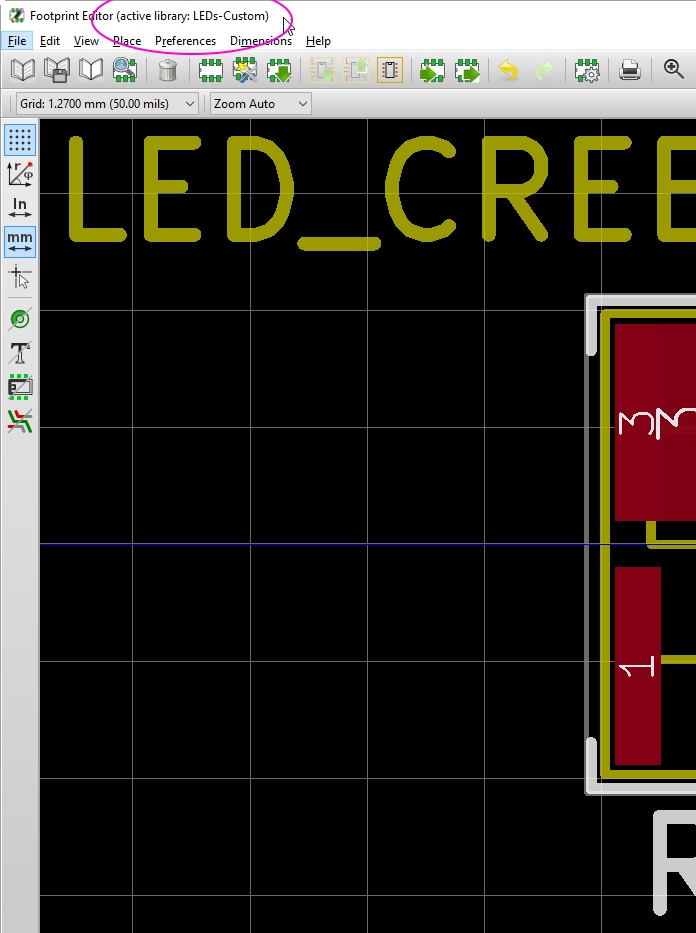
At last! We have an active local library. Now when you click 'Save footprint in local library' or press 'ctrl+s' KiCad will prompt you with a Save Footprint window with Name (annoyingly every time). Press enter and your modifications will be saved.
Now you can explore creating and editing footprints using the Footprint Editor.
After you've created your first footprint or two be sure to read KiCad's KiCad Library Conventions (KLC). It's a well documented system for creating community share-able footprints. Left to our own devices we will all create things a little differently; the KLC tries to get us all on the same page and SparkFun follows it.
In the future, if you're creating a lot of footprints consider using git repo to manage the changes. At SparkFun, we use the following structure:
- \SparkFun-KiCad-Libraries - A git repo directory containing all KiCad schematic component files (*.lib)
- \SparkFun-KiCad-Libraries\Footprints - Contains directories of footprints
- \SparkFun-KiCad-Libraries\Footprints\LEDs.pretty - Directory containing all the LED footprints (*.kicad_mod)
- \SparkFun-KiCad-Libraries\Footprints\Sensors.pretty - Directory containing all the sensor footprints (*.kicad_mod)
- etc.
By using a git repo, SparkFun engineers and our users can contribute schematic components and footprints.
Paring Down the KiCad Libraries
When opening CvPcb to assign footprints to the schematic components, it can take a very long time to load. This is because KiCad is pinging all the KiCad github repos and pulling down 93 libraries. To make this faster, we recommend removing the libraries that are either deprecated or libraries that you will never use.
It's quick and easy to remove a library: select a row in the Footprint Libraries Manager and click the 'Remove Library' button. If something goes wrong, don't panic! Simply click 'Cancel' in the manager window and the library manager will close without saving changes. If things go really wrong, you can always delete the 'fp-lib-table' file and restart KiCad. This will cause it to create the footprint table with the KiCad defaults.
The footprint libraries table file (on Windows 10) is located in your AppData. It should look similar to: 'C:\Users\Nathan\AppData\Roaming\kicad\fp-lib-table' .
Removing the deprecated libraries brings the default count down to 75 and CvPcb still takes an annoyingly long time to load. This is where you'll have to make some tough decisions. Do you plan to ever need the 'Shielding-Cabinets' library? Perhaps. Perhaps not. If I ever do need an RF shield for a design, it will most likely be a custom part or a part that is not in the library. So that one gets the toss.
SparkFun is taking a blended approach. We're becoming very familiar with the default KiCad libraries and using their footprints wherever it makes sense. When we find or use a package we like, we copy it over to the SparkFun-KiCad-Libraries GitHub repo. At the same time, we're continuing to leverage all our custom Eagle footprints that we've been using and creating for over a decade. We know and trust these footprints. I have had many PCBs ruined because I trusted someone else's footprint so I tend to be very paranoid. Use the community where you can but be very rigorous about checking them for correctness.
If you're needing a generic 2x5 pin male header, check the KiCad libraries. It should work fine. However, if you're using a more eclectic part, you may be better off creating the footprint from scratch. Even if the KiCad libraries contain the part, you'll want to check it against the datasheet very closely and do a one to one test print.
Using Eagle Footprints in KiCad
If you're familiar with Eagle, it can be scary to think all the time spent creating footprints will be lost when switching to KiCad. Don't fear! KiCad inherently reads Eagle footprints! Yep, it's built right in. Now don't get too excited. KiCad can't read your Eagle schematic components but we have a solution for that in a later section.
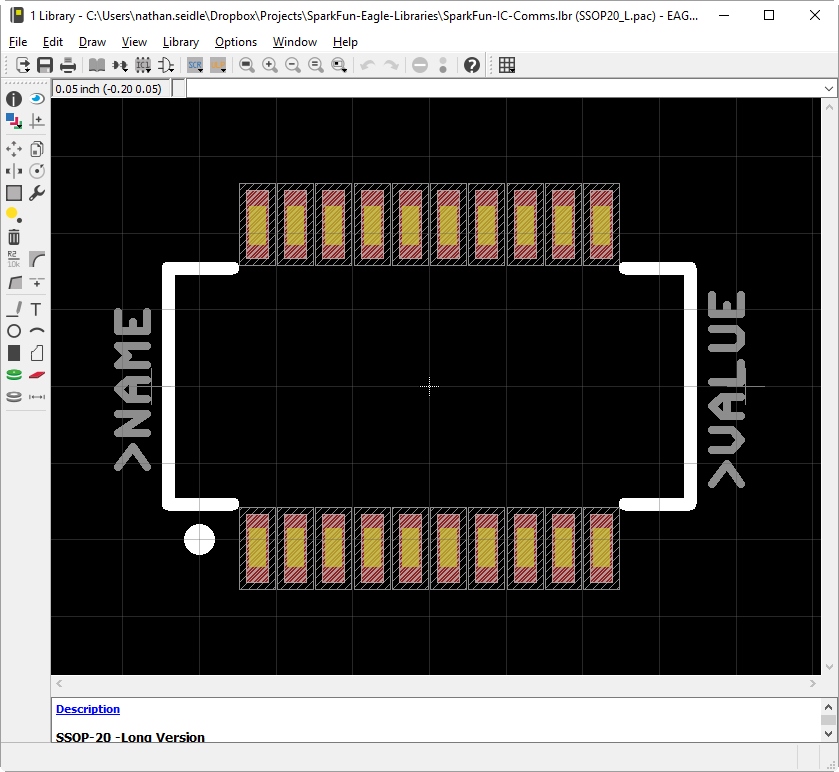
The approach we are taking at SparkFun is to link to a local copy of all our classic Eagle Librarie Anytime we need one of the Eagle footprints, we copy and paste it into a modern KiCad library. We don't have to re-create the footprint but by moving it over to a KiCad library. We are able to then edit the footprint as needed. Furthermore, any new footprints are created from scratch and saved to the appropriate SparkFun KiCad library.
You should have already opened the PCB Footprint Editor at least once by now. This will have created a 'fp-lib-table' file that we will be editing shortly. Now to get started, be sure that KiCad is closed.
Download the SparkFun Eagle Libraries from GitHub.
Unzip them into a local directory of your choice. I store our Eagle libraries in a DropBox folder so both my desktop and laptop can access the same set of files.
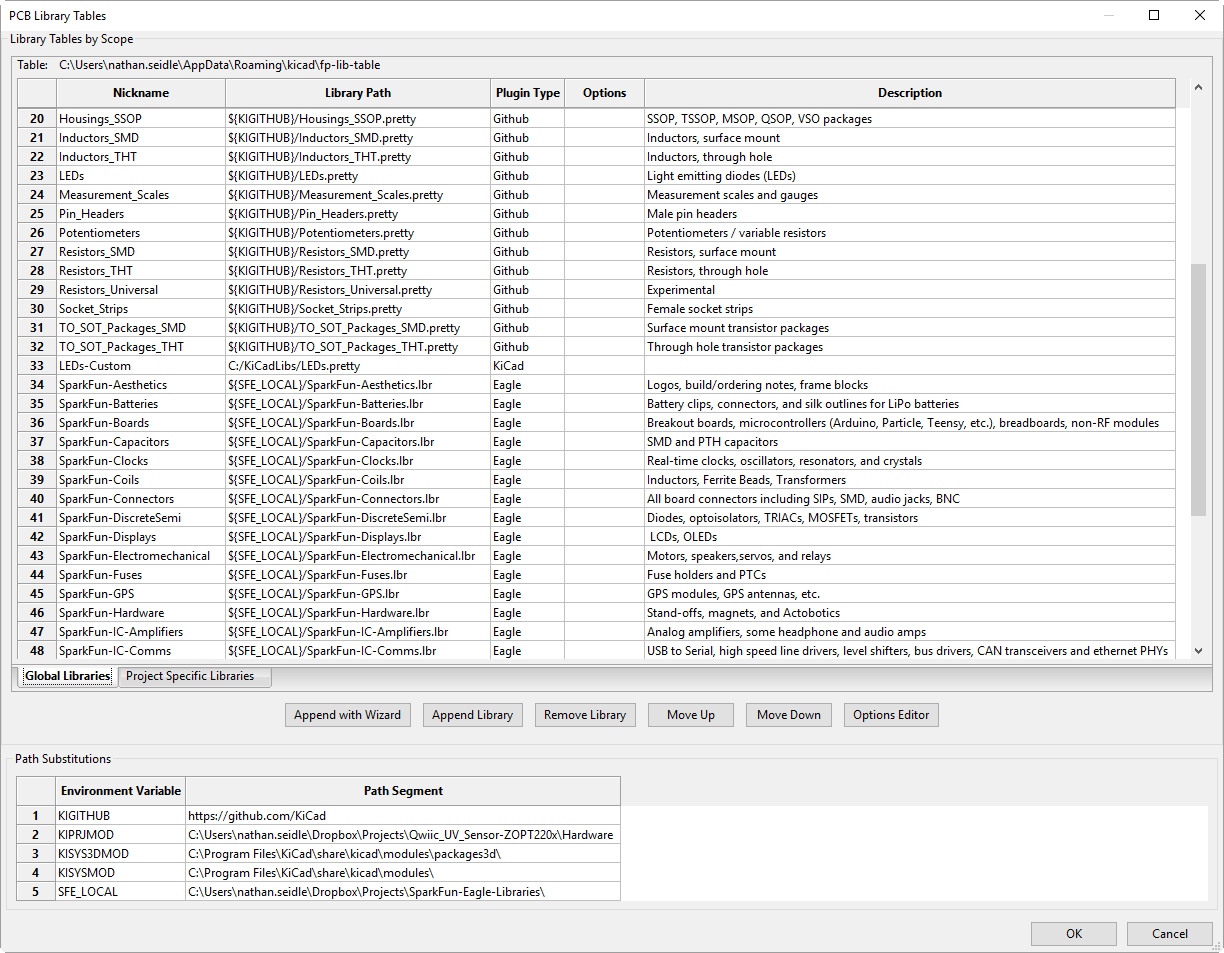
You could use the Footprint Libraries Manager located in the footprint editor but adding or removing many libraries becomes tedious; it's easier to edit the table file directly.
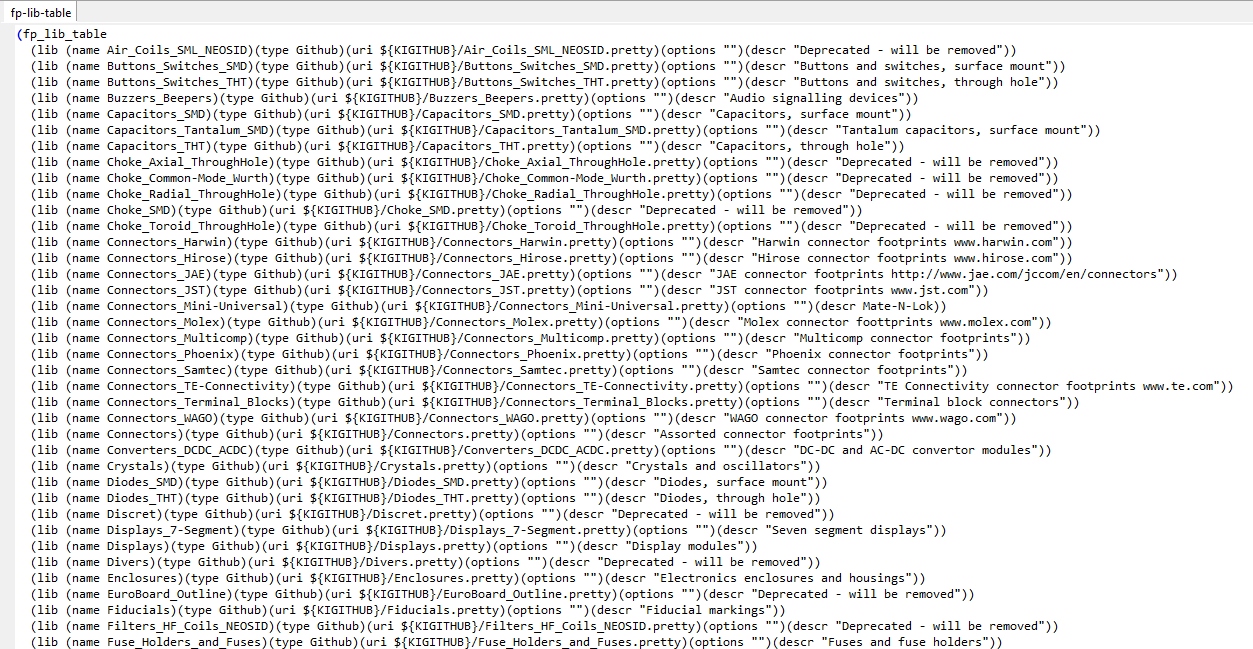
The 'fp-lib-table' tells KiCad where to find all the various libraries and what types of libraries they are (KiCad, github, EAGLE, etc).
We are going to edit this file to add in the SparkFun libraries as well as remove the deprecated libraries and libraries that SparkFun doesn't use.
Here are the files of importance:
- original fp-lib-table - This is what KiCad creates by default. You don't really need to download it. It's just for reference.
- sparkfun fp-lib-table - The list of SparkFun libraries. You don't need to download it, just for reference.
- combined fp-lib-table - This is the combination of the original table, with extraneous libraries removed and SparkFun libraries added.
Download the 'combined fp-lib-table' to a local folder. Rename it to 'fp-lib-table'. Now move the file to where KiCad expects it. The footprint libraries table file (on Windows 10) is located in the AppData folder similar to: 'C:\Users\Nathan\AppData\Roaming\kicad\fp-lib-table'. You'll want to overwrite the file that is there.
Once the file is in place, re-open KiCad, open the PCB footprint editor, and finally the Footprint Libraries Manager. You should see a long list of libraries including the new SparkFun libraries.
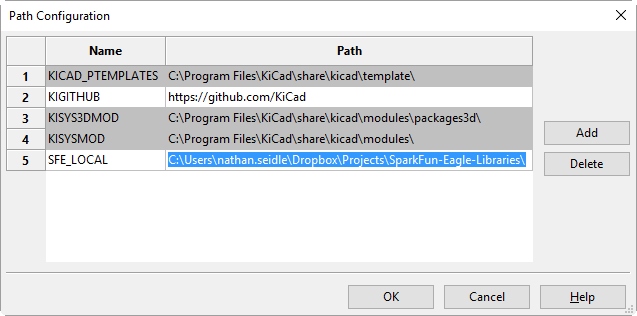
The last step is to tell KiCad the local path to the SparkFun libraries. Currently it's a variable called SFE_LOCAL. We need to assign this to something. Close the Library Manager window, click on Preferences -> Configuration Paths. Click the 'Add' button. Edit the Name and Path fields.
In the image below, you can see I've set the 'SFE_LOCAL' variable to a local path of 'C:\Users\nathan.seidle\Dropbox\Projects\SparkFun-Eagle-Libraries\'. Set this variable to wherever you locally stored the SparkFun Eagle Libraries.
Congratulations! You can now see, use, and copy all the SparkFun Eagle libraries.