Artemis Development with the Arduino IDE
Serial Port: Hello World and Enabling Peripherals
In this example, we will create a code that outputs Hello World to the serial monitor, through the USB connection of the associated board. Unfortunately, there isn't an example built into the Arduino IDE, so users will need to copy and past the code below.
language:c
// the setup routine runs once when you press reset:
void setup() {
  // initialize serial communication at 9600 bits per second:
  Serial.begin(9600);
}

// the loop routine runs over and over again forever:
void loop() {
  // print out "Hello World"
  Serial.println("Hello World");
  delay(500);
}
Follow the steps for programming the associated board to see the code in action.
Operation: Serial Monitor
This example outputs Hello World to the serial monitor, through the USB connection of the associated board. Follow the steps for programming the associated board to see the code in action.
Once the board is programmed, open the serial monitor on the Arduino IDE; make sure to set the baud rate to 9600 baud. Hello World should be printed out continuously.
Hello World print out in the Arduino IDE Serial Monitor. Configuring Peripheral Serial Ports/Pins
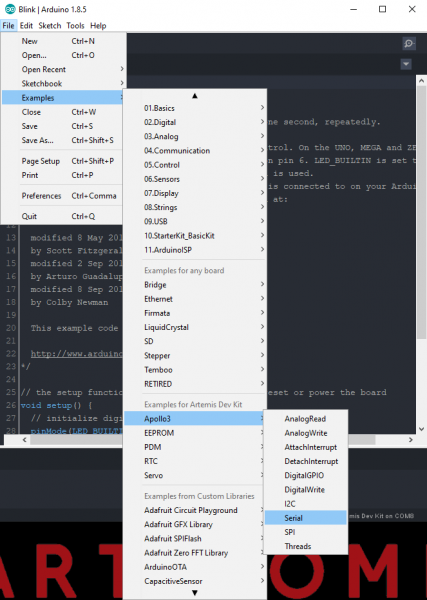
In order for users to understand how to adapt their code to configure the peripheral UART ports and pins, we have provided a built-in example for the Apollo3 core. From the file drop-down menu: File > Examples > Apollo3 > Serial.
Serial example for the Apollo3 core. 
