ARGOS ARTIC R2 Satellite Transceiver Shield Hookup Guide
 PaulZC
 Hardware Hookup
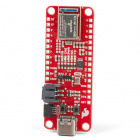
The ARGOS ARTIC R2 Satellite Transceiver Shield is designed to be mounted directly on top of one of our Feather-compatible Thing Plus boards. You will find that the examples in the Arduino Library are written for the SparkFun Thing Plus - Artemis but they can be adapted for any board by changing the pin definitions in the code. If you are looking for a works-out-of-the-box solution then the SparkFun Thing Plus - Artemis is the one to go for.
If you are looking for a complete kit to get you started, here are the parts you will need:


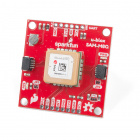
If you want to add GNSS functionality to your kit, so you can transmit your location accurately and/or predict the next satellite pass based on your location, you will also need (e.g.):

Qwiic Cable - 100mm
PRT-14427or:

Our favorite way to connect the ARGOS Shield to the Thing Plus Artemis is to use stacking headers. Solder lengths of our Female Headers onto the top of the Thing Plus Artemis. (This will allow you to connect jumper wires to the board if you want to.) Solder lengths of our male Break Away Headers - Straight to the underside of the ARGOS Shield. (This will allow you to mount the shield on breadboard too if you want to.) That's all the soldering done. If you haven't soldered before, you will find our tutorial useful:
How to Solder: Through-Hole Soldering
Mate the two boards together and voilà, you're just about ready to rock!
Connect your ARGOS antenna to the shield before you forget!
If you connect your LiPo battery to the Thing Plus Artemis now, it will recharge while you have USB power connected.
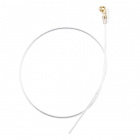
You won't need the GNSS receiver to begin with, but if you want to hook it up now, go right ahead! For the ZOE-M8Q, the GNSS antenna clips onto the u.FL connector on the GNSS board. Check out our tutorial if you haven't used u.FL before:
Three Quick Tips About Using U.FL
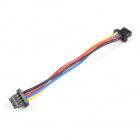
Connect the GNSS board to the Thing Plus using the Qwiic cable (which provides both power and I2C data).
Finally, the USB-C cable connects the Thing Plus to your computer. If you haven't used a CH340 USB interface before, you will want to install the driver first. The following section describes how to do that.
Jumper Wire Connections
If you have used the recommended Thing Plus Artemis and stacking headers, you don't need to worry about which signals to connect. It's all done for you. However, if you want to use a different Arduino board and connect your shield using jumper wires, here are the connections:
- Power:
- Connect GND to a GND (Ground) / 0V pin on your Arduino board
- If you want your Arduino board to provide power to the ARGOS ARTIC R2 Shield, we recommend connecting the Shield's VUSB pin to the 5V pin on your Arduino board
- SPI:
- Connect CIPO, COPI and SCLK to the SPI pins on your Arduino board
- Connect the CS (Chip Select) pin to a suitable I/O pin
- I/O (Essential):
- Connect the RESETB, BOOT, PWR EN, RF EN, INT1 and INT2 pins to suitable I/O pins on your Arduino board. Make a note of the pin numbers as you will need to enter them into the code.
- I/O (Optional):
- Connect the G8 gain control pin to another I/O pin on your Arduino board if you want to be able to control the transmit gain via software. If you leave this pin floating, the RF amplifier will transmit at reduced gain. Pull this pin up to 3.3V to transmit at maximum gain.
Note: Feather and Thing Plus Pins
On some Feather and Thing Plus boards, you may find that the pin below the ARGOS Shield's RF EN pin is digital pin 13 and also connected to the board's built-in LED. On some boards, the LED is flashed rapidly while the bootloader is running and code is being uploaded to the board. This will cause the Shield's RF power circuit to be turned on and off rapidly. While this is unlikely to damage the RF amplifier, it is best avoided. SAMD-based boards are the worst offenders.
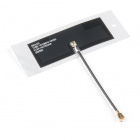
Note: Molex GNSS Antenna
Our Molex GNSS Antenna is very lightweight and is self-adhesive. It is an ideal choice for miniature satellite tracker projects. However, the antenna works best when located at least 40mm away from a ground plane. Don't be tempted to stick the antenna to a ground plane, metallic case or even your LiPo battery. If you do, you will get little or no GNSS signal. Please consult the application specification for more details.