WS2812 Breakout Hookup Guide
WS2812 Hardware Overview
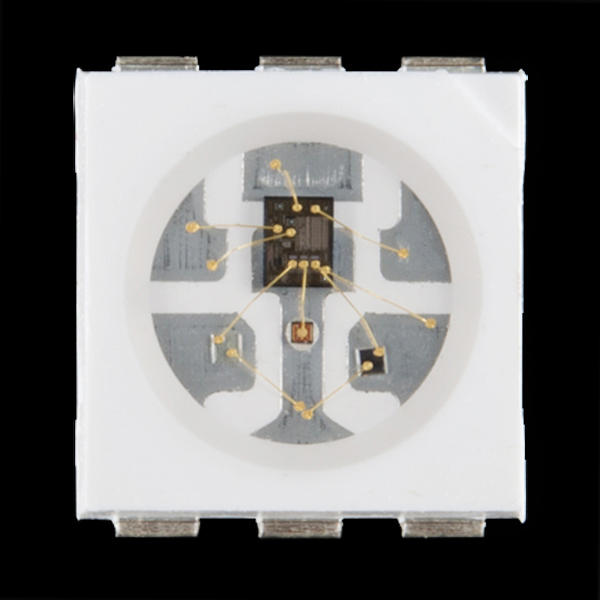
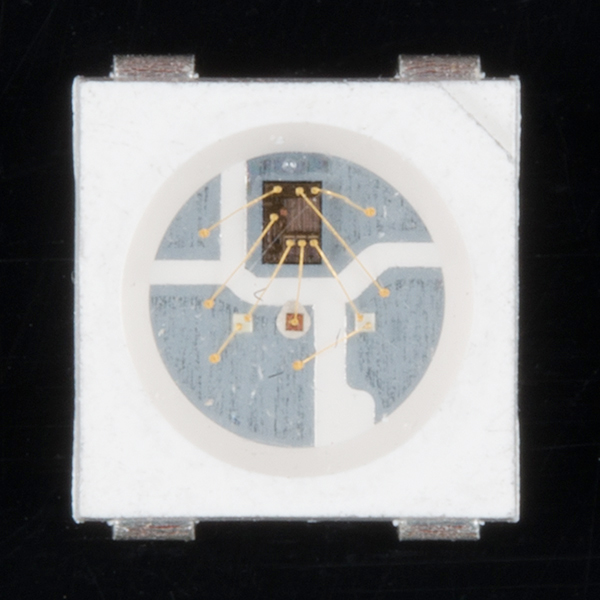
The WS2812-based LED is much more than meets the eye. It may look like a common 5050-sized (5x5mm) LED, but there's actually an integrated circuit embedded inside there too. If you look really hard, you can see the tiny black chip hidden in there, along with minuscule gold wires connecting the chip to the LED. Below are images of the WS2812 and WS2812B zoomed in.
|
|
The LED itself is like any RGB (Red/Green/Blue) LED. The brightness of each color can be adjusted using pulse-width modulation to one of 256 different levels. That means there are 16,777,216 (2563) possible combinations of colors. You can produce any color from white to black (off), or salmon to sienna.
Breakout Board Pinout
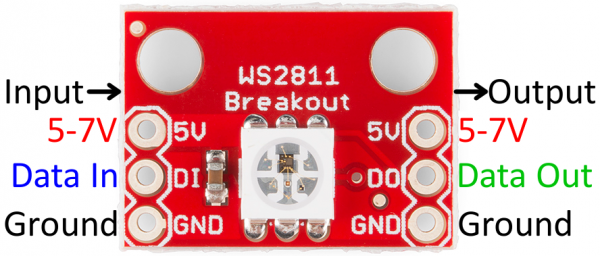
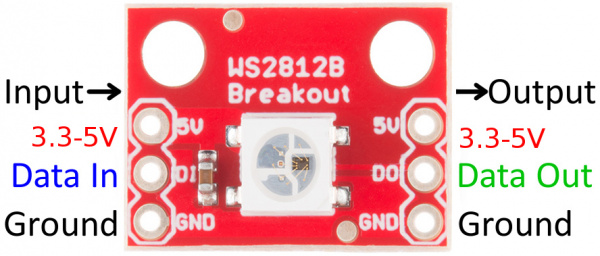
The breakout board mounts that multi-talented LED onto a PCB, and breaks out the few pins required to control the LED.
|
|
Four unique pins are broken out:
- "5V" - The input voltage will can vary based on the IC version's specifications:
- WS2812 -- This should be a regulated supply voltage between 5V and about 7V. More than that could harm the LED, less than 5V will either reduce brightness, or it just won't turn on.
- WS2812B -- This should be a regulated supply voltage between 3.3V and about 5V.
- GND -- The common, ground, 0V reference supply voltage.
- DI -- Data from a microcontroller (or another WS2812/WS2812B pixel) comes into this pin.
- DO -- Data is shifted out of this pin, to be connected to the input of another pixel or left floating if it is the last link in the chain.
We recommend matching the input voltage with the logic level for the data lines (DI and DO). So if you are powering the WS2812B breakout board with 5V, you will be connecting DI and DO with a logic level of 5V.
Data Transmission Interface
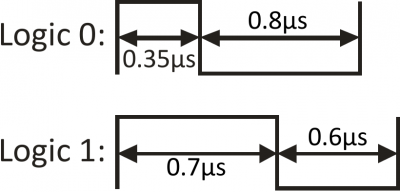
The communication interface between a microcontroller and the WS2812 is weird. It's one wire, but it's not like a standard, UART serial interface. This interface is very time-specific. Both a logic 0 and a logic 1 require a square pulse, and it's the length of the pulse that defines which it is.
The data is sent in a sequence containing 24 of those bits -- 8 bits for each color -- followed by a low "reset" pulse of at least 50µs.
The larger the value of a specific color is, the brighter it will be. If every color is set to 0, the LED will be off. If every color is set to max -- 255 -- the LED will be as bright and white as can be.
This is all to say that the interface is very time-specific. To run the LEDs you'll need a real-time processor, like an Arduino; microprocessors like those on the Raspberry Pi or pcDuino can't give you a reliably-timed pulse. Even if one bit is less than a microsecond off, that could mean the difference between purple and maroon.
