WiFly Shield Hookup Guide
 Joel_E_B,
  CTaylor
Connecting to a Network
The WiFly module is configured by sending it commands through its UART. To do this, the user must first place the module in command mode. For a complete list of configuration commands, please see the RN-131 Reference Guide.
To begin, put the module in command mode by typing the command
$$$
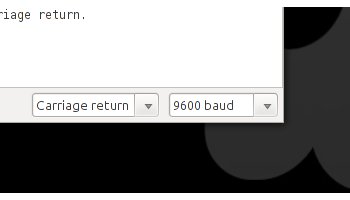
into the Arduino Serial Monitor and pressing enter. (Make sure the serial monitor is set to "No line ending" when you type in the $$$). The module will respond with the letters “CMD”, indicating that it is in command mode. From this point on, commands that we send must be ended with a carriage return, so in the dropdown menu next to the baud rate menu, select “Carriage return”. This will ensure that the serial monitor sends a carriage return after every command you type in the send box.
Next, we need to scan for wifi networks. To do this type the command
scan
You can skip this step if you already know the credentials of your wireless network. The WiFly module will scan for any networks and print the results to the terminal. We are concerned with the columns labeled “SSID” and “Sec”. These are the name of the access point and the security protocol of the access point, respectively. We will need them to configure the WiFly to connect to the access point.
At this point, we’ll need to tell the WiFly what security protocol to use. The security protocols have set values listed in the RN131 reference guide on page 65.
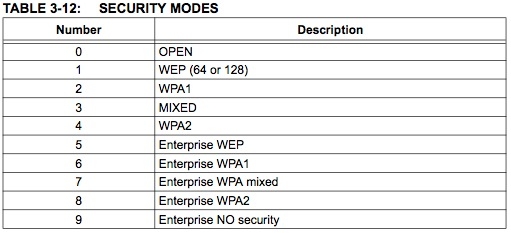
Find the value that corresponds to the security protocol on your access point. Then, in the serial monitor, send the command
set wlan auth <value>
where \
If your access point is using a security protocol, you will need to tell the WiFly your passphrase. To do this, send the command
set wlan phrase <passphrase>
where \
Now our module should be configured and ready to connect to the access point. Tell it to join by sending the command
join <ssid>
Where \
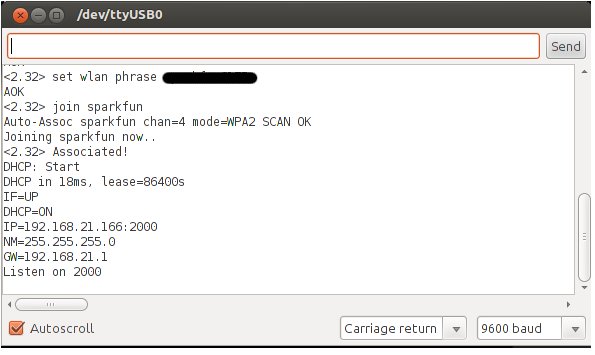
Congrats, you are now networking from the Arduino!
Autoconnect to a Network
If you would like the WiFly module to automatically connect to a network upon power up, follow the above directions. Instead of using the join command, you can store the SSID and tell the module to connect to that SSID by default.
Do so by using this command
set wlan ssid <ssid>
where \
set wlan join 1
This tells the module to try and connect to the SSID stored in memory automatically.
The last thing is to store these settings in the WiFly's config file. We'll talk about this more in depth in the Configuration Files and Firmware Upgrade section, but, for now, just know that is where the WiFly stores all its settings. To do this, simply type
save
Now, whenever you power up your WiFly, it should connect to that network without having to issue it any commands. To join to the network you just stored in memory without reseting the Arduino, issue just the join command without an parameters.
Static IP
If you want your WiFly Shiled to have a static IP address instead of having one assigned via DHCP, you must first turn of DHCP and then set the IP address you want if it hasn't been set already. Using the Terminal sketch, enter command mode. Issue this command to turn of DHCP:
set ip dhcp 0
Next you can assign the IP address you want using this command:
set ip address <address>
Troubleshooting
If you already used the WiFly shield with DHCP on, there may already be an IP address stored in the WiFly's memory. You can keep this IP address as you static IP address, and you know that it will be available.
If you upload any of the default example sketches that come with the WiFly library, you may overwrite the settings you just configured. If you are using an example sketch with a static IP, comment out the following lines in the Setup() function.
if (!WiFly.join(ssid, passphrase)) { while (1) { // Hang on failure. } }
This will prevent the sketch from overwriting your settings.
Also, check out the Configuration Files section of this tutorial to see how you can save and load different settings profiles in case you do accidentally overwrite your settings.
You may also need to change this line in any example sketch, if you plan on using a port other than 80.
WiFlyServer server(80);