Using the A111 Pulsed Radar Sensor with a Raspberry Pi
This Tutorial is Retired!
This tutorial covers concepts or technologies that are no longer current. It's still here for you to read and enjoy, but may not be as useful as our newest tutorials.
View the updated tutorial: Getting Started with the A111 Pulsed Radar Sensor
 jimblom
Setup the Hardware
Raspbian and SPI
This tutorial assumes you've already set up a Raspberry Pi with Raspbian. For help installing the Debian-based OS on your Pi, check out the docs on Raspberrypi.org. Or -- better yet! -- check out our Headless Raspberry Pi Setup tutorial.
You'll also need to enable SPI on your Pi. For help with that, check out our SPI on Pi tutorial.
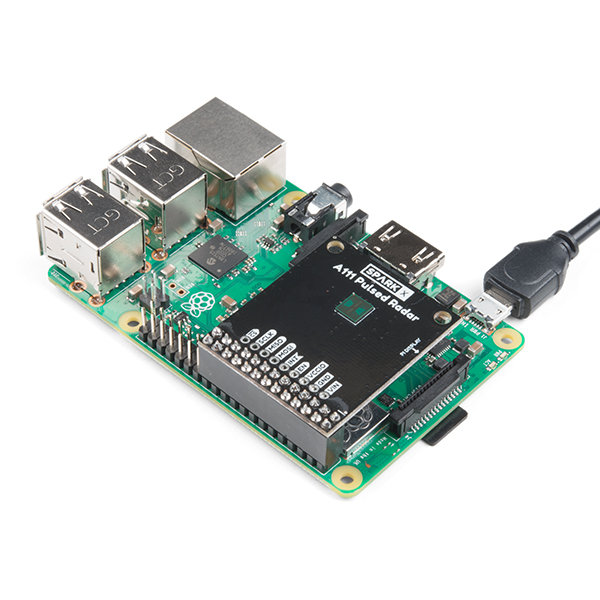
The A111 Pulsed Radar Breakout is designed to sit directly on top of a Raspberry Pi. It doesn't span all 40 (2x20) pins of a Raspberry Pi B+ (or later), but the 26-pin -- 2x13 -- header should be compatible with any Pi.
Solder the 2x13 header so the female side is facing away from the greenish-black A111 IC. Then connect the shield to a Raspberry Pi ensuring that the "Pi Display" text on the breakout matches up with the display header on your Pi. The sensor should be facing up after plugging it in.
Or, if you'd like to manually wire the breakout up to a Pi, here is the pin-out we'll use through the rest of this tutorial:
| Breakout Pin | Raspberry Pi Pin Name | RasPi Pin Number |
|---|---|---|
| CS | SPI0 CS0 | 24 |
| SCLK | SPI0 SCLK | 23 |
| MISO | SPI0 MISO | 21 |
| MOSI | SPI0 MOSI | 19 |
| INT | GPIO25 | 22 |
| EN | GPIO27 | 13 |
| VCCIO | 3.3V | 1,17 |
| GND | GND | 6, 14, 20, etc. |
| VIN | 5V | 2, 4 |
The Raspberry Pi pin breakouts, for example, connect VIN to 5V and VCCIO to 3.3V, as the Raspberry Pi's 3.3V bus may not be able to fully power the A111, but the Pi can only handle 3.3V I/O.