Twinkling Trick or Treat Bag
 Gella
Gella 
Step 3: Sew Power Lines
Double check that all your components are face up and positioned correctly. Thread a needle with ~12 inches of conductive thread and tie a knot at the end.
Stitching Tip: Occasionally check both the front and back of your stitches as you work to make sure you aren't accidentally sewing the bag closed or tangling the conductive thread inside the bag.
Start by looping 2-3 times through and around the positive pin of the battery holder closest to the LilyTwinkle.
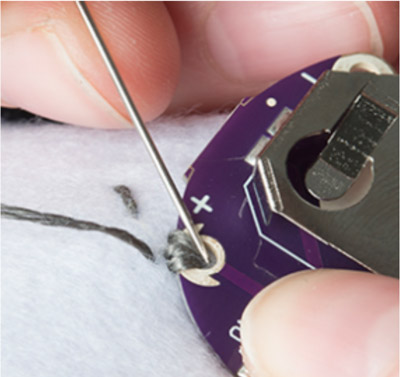
Stitch along the marked line until you reach the positive pin on the LilyTwinkle. Loop 2-3 times and knot it there. Cut off any excess thread.
Repeat this process for the LEDs, following the lines to connect the positive ends to the marked holes on the LilyTwinkle as shown below.

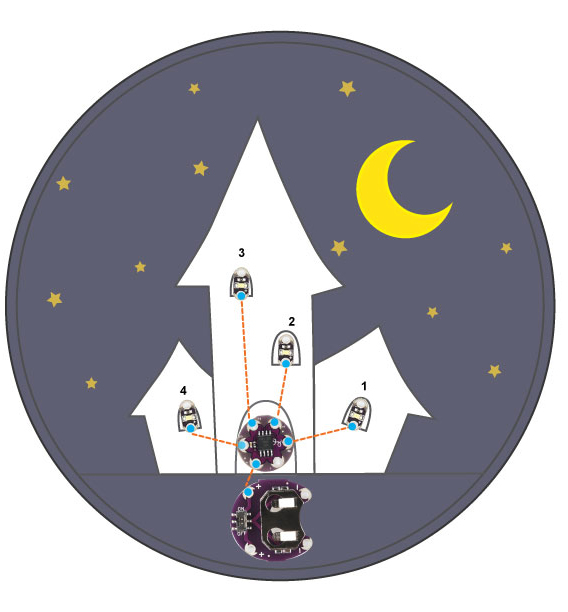
Differences in Templates:
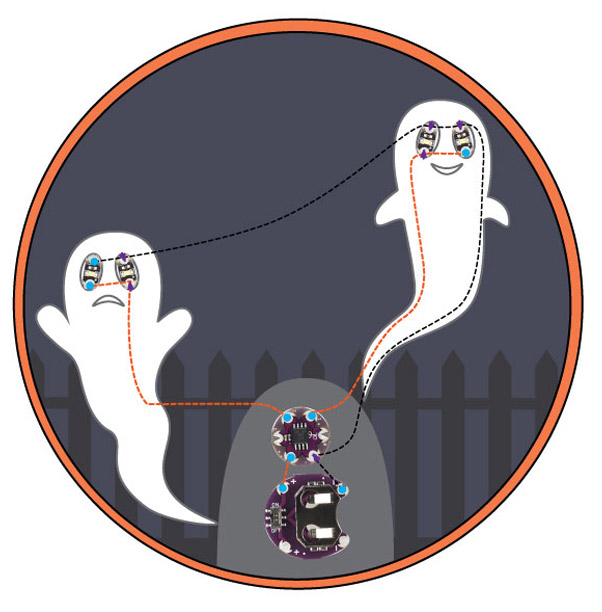
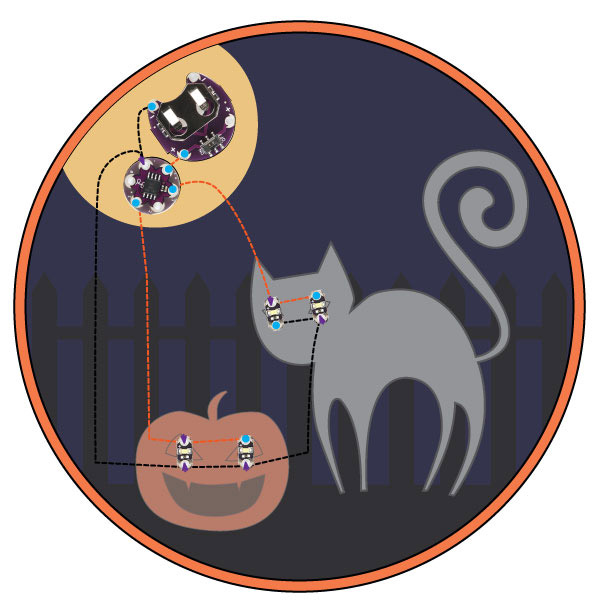
The other designs group LEDs together in a parallel circuit. The Bat, Cat, and Ghost designs use two LEDS to one pin on the LilyTwinkle so that they light up together. For these LEDs, loop 2-3 times over the first LED in the pair and then continue stitching until you reach the next one, loop 2-3 times around, then tie a knot.
Want to learn more about multiple LED circuits? Check out LDK Experiment 2: Multiple LED Circuits.
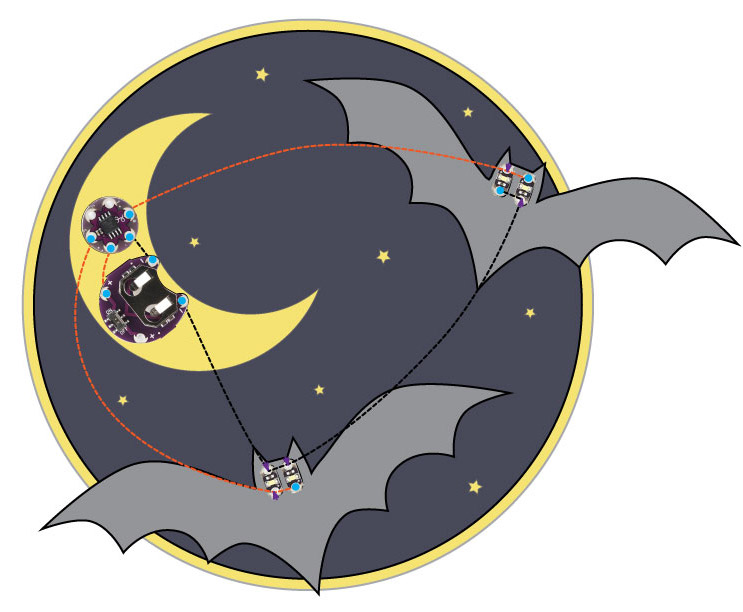
Note: Bat design uses both negative pins on the battery holder instead of one so that the stitching doesn't accidentally touch the board.