Tsunami Super WAV Trigger Hookup Guide
Contributors:
santaimpersonator

Resources and Going Further
For more information on the Tsunami Super WAV Trigger (Qwiic), check out the links below:
- Schematic (PDF)
- Eagle Files (ZIP)
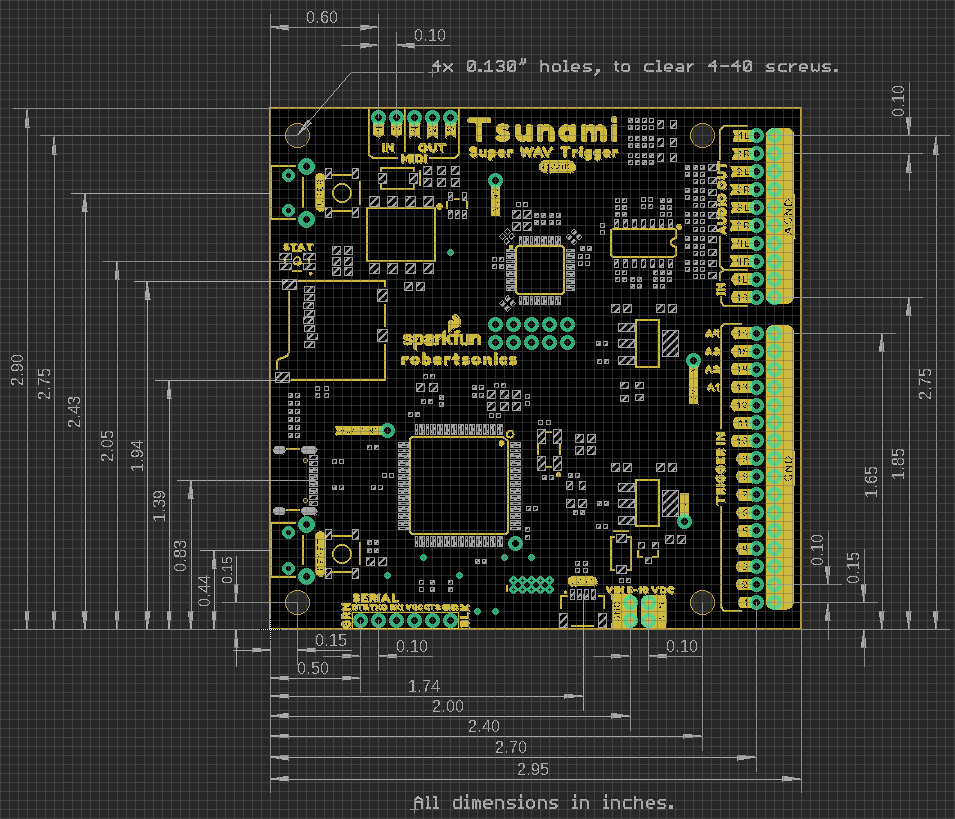
- Board Dimensions
- Tsunami User Guide
- Tsunami Downloads Page
- microSD Cards for Audio 2024
- microSD Cards for Audio
- Tsunami Arduino Serial Library
- SparkFun Tsunami Qwiic Arduino Library
- Python Library (Special Thanks to Nicholas Hayeck!)
- GitHub Hardware Repo
- Product Showcase Video
For more inspiration, check out theses other audio related tutorials:
Binary Blaster Assembly Guide
Learn how to assemble and play the Binary Blaster Game from SparkFun Electronics.
Si4703 FM Radio Receiver Hookup Guide
Add some tunes to your project with the Si4703 FM Radio Receiver Breakout.
Hackers in Residence: The Sound Visualizer Pt. 2
An addition to a previous project, this time using a PC and a custom Java app to create your own music visualizer using a RGB LED matrix.
MP3 Trigger Hookup Guide V24
Incorporate sound into your next project easily with the MP3 Trigger.
Wireless Audio Bluetooth Adapter w/ BC127
Build a custom wireless audio Bluetooth adapter using BlueCreation's BC127 and add it to your old speaker system!
Clap On Lamp
Modify a simple desk lamp to respond to a double clap (or other sharp noise) using parts from the SparkFun Inventor's Kit v4.0.
Build a Qwiic Jukebox that is Toddler Approved!
Follow this tutorial to build your own custom jukebox. Note, this is designed simple and tough for use primarily with toddlers. It's also a great introduction to SparkFun's Qwiic products!
Qwiic Speaker Amp (TPA2016D2) Hookup Guide
The SparkFun Qwiic Speaker Amp includes the Texas Instruments TPA2016D2 stereo, filter-free class-D audio power amplifier. This tutorial will help you get started and configure the amplifer settings using an Arduino microcontroller.