TB6612FNG Hookup Guide
 M-Short
Hardware Setup
For this demo, we'll use a small chassis with the included motors and wheels as well as an Arduino Pro Mini.
The first step is to find a power supply. While it is best to find one that will work with the motors and logic, that is not always possible. Sometimes your motors want 24V, but your microcontroller only wants 5V. In that case, it is probably easiest to use 2 power supplies. For this demo, we'll be using the 4xAA battery holder that comes with the Actobitty chasis. The battery holder should output 6V since each alkaline AA battery is 1.5V (NiMH AAs are only 1.2V). The Arduino Pro Mini can handle up to about 12V on the RAW power line, which it will regulate down to 5V.
The next step is to connect everything using your preferred project platform. We're using a piece of the snappable protoboard with female headers, so we can just plug in the motor driver and Arduino Pro Mini. If you are using different pins, or a different microcontroller, remember that the PWM pins of the motor driver need to be PWM pins on your microcontroller.
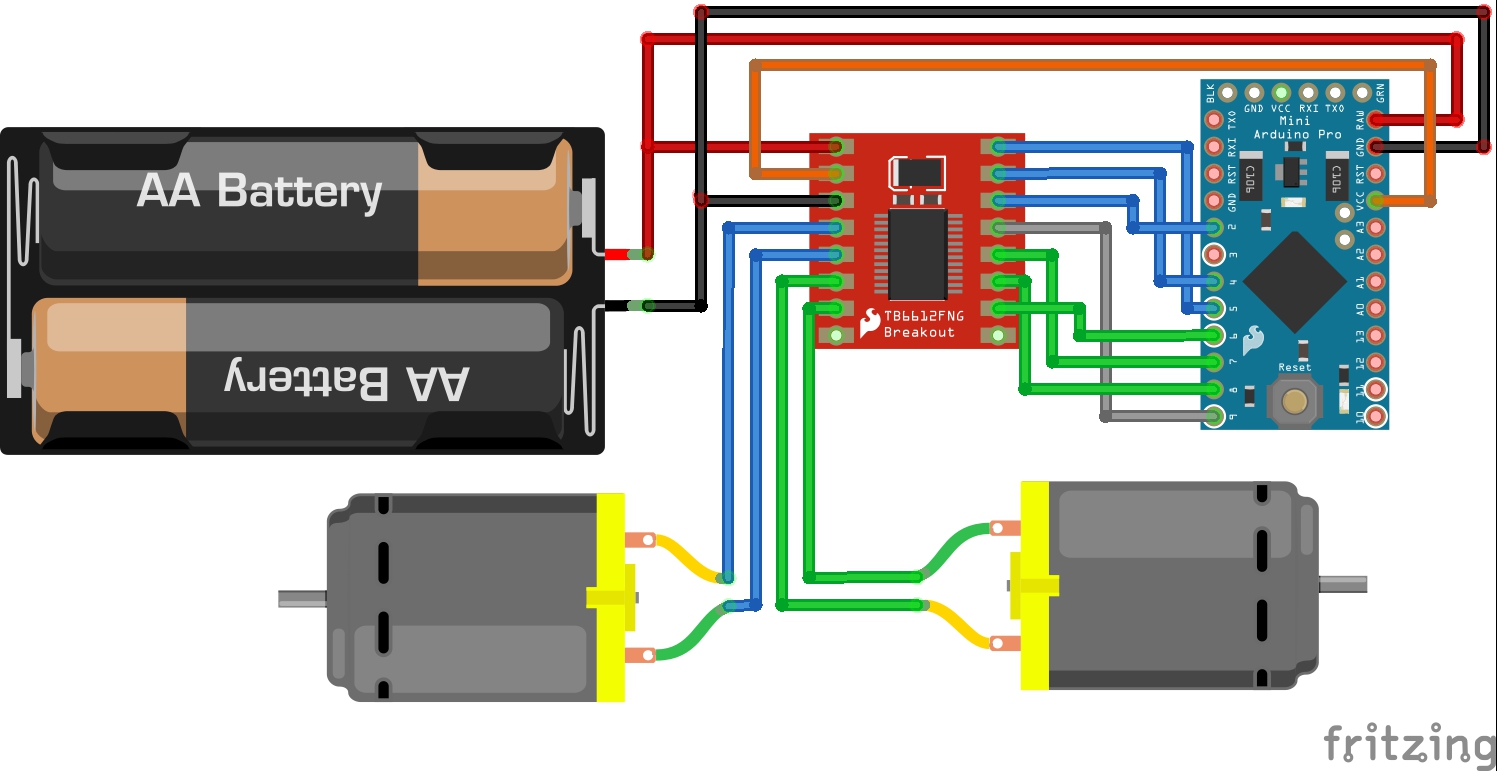
Here is a Fritzing diagram showing how all the connections were made.
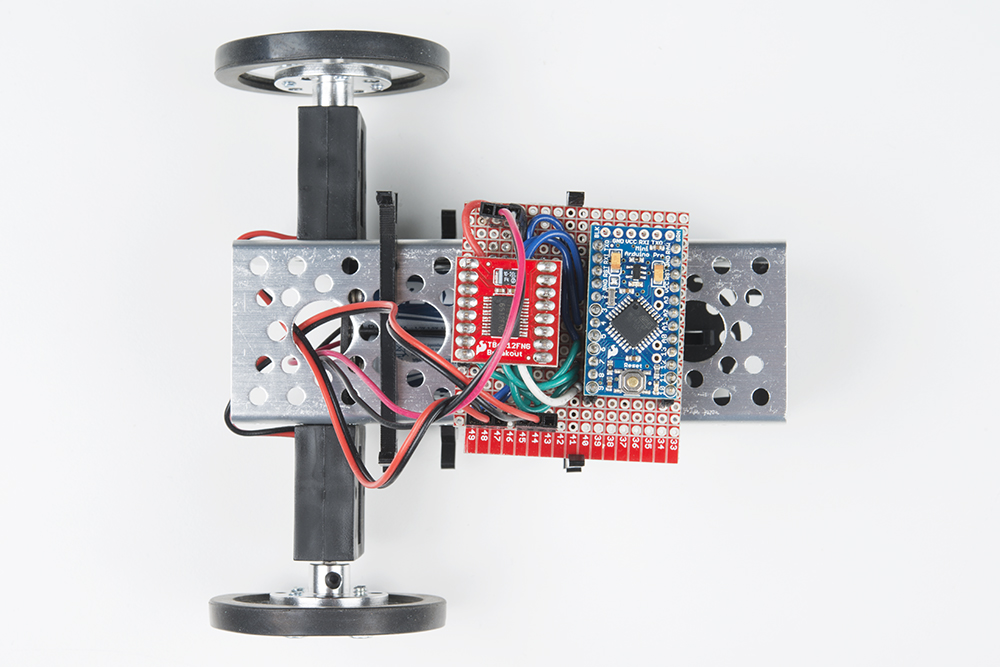
Here is the final project assembled on the Actobitty chassis.