STM32 Thing Plus Hookup Guide
 Alex the Giant, Ell C
Example - Blinky
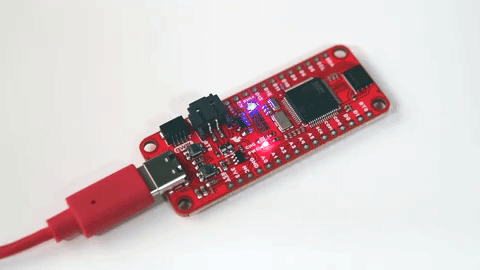
With the STM32 Arduino core installed, you're ready to begin programming. If you haven't already, plug the STM32 Thing Plus into your computer using a USB-C cable.
Once the board is plugged in, it should be assigned a unique port identifier. On Windows machines, this will be something like COM#, and on Macs or Linux computers it will come in the form of /dev/tty.usbserial-XXXXXX.
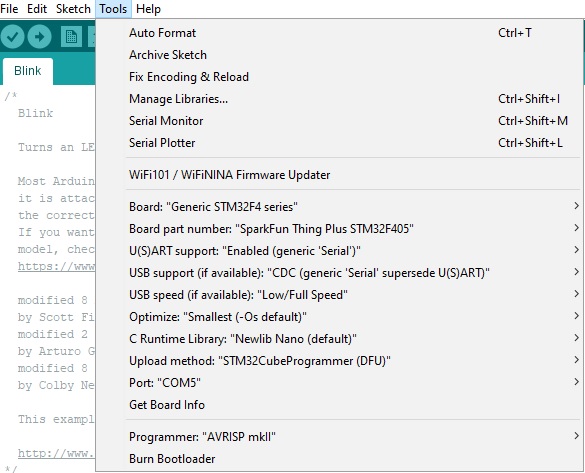
Select the Board and Port
You'll notice that there are quite a few options. Make sure you have the Generic STM32F4 Series board and SparkFun Thing Plus STM32F405 board part number selected under your Tools menus.
The other options are more variable. For this example, you'll want to set your selections as you see below.
Loading Blink
To make sure your toolchain and board are properly set up, we'll upload the simplest of sketches -- Blink! The builtin LED is perfect for this test. Copy and paste the example sketch below into a fresh Arduino sketch:
language:c

void setup()
{
    pinMode(LED_BUILTIN, OUTPUT);
    Serial.begin(115200);
}

void loop()
{
    Serial.println("Hello, world!");
    digitalWrite(LED_BUILTIN, HIGH);   // turn the LED on (HIGH is the voltage level)
    delay(1000);                       // wait for a second
    digitalWrite(LED_BUILTIN, LOW);    // turn the LED off by making the voltage LOW
    delay(1000);                       // wait for a second
}
With everything setup correctly, hit the upload button.
Once the code finishes transferring, open the serial monitor and set the baud rate to 115200. You should see Hello, world!'s begin to fly by.
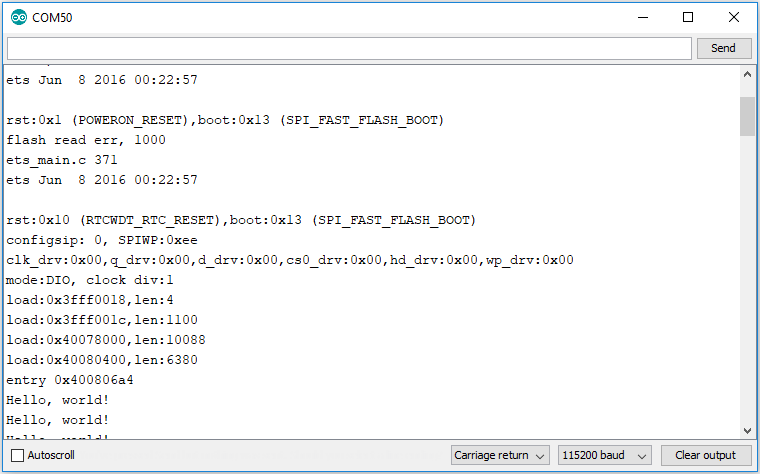
You may also notice that when the STM32 boots up it prints out a long sequence of debug messages. These are emitted every time the chip resets -- always at 115200 baud.