SparkFun LoRa Gateway 1-Channel Hookup Guide
 jimblom,
  Liquid Soulder
Routing Into The Things Network
The final components to a LoRaWAN network are a server and application. Although it is possible to make your own server we've already configured the gateway to send data to The Things Network through one of their routers like "router.eu.thethings.network". This is an easy and free way to get started with LoRaWAN so we recommend starting this way.
Single-Channel Blues
At the trade-off of being low-cost, this gateway is only capable of monitoring a single LoRa channel on a limited set of spread factors. Single-channel gateway's don't get much support from LoRaWAN platforms like The Things Network, as they are not, necessarily, LoRaWAN-compliant. They are, however, a great way to begin exploring the world of LoRa and LoRaWAN!
If you haven't already, head to thethingsnetwork.org and create an account. Once that's done, go to your Console.
Create an Application
If your data is being sent to The Things Network's servers then you can create an application to access that data. This works by registering devices with unique cryptographic keys so that your data is only visible to you.
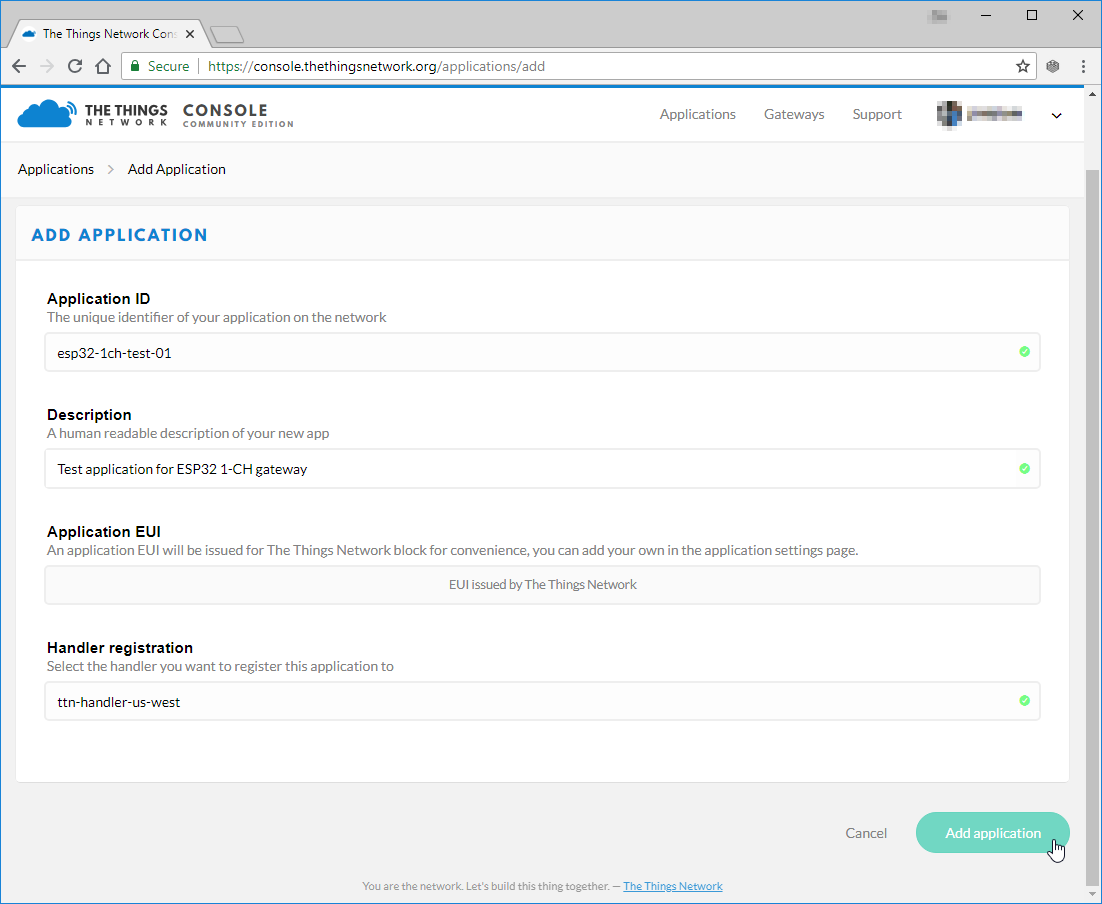
In order to register a device, you first need to create an application to house it under. In the console, click "Applications" then click "add application".
Fill out any ID and description you'd like. The Application EUI will automatically be generated when you create the application. You can also pick your preferred handler for the application (e.g. ttn-handler-us-west).
Create and Configure a Device
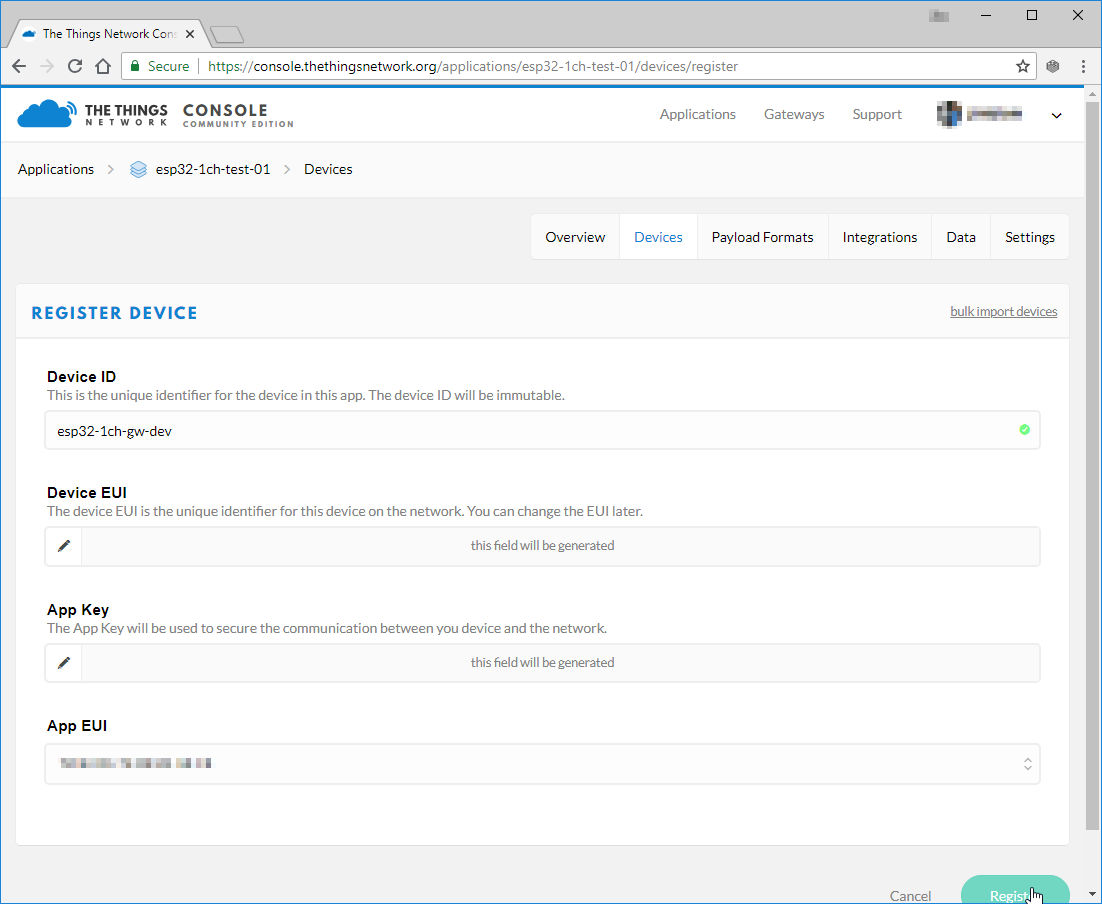
Next register a device in your application. Under the "Devices" section, click "register device".
This is again pretty simple. Fill out a unique device ID, click the "generate" button under "Device EUI" to automatically generate a EUI. Then click "Register."
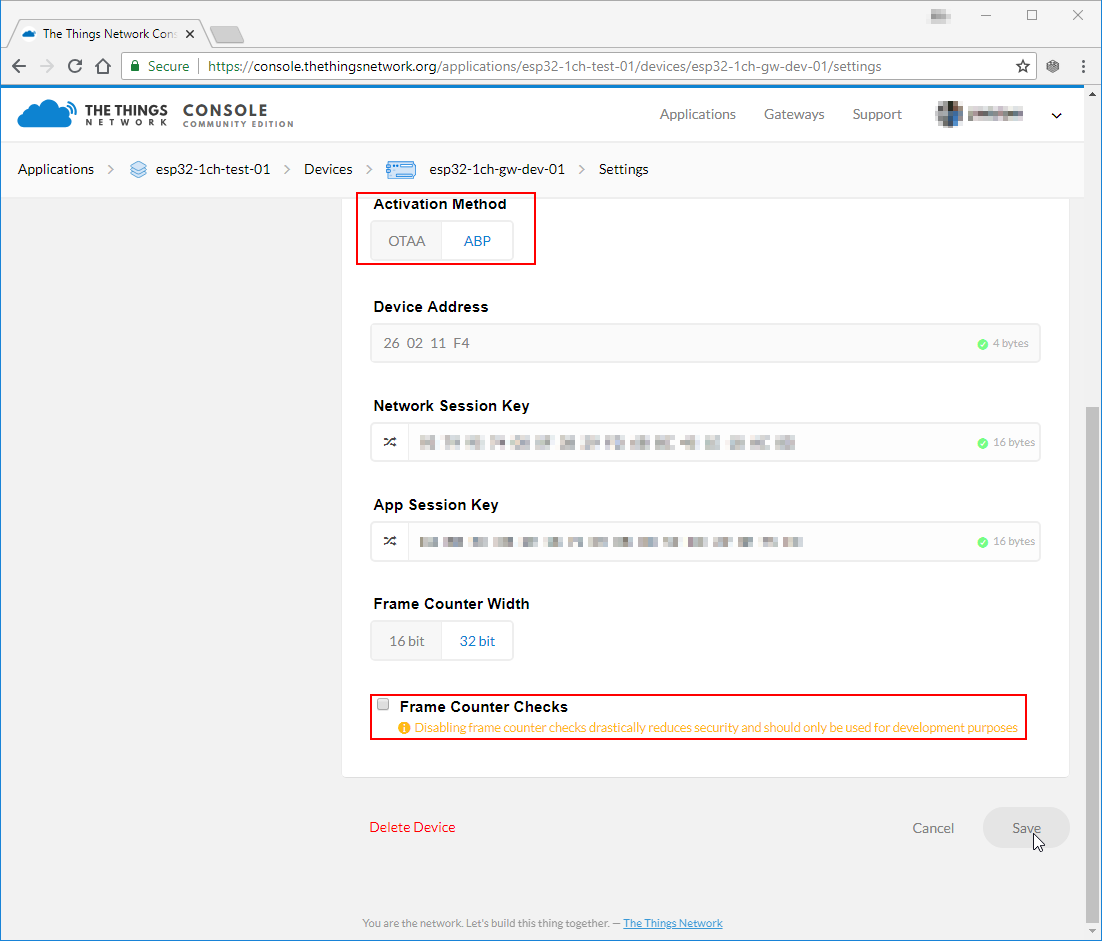
This example sketch only supports ABP activation, so you'll need to modify that in the device settings. In the "Device Overview" page, click "Settings". From there, under "Activation Method" click ABP. I also recommend disabling Frame Counter Checks. The gateway is capable of frame-counter checks, but it can get out of sync -- especially if you have another gateway nearby.
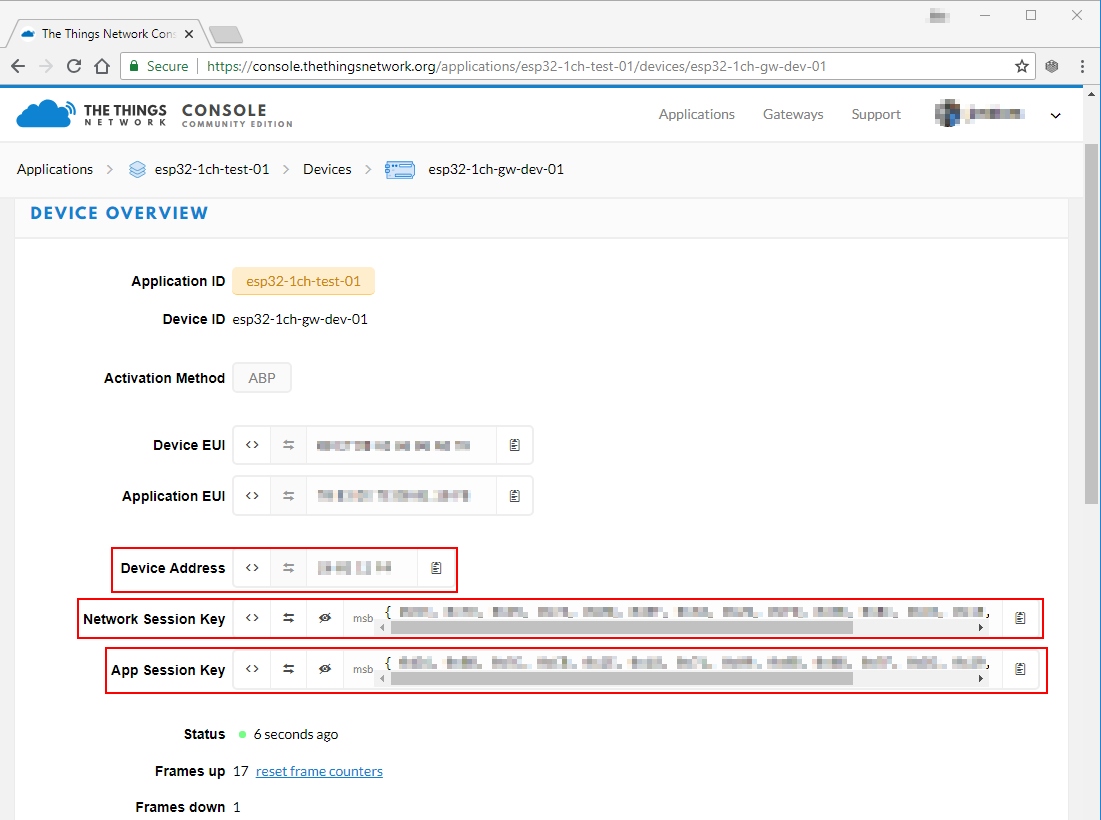
Save the settings and go back to your "Device Overview" page. You should see new keys, including "Network Session Key", "App Session Key", and "Device Address." These will need to be plugged into the device sketch and uploaded to the device - which we will cover in the next section.
Update the Example Code
With your application, network session, and device keys in-hand, you're ready to finish configuring the ESP32 LoRa device sketch and start posting data!
On the "Device Overview" page, click the "code" symbol (<>) next to "Network Session Key" and "App Session Key" -- this will make the key visible and display it as a 16-byte array. Copy each of those keys, and paste them in place of the {PASTE KEY HERE} place-holders. "Network Session Key" should be pasted into the NWKSKEY variable and "App Session Key" should be pasted into the APPSKEY variable.
The DEVADDR variable expects a single 32-bit variable, so copy the "Device Address" key as shown and paste that into the PASTE_DEV_ADDR_HERE placeholder.
Here's an example of what your three constants should look like once done:
language:c
// LoRaWAN NwkSKey, network session key
// This is the default Semtech key, which is used by the early prototype TTN
// network.
static const PROGMEM u1_t NWKSKEY[16] = { 0x01, 0x23, 0x45, 0x67, 0x89, 0xAB, 0xBD, 0xEF, 0x01, 0x23, 0x45, 0x67, 0x89, 0xAB, 0xCD, 0xEF };

// LoRaWAN AppSKey, application session key
// This is the default Semtech key, which is used by the early prototype TTN
// network.
static const u1_t PROGMEM APPSKEY[16] = { 0xFE, 0xDC, 0xBA, 0x98, 0x76, 0x54, 0x32, 0x10, 0xEE, 0xDC, 0xAA, 0x98, 0x76, 0x54, 0x32, 0x10 };

// LoRaWAN end-device address (DevAddr)
static const u4_t DEVADDR = 0x01234567;
And that's it! Now upload the code to your LoRa Gateway 1-Channel board (the one that is supposed to be the device, that is!)
Testing the Code
After setup, the device should immediately send a "Hello, World" message. It'll continue to send a message every minute or any time the "0" button on the board is pressed.
To check if your gateway is receiving the message, you can either check the Serial Monitor or monitor the ESP Gateway Config page served by the gateway. Every time a message is received it should be added to the "Message History" table.
If messages are getting through to your gateway, click the "Data" tab on your device to check for new messages.
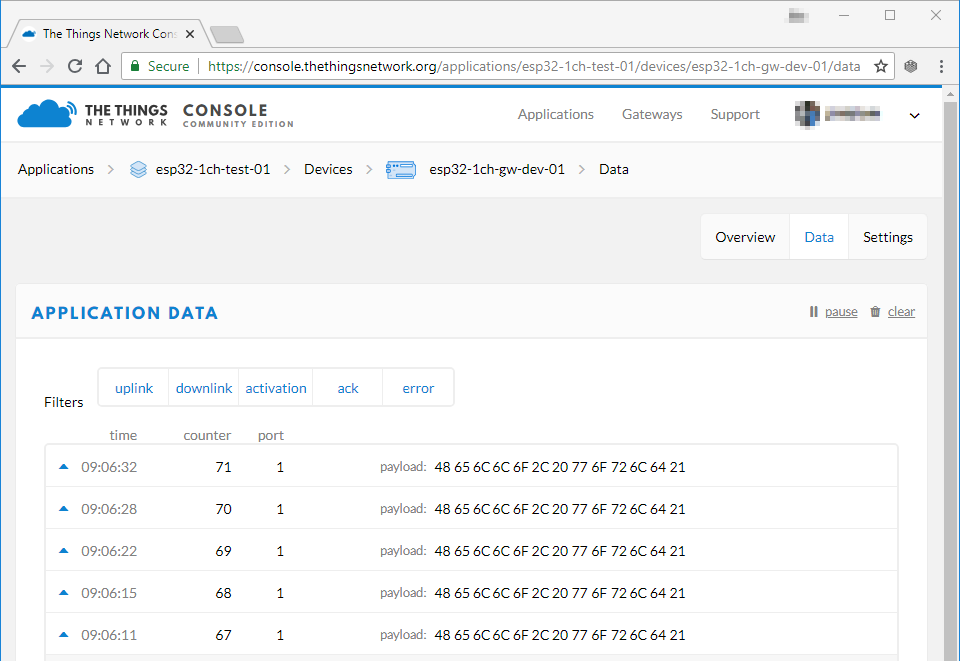
The message's payload -- which was encrypted between leaving the device and getting into your application -- should be a series of hex values corresponding to "Hello, world".
Decoding the Message
You may have noticed in the Application Data window that your payload is shown in raw bytes. In order to see "Hello, World!" encoded in ASCII, the way you sent it, you'll need to decode the payload. The Things Network includes tools for doing this right in the console! Navigate to the Application Overview page for your application and click on the Payload Formats tab. This menu allows you to write functions which will be applied to all incoming packets for this application.
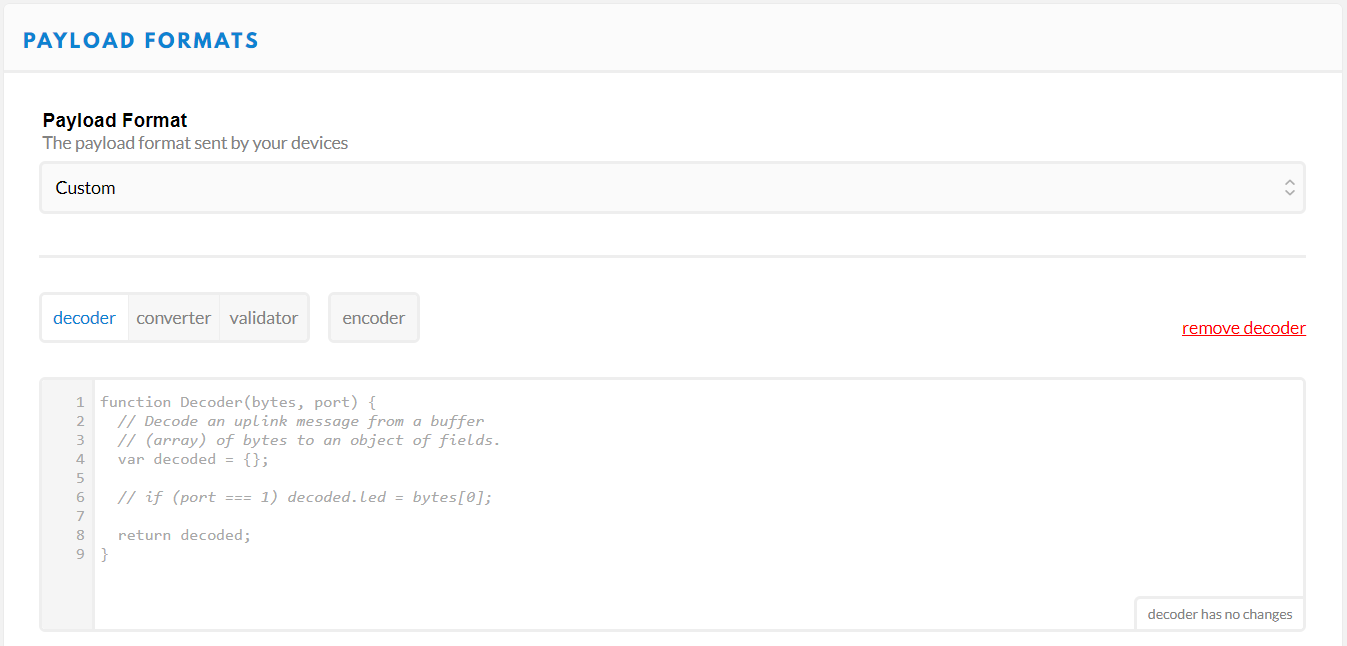
So let's write our own decoder. We need to take the raw byte data and return a string that contains all of the characters corresponding to each byte. Take a look at this solution and then we'll walk through it:
language:js
function Decoder(bytes, port) {

    return {
        ASCII: String.fromCharCode.apply(null, bytes)
    };

}
Decoder is a Javascript function that The Things Network has already set up for us. It takes two arguments called bytes, an array containing our payload, and port, the LoRaWAN™ "FPort" of the packet. FPort identifies the end application or service that the packet is intended for. Port 0 is reserved for MAC messages. We don't need to know anything about the port number for our example.
We can return any value that we want from the Decoder function and it will appear alongside our payload in the Application Data window. In the example above, I've created a new property called "ASCII" which is equal to String.fromCharCode.apply(null, bytes). To break this down a little more, we're returning a new String object called "ASCII," and we're using the Javascript apply() method to call fromCharCode() with the argument bytes and stuff the result into our new String. The fromCharCode() method simply steps through each byte in the array bytes (which, remember, contains our payload) and returns the ASCII character represented by that character code.
After copying the above code into your decoder function, scroll down and click the save payload functions button. Now return to the Application Data window and you should see that all packets received after the decoder function was changed now have a new property:
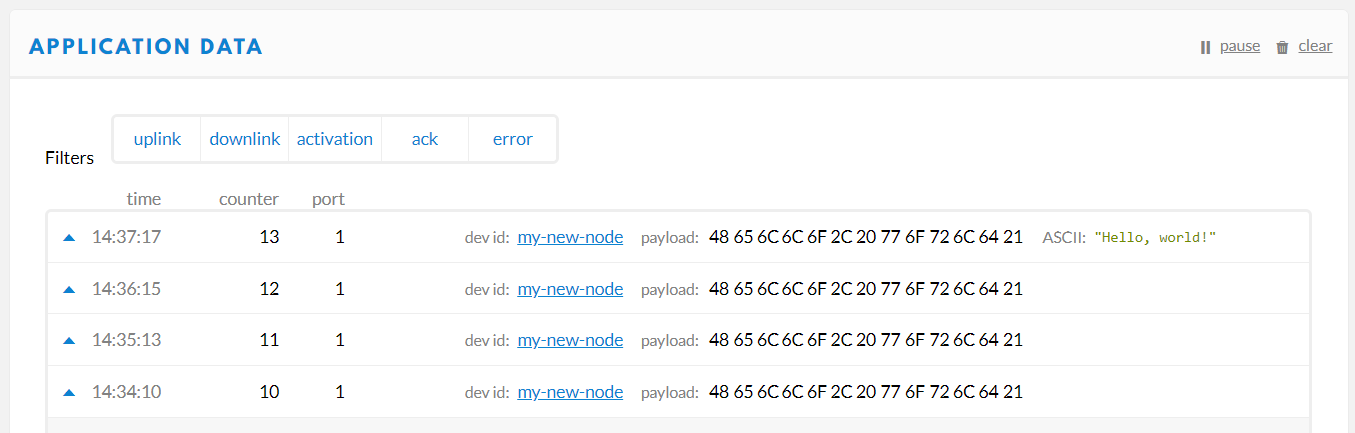
Our packet has been decoded! Excellent!
Troubleshooting
If messages are not getting to your gateway, first make sure the channel and spread factor match up. Left unchanged, the device example code should be sending data out on the 903.9MHz channel at a spread factor of 7 (That's assuming you've set the LMIC library to CFG_us915. If it's set to a European frequency spectrum, it'll be 868.1MHz, SF7).
You can use the gateway's web server to adjust these setting on the fly. Note that the channel numbers should sequentially match the freqs array in loraModem.h -- e.g. channel 0 should be 903.9MHz (again, assuming US frequencies).
If messages are getting to your gateway, but not showing up on your TTN device console, consider changing the _TTNSERVER variable in "ESP-sc-gway.h". I haven't had success with the us-west router, but "router.eu.thethings.network" has worked perfectly (even in the US).