smôl ESP32 Hookup Guide
Software Setup and Programming
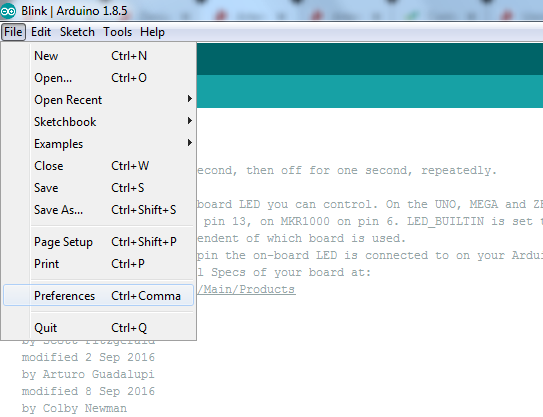
To get started with the smôl ESP32 Processor Board, you'll need to install the ESP32 Board Definition. Open the Arduino IDE (must be v1.8.13 or later) and navigate to File->Preferences, like so:
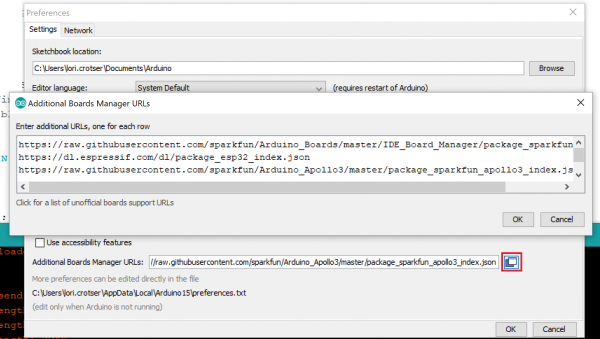
In the "Additional Board Manager URL" box, make sure you have the following two json files included. If you do not have them, add them to your preferences.
language:c
https://raw.githubusercontent.com/espressif/arduino-esp32/gh-pages/package_esp32_index.json
https://raw.githubusercontent.com/sparkfun/Arduino_Boards/main/IDE_Board_Manager/package_sparkfun_index.json
If you have more than one json file, you can click on the button outlined in red and add the json links at the end. It'll look something like the following:
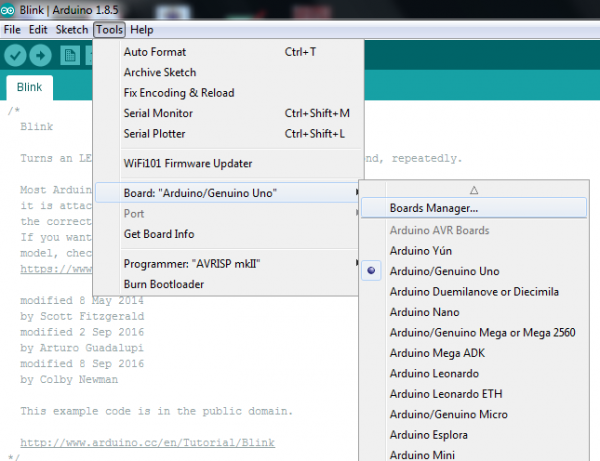
Once you've got your preferences updated, go to Tools -> Board and select the Boards Manager like so:
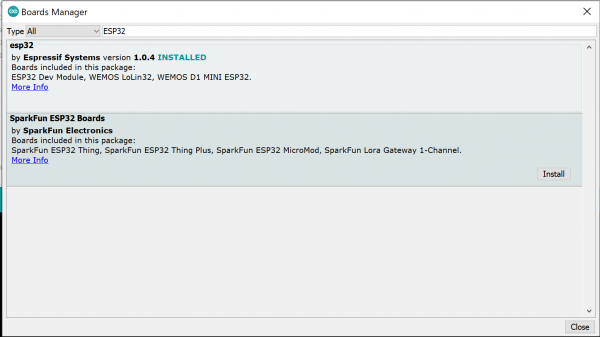
Search for "ESP32", and you should find both the esp32 and SparkFun ESP32 Boards board packages. Make sure the latest version selected and click Install for the esp32 boards. Repeat for the SparkFun ESP32 Boards.
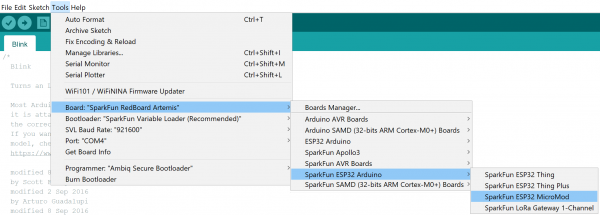
Once the board definitions have been installed, you should see the SparkFun ESP32 Thing Board under your Tools -> Board -> SparkFun ESP32 Arduino menu. The smôl ESP32 uses the same board definition as the SparkFun ESP32 Thing; select that (and ignore the Thing Plus, MicroMod and LoRa Gateway options).
Voila! You're ready to rock with your smôl ESP32 Processor Board!
