Si4703 FM Radio Receiver Hookup Guide
 Toni_K
 Hooking Up to an Arduino
First, you will need to prepare both the Si4703 board and the Arduino Pro Mini. Solder on the male headers to both boards. You will need headers on both the FTDI header, as well as the pins that you will be connecting to the Si4703.
Pin Connections
Once you have headers soldered, you will need to use the jumper wires to connect between the Si4703 and the Pro Mini. Remember, we are using a 3.3V Pro Mini to prevent damage to the logic on the Si4703.
Si4703 → 3.3V Pro Mini
- GND → GND
- 3.3V → VCC
- SDIO → A4
- SCLK → A5
- RST → D2
- GPIO2 → D3
You will then also need to hook up the Pro Mini to the FTDI board, and connect to your computer over USB.

Installing the Library
Now that the hardware is hooked up and connected, it's time to prepare to upload code. First you need to install the Arduino library into the IDE. If you are unaware how to do this, please check out our tutorial here. You can download the code here.
Once the library is properly installed, please open up the example sketch labeled "Si4703_Radio_Test". Make sure you select the "Arduino Pro or Pro Mini (3.3V, 8MHz) w/ ATMega328" under the "Tools -> Boards" heading. Select the proper COM port for your FTDI device under "Tools -> Serial Port". Upload the sketch to the board.
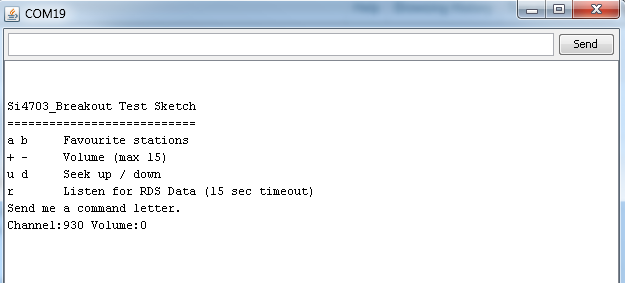
Once you have it uploaded, open up your Serial terminal (either through the Arduino IDE or your favorite terminal program). Open the connection with the settings 9600bps, 8, N, 1, and you should see the following displayed on the terminal.

You can then choose from any of the options listed. If you initially send the board option "a", you should see the following displayed back.
These favorite stations are pre-determined in the sketch, so feel free to change those to your own favorite stations if you would like.
else if (ch == 'a')
{
  channel = 930; // Rock FM
  radio.setChannel(channel);
  displayInfo();
}
else if (ch == 'b')
{
  channel = 974; // BBC R4
  radio.setChannel(channel);
  displayInfo();
}
Keep in mind you will need to upload the code to the board again to update to the new stations. You can then direct the tuning either up or down, and control the volume of the board. For example, to tune to station 95.7 FM here in Boulder, I sent the commands: u, u, +, +, +, +, +, +, +, +, +, +, +, +, +, u, u, u, u, u, u. This results in the following in the serial terminal.
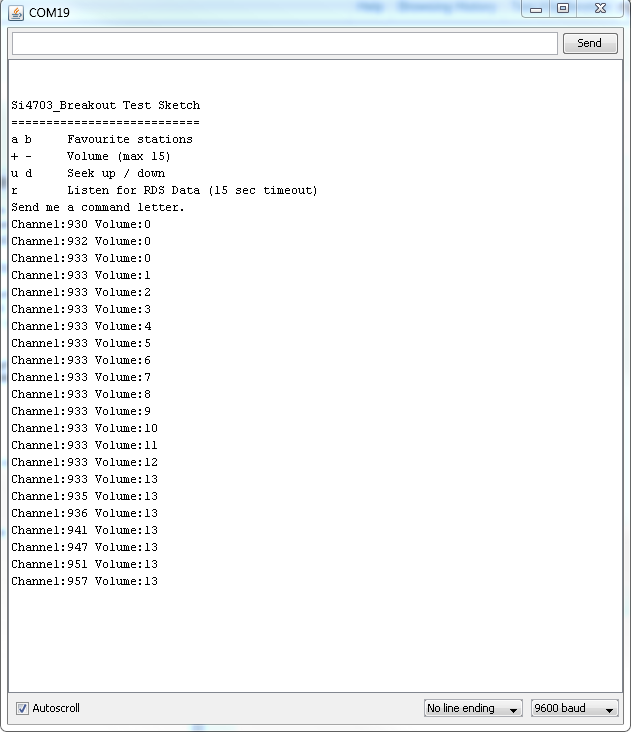
For this example, I am using my headphone wire as the anntena. Because of this, I was not necessarily able to receive stations that I often can when I'm not using a headphone wire as an antenna while connected to my computer (EMI is so much fun!). Play around with moving around or using different headphone wires and see how radio reception can change.