Setting up a Rover Base RTK System
 Nate
Nate 
Rover Setup
We're going to assume you've got a base station setup, either as a temporary base or with ECEF coordinates (we’ll go into that advanced topic later). u-blox has some good documents on how to set up the ZED-F9P in rover mode but it's surprisingly easy. The rover simply needs to be fed RTCM corrections and it will enter RTK Float, then RTK Fix.
Open u-center and connect to the rover module. Multiple instances of u-center can be started if you have multiple modules connected to one computer.
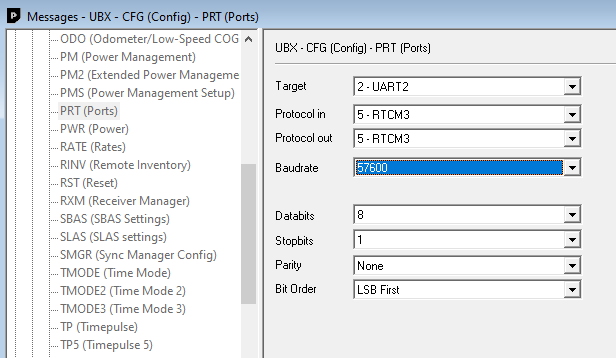
Navigate to the CFG / PRT message and configure UART2. We want to set UART2 to 57600bps to match the base and the telemetry radio kit we will be using.
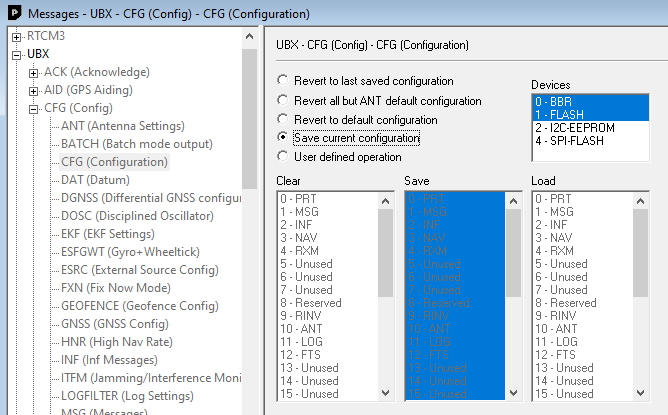
Now save these port settings so they get loaded at each power-on.
Note: If you ever run into problems with the configuration of a module you can always select 'Revert to default configuration' and hit send. This should give your module a good brainwash returning it to the default factory settings. This command will also reset the BBR/Flash settings.
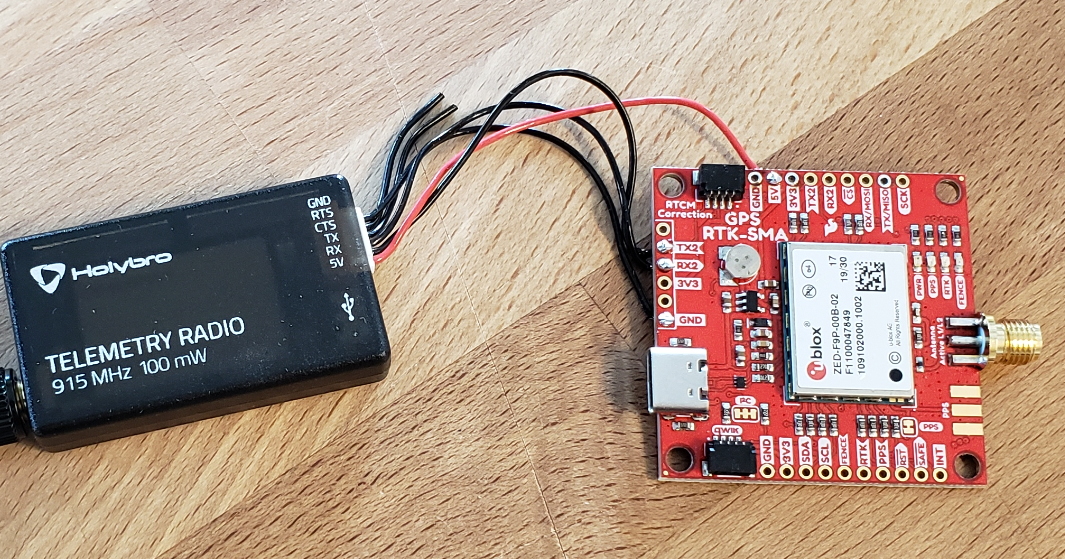
Solder the other half of the radio cable to the UART2 on the rover receiver. The setup is exactly the same as before with the base receiver:
- Radio 5V - RTK 5V
- Radio TX - RTK RX2
- Radio RX - RTK TX2
- Radio GND - RTK GND
Time for a test! Power up the rover and base and you should see the green LED on the radios go from blinking to solid indicating the radios detect each other and are passing serial data between them. A blinking red LED on the radios indicates serial data being transmitted.
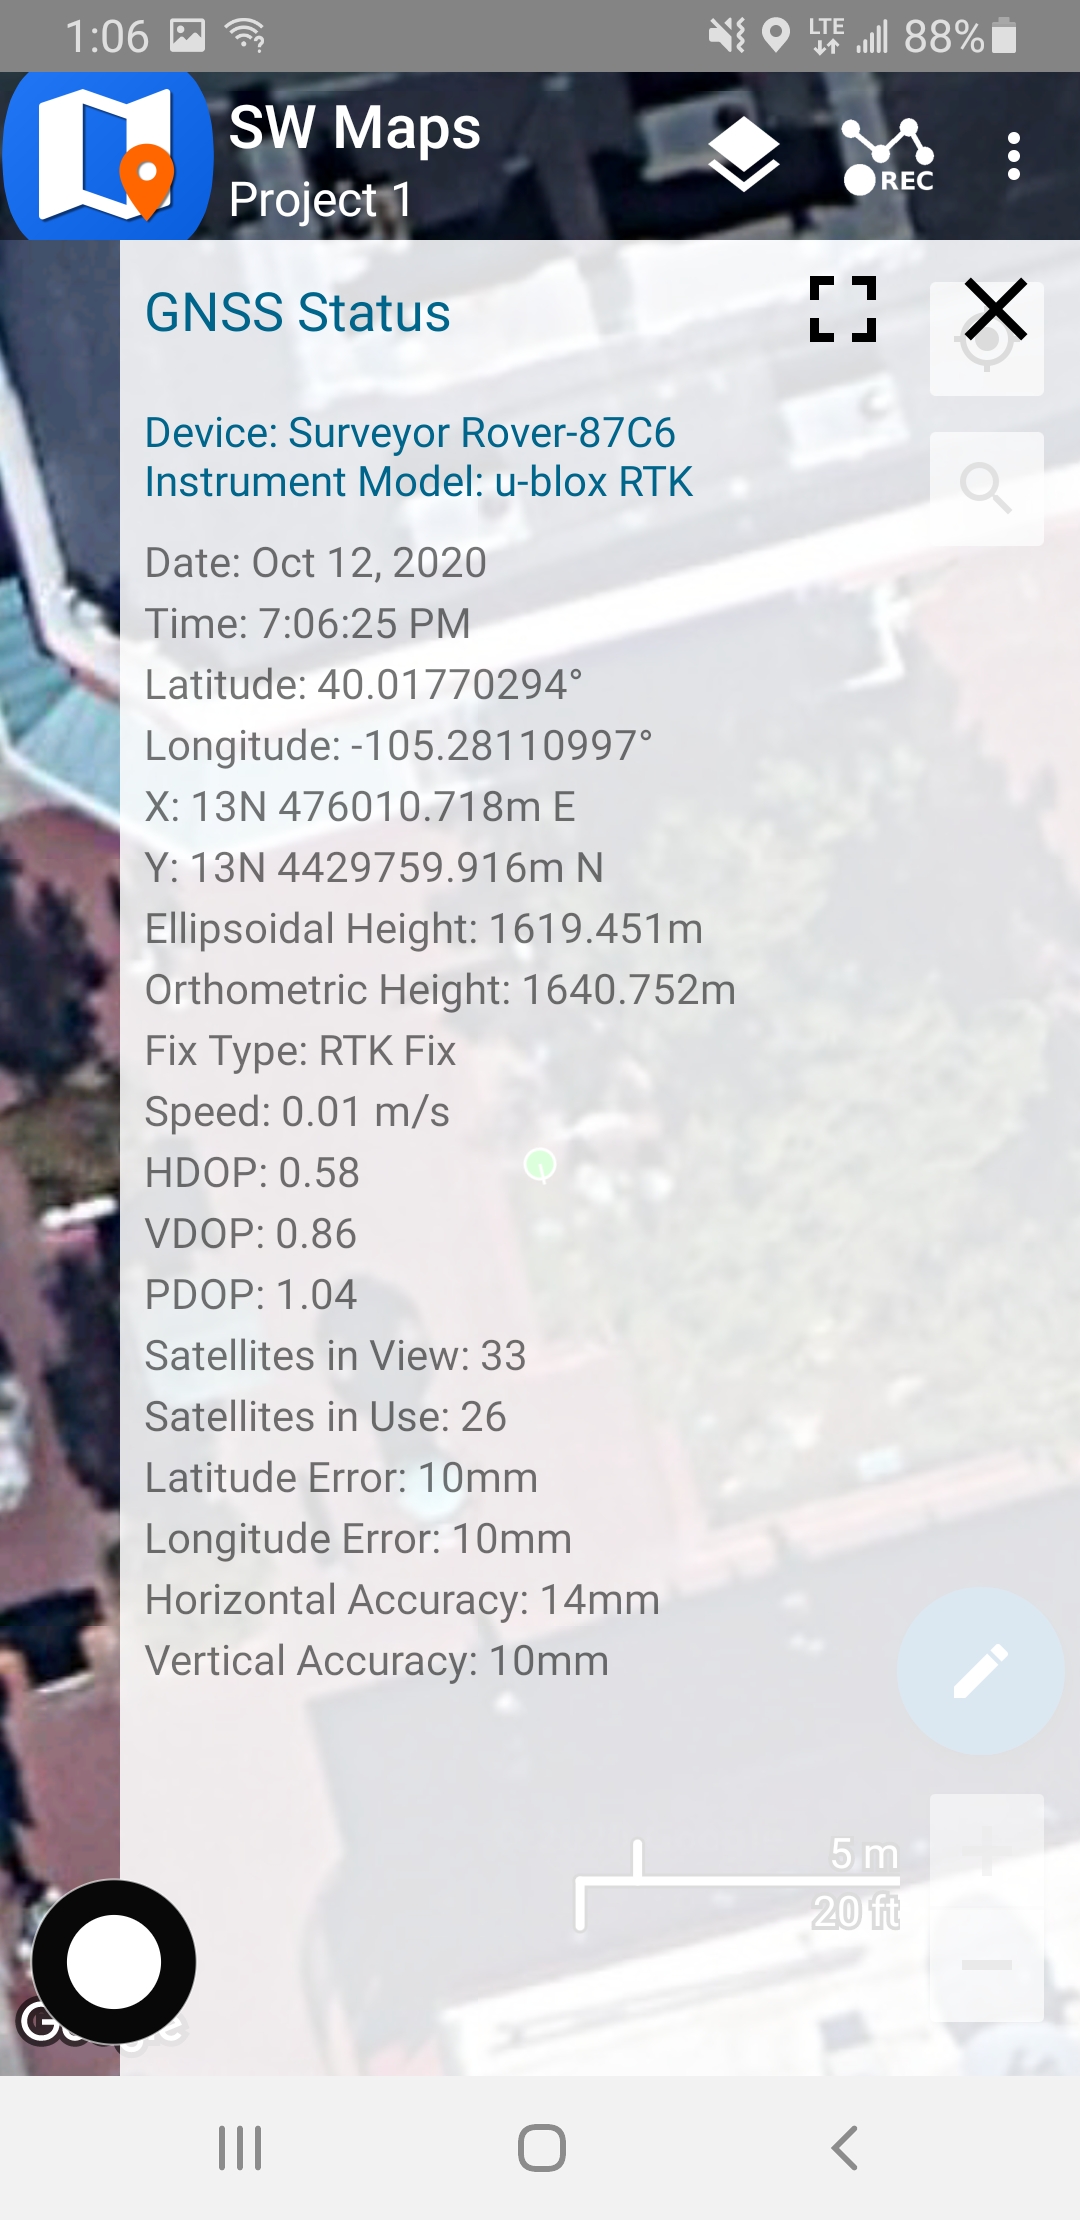
That’s it! This rover module is now ready for the field. It is still recommended to have u-center handy to view the status of the rover as it receives RTCM corrections. As the rover receives RTCM it will quickly move from a 3D fix, to RTK Float, to RTK Fix.
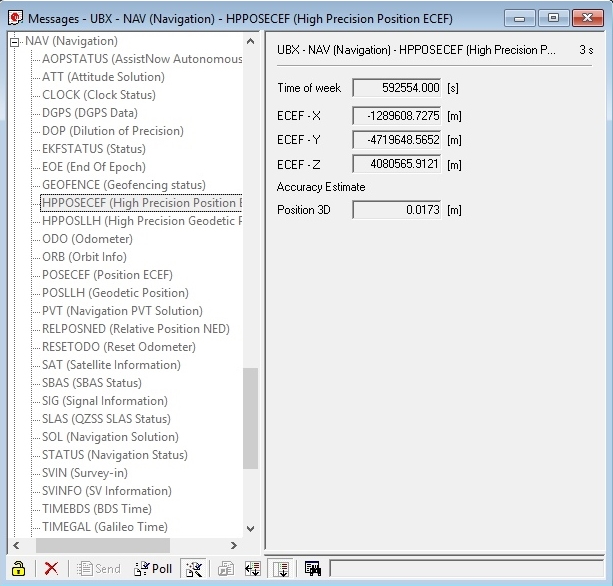
There are a few messages to watch while the rover achieves RTK Fix. NAV/HPPOSECEF will show overall positional accuracy, NAV/HPPOSLLH will show the horizontal accuracy. NAV/PVT will show the fix type as it progresses from 3D, to RTK Float, to RTK Fixed.
- RTK LED On = Regular Satellite Mode
- RTK LED Blinking = RTK Float, ~<500mm accuracy
- RTK LED Off = RTK Fix, 14mm acurracy
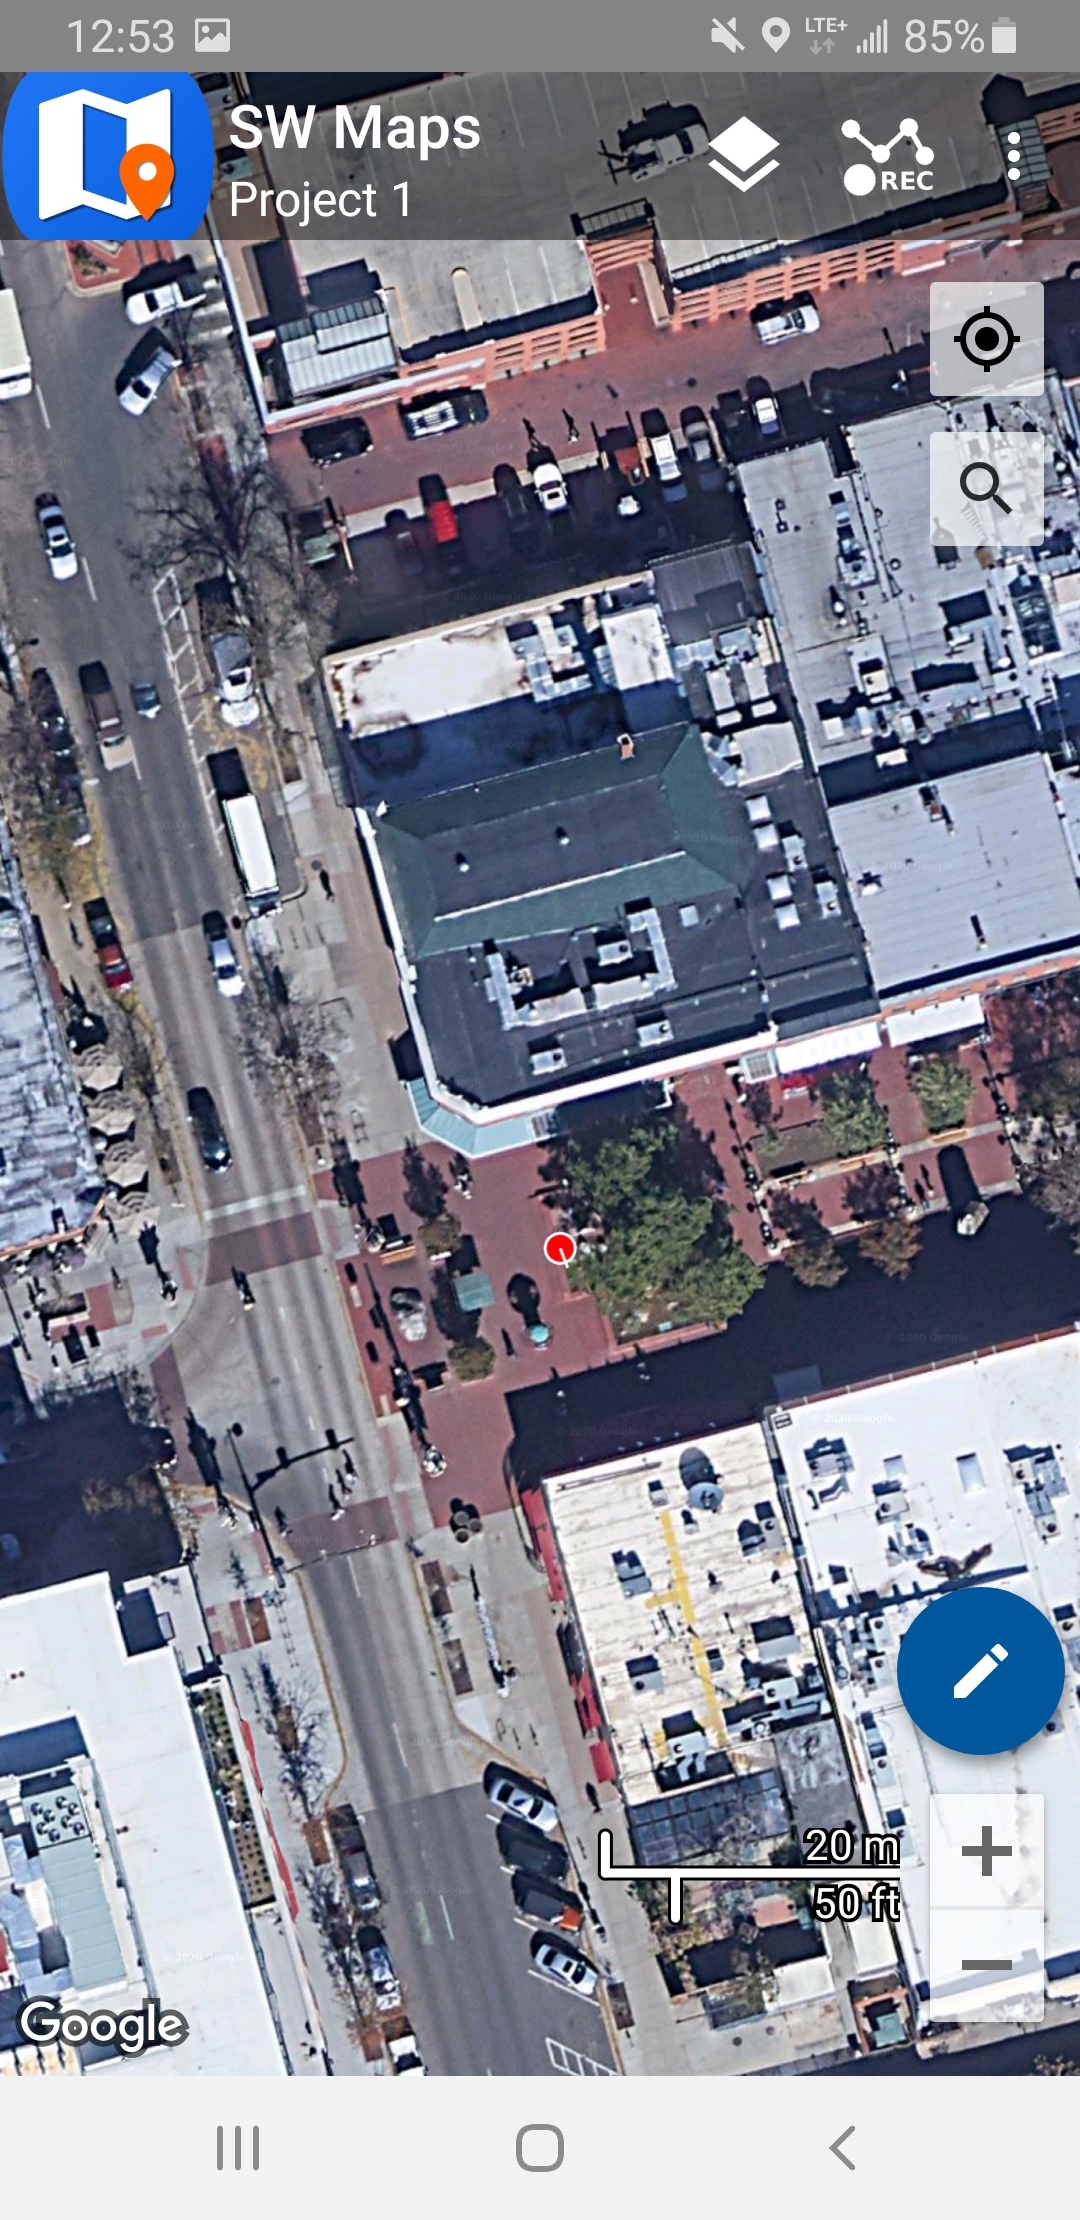
Once the rover has achieved RTK fixes, what next? The ZED-F9P will be outputting high-precision coordinates UART1 and USB. Any microcontroller that can parse serial can figure out where it is in the world with millimeter accuracy. For surveying applications, we have been blown away with the android app SW Maps. Made by an impressive team in Nepal, SW Maps is a superb app to connect to ZED-F9Ps and record various GIS and surveying points of interest (POI).
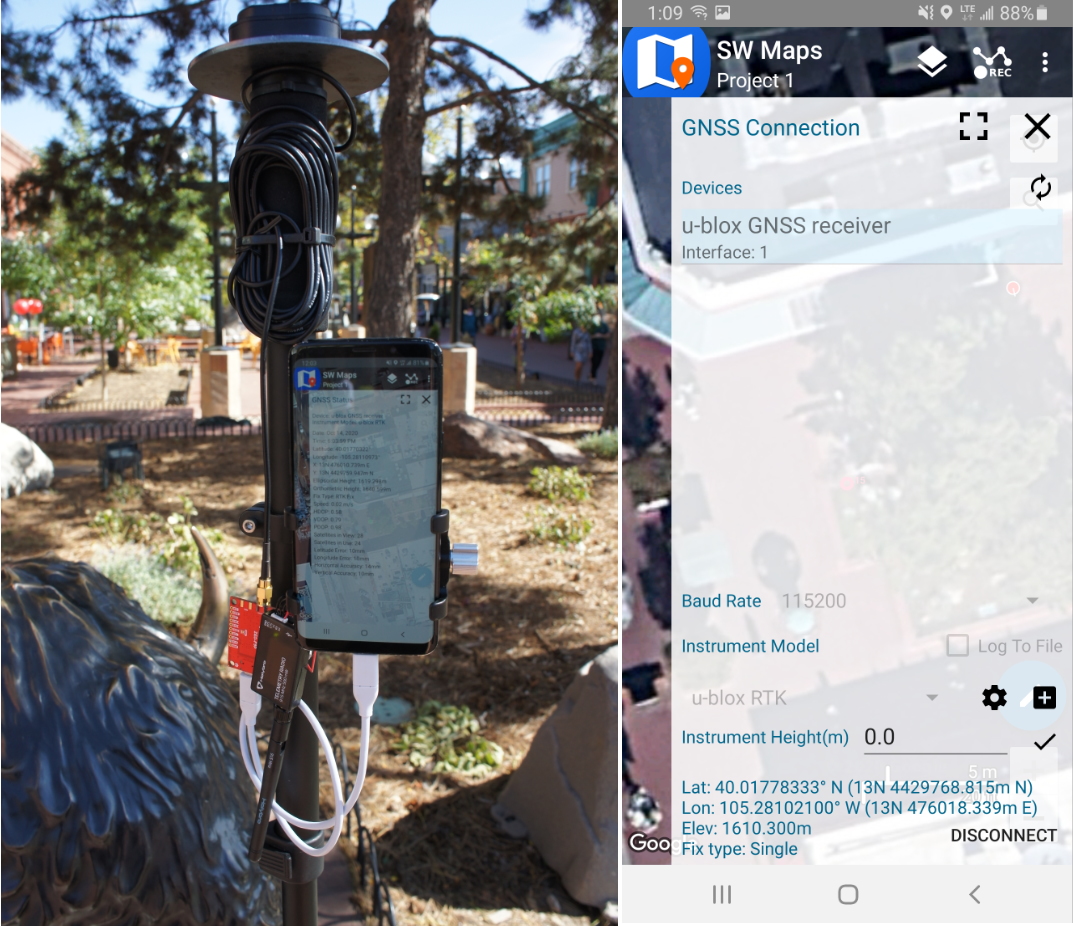
Connecting a ZED-F9P to SW Maps is as simple as a USB C to C cable (assuming your cell phone is USB-C, microB OTG also works). The ZED-F9P will show up as a serial device on Android. SW Maps will connect and display all the position data, RTK status, give the user the ability to record waypoints, tracks, survey information, and notes; perfect for DIY surveying of infrastructure and properties.
In the image above we are using a camera monopod with a bolt on cell phone holder and have been really pleased with the setup (be sure to get a holder capable of 1" / 27mm diameter in order to bolt to the monopd).
Note: If you plan to use SW Maps there are two additional settings that we recommend setting with u-center before going into the field.
- Enable GxGST messages

Turning on the GxGST NMEA sentence will transmit the various, lat, long, horizontal, and vertical positional errors. This sentence is needed to see the values in SW Maps GNSS Status window.
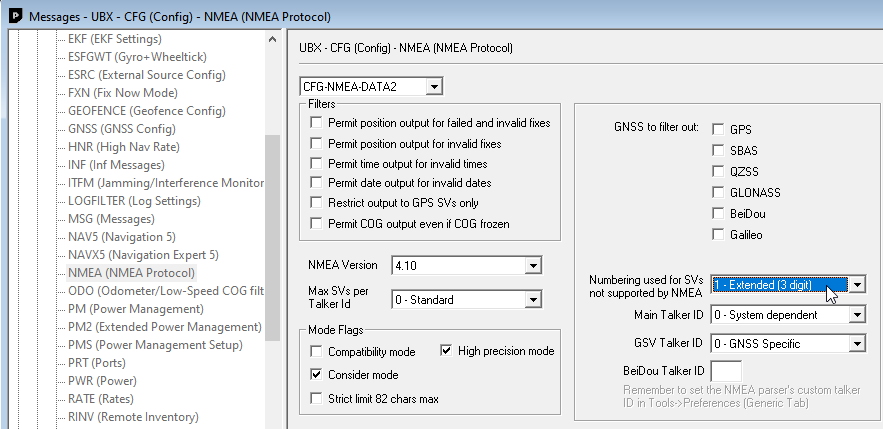
- Enable High Precision mode
This will extend the decimals of Lat/Long and setting the Numbering used for SVs will get around a NMEA limit for satellites in view. And High precision NMEA increases the number of decimal places from 5 to 7.
$GNGLL,4005.42027,N,10511.08674,W,180753.00,A,D*63
$GNGLL,4005.4202248,N,10511.0867652,W,180817.00,A,D*60
Again, if you plan to use these settings on a regular basis consider saving them to BBR/Flash so that they will be loaded at each power-on.
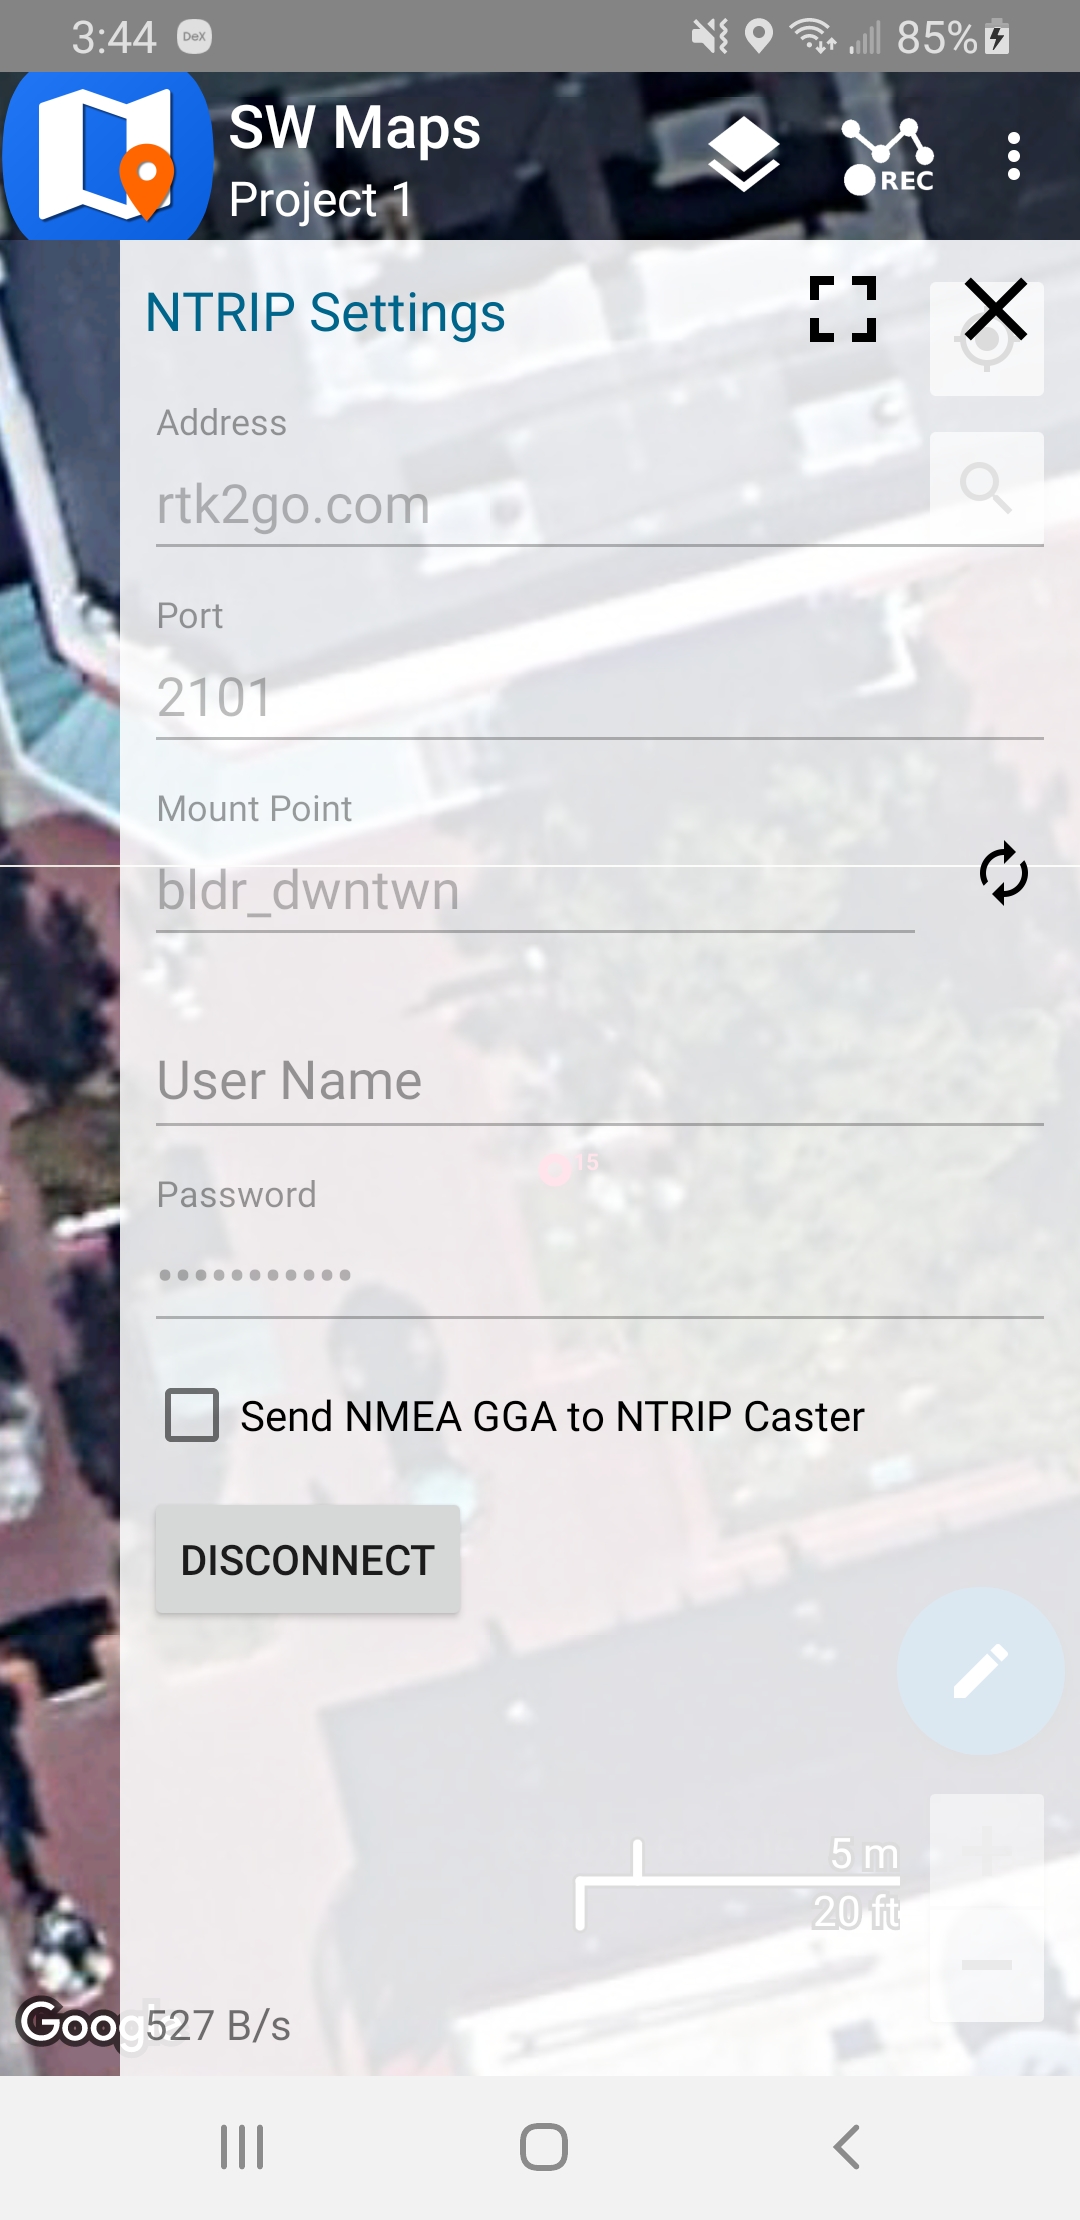
In addition to being able to connect directly to u-blox receivers, when you select a u-blox RTK receiver inside SW Maps and connect, you will be able to enable an NTRIP Client. Once logged in to an NTRIP caster, your phone will download the correction data from the server over its cellular connection and pass the RTCM to the GNSS receiver over USB. SW Map is just amazing! Note: In this example we are using the 915MHz Serial Telemetry Radios to transmit the RTCM correction data so you do not need to connect an NTRIP Client for corrections... But you can see where we are headed in the next tutorial!
Troubleshooting RTCM
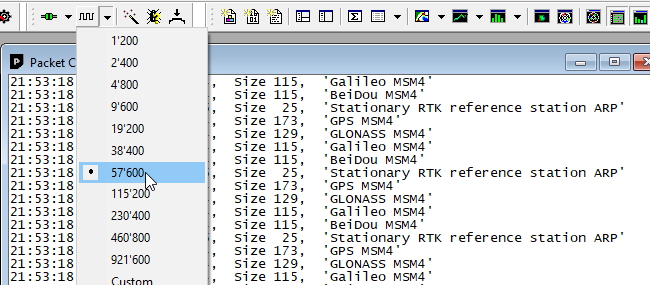
If you’re unsure RTCM messages are coming through the RF link, disconnect the JST cable from the radio on the rover and attach a microB USB cable into the 915MHz radio. This will create a COM port. Open u-center and connect to the radio at 57600bps as if it were a GNSS receiver. Then open the packet console. If RTCM messages are being received from the base, u-center will correctly interpret the incoming RTCM messages and display them in the packet console.