RETIRED - Raspberry gPIo
This Tutorial is Retired!
This tutorial covers concepts or technologies that are no longer current. It's still here for you to read and enjoy, but may not be as useful as our newest tutorials.
View the updated tutorial: Raspberry gPIo
 jimblom
Introduction
The Raspberry Pi is unique in the world of embedded electronics. Relative to its size, it's a powerhorse of a computer -- it can drive HDMI displays, process mouse, keyboard, and camera inputs, connect to the Internet, and run full-featured Linux distributions. But it's more than just a small computer, it's a hardware prototyping tool! The Pi has 17 bi-directional I/O pins, which you can use to drive LEDs, spin motors, or read button presses.
Driving the Raspberry Pi's I/O lines requires a bit of programming. Programming in what language? Take your pick! A quick glance at the Raspberry Pi GPIO examples shows that there are dozens of programming-language-choices. We've pared that list down, and ended up with two really solid, easy tools for driving I/O: Python and C (using the WiringPi library).
If you've never driven an LED or read in a button press using the Raspberry Pi, this tutorial should help to get you started. Whether you're a fan of the easily-readable, interpretive scripting language Python or more of a die-hard C programmer, you'll find a programming option that suits our needs.
Covered In This Tutorial
In this tutorial we'll show two different approaches to reading and driving the Raspberry Pi's GPIO pins: python and C. Here's a quick overview of what's covered:
- GPIO Pinout -- An overview of the Pi's 26-pin GPIO header.
- Python API and Examples
- RPi.GPIO API -- An overview of the Python functions you can use to drive GPIO.
- RPi.GPIO Example -- An example Python script that shows off both input and output functionality.
- C (and WiringPi) API and Examples
- WiringPi Setup and Test -- How to install WiringPi and then take it for a test drive on the command line.
- WiringPi API -- An overview of the basic functions provided by the WiringPi library.
- WiringPi Example -- A simple example program that shows off WiringPi's input and output capabilities.
- Using an IDE -- How to download and install Geany. Our favorite IDE for programming on the Raspberry Pi.
Each programming language has it's share of pros and cons. Python is easy (especially if your a programming novice) and doesn't require any compilation. C is faster and may be easier for those familiar with the old standby.
What You'll Need
Here's a wishlist-full of everything we used for this tutorial.
Some further notes on that bill of materials:
- Your Raspberry Pi should have an SD card with Raspbian installed on it. Check out our How to Install Raspbian tutorial for help with that.
- We're also assuming you have the necessary mouse, keyboard and display hooked up to your Pi.
- Your Pi will need an Internet connection to download WiringPi. You can use either Ethernet or WiFi (check out our Raspberry Pi WiFi tutorial for help with that.
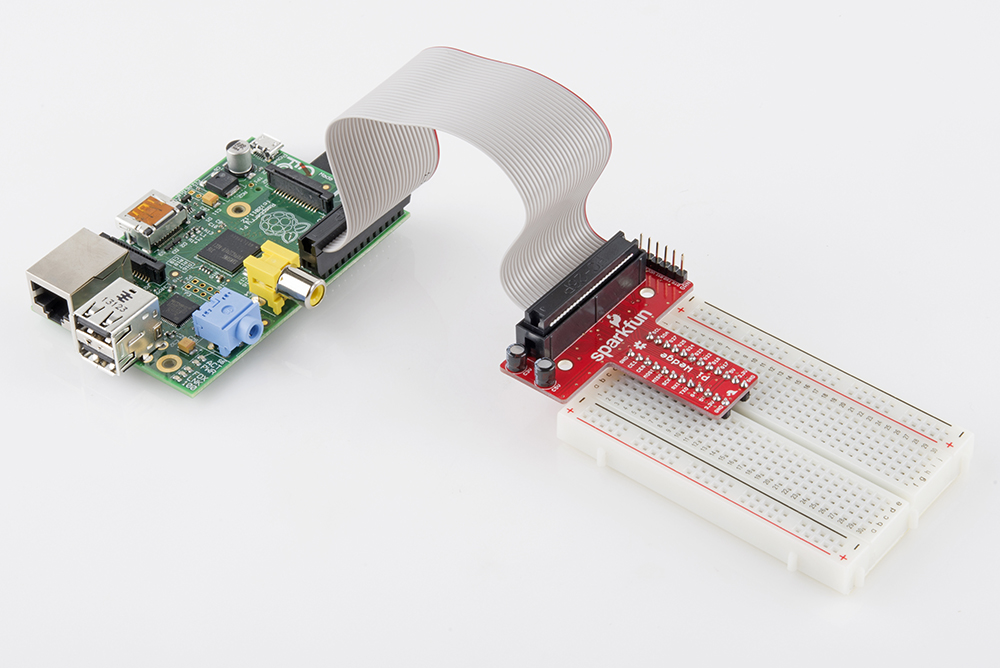
- The Pi Wedge isn't quite required, but it does make life a lot easier. If you want to skip the breakout, you can instead use Male-to-Female jumpers to connect from Pi to breadboard.
- Of course, feel free to swap in your preferred button and LEDs.
Suggested Reading
This tutorial will assume you have Raspbian installed on your Raspberry Pi. Raspbian is the most popular, well-supported Linux distribution available for the Pi. If you don't have Raspbian set up, check out our Setting Up Raspbian tutorial before continuing down this rabbit hole.
Other, more general purpose tutorials you might be interested in reading include:
- Pulse-Width Modulation -- You can use PWM to dim LEDs or send signals to servo motors. The RPi has a single PWM-capable pin.
- Light-Emitting Diodes (LEDs) -- To test the output capabilities of the Pi, we'll be driving a lot of LEDs.
- Switch Basics -- And to test inputs to the Pi, we'll be using buttons and switches.
- Pull-Up Resistors -- The Pi has internal pull-up (and pull-down) resistors. These are very handy when you're interfacing buttons with the little computer.
Suggested Viewing
Check out our Raspberry Pi video tutorials if you want a more visual introduction to the Pi!