RETIRED - Raspberry gPIo
This Tutorial is Retired!
This tutorial covers concepts or technologies that are no longer current. It's still here for you to read and enjoy, but may not be as useful as our newest tutorials.
View the updated tutorial: Raspberry gPIo
 jimblom
Python (RPi.GPIO) Example
Follow along as we use the basic RPi.GPIO functions from the last page to create a simple example GPIO script.
1. Create a File
To begin, we need to create a Python file. You can do this through the GUI-based file explorer. Or, if you want a terminal-based solution, open up LXTerminal, and navigate to a folder you'd like the file to live (or create one). And create a new folder with these commands:
pi@raspberrypi ~/code $ mkdir python
pi@raspberrypi ~/code $ cd python
Create a file -- we'll call ours "blinker" -- and terminate it with a .py extension. Then open it up in your favorite text editor. Nano works, as does Pi's default GUI text editor, Leafpad.
pi@raspberrypi ~/code/python $ touch blinker.py
pi@raspberrypi ~/code/python $ leafpad blinker.py &
That'll open up a blank text file (the "&" will open it in the background, leaving the terminal in place for future use). Time for some code!
2. Codify
Here's an example sketch that incorporates everything we learned on the last page. It does a little input and output, and even handles some PWM. This assumes you've set up the circuit as arranged on the Hardware Setup page.
language:Python
# External module imports
import RPi.GPIO as GPIO
import time

# Pin Definitons:
pwmPin = 18 # Broadcom pin 18 (P1 pin 12)
ledPin = 23 # Broadcom pin 23 (P1 pin 16)
butPin = 22 # Broadcom pin 22 (P1 pin 15)

dc = 95 # duty cycle (0-100) for PWM pin

# Pin Setup:
GPIO.setmode(GPIO.BCM) # Broadcom pin-numbering scheme
GPIO.setup(ledPin, GPIO.OUT) # LED pin set as output
GPIO.setup(pwmPin, GPIO.OUT) # PWM pin set as output
pwm = GPIO.PWM(pwmPin, 50)  # Initialize PWM on pwmPin 100Hz frequency
GPIO.setup(butPin, GPIO.IN, pull_up_down=GPIO.PUD_UP) # Button pin set as input w/ pull-up

# Initial state for LEDs:
GPIO.output(ledPin, GPIO.LOW)
pwm.start(dc)

print("Here we go! Press CTRL+C to exit")
try:
    while 1:
        if GPIO.input(butPin): # button is released
            pwm.ChangeDutyCycle(dc)
            GPIO.output(ledPin, GPIO.LOW)
        else: # button is pressed:
            pwm.ChangeDutyCycle(100-dc)
            GPIO.output(ledPin, GPIO.HIGH)
            time.sleep(0.075)
            GPIO.output(ledPin, GPIO.LOW)
            time.sleep(0.075)
except KeyboardInterrupt: # If CTRL+C is pressed, exit cleanly:
    pwm.stop() # stop PWM
    GPIO.cleanup() # cleanup all GPIO
After you've typed all of that in (don't forget your whitespace!) save.
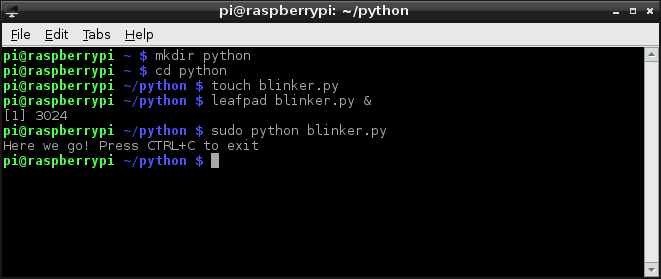
Running the Script
The RPi.GPIO module requires administrator privileges, so you'll need to tag a sudo on to the front of your Python script call. To run your "blinker.py" script, type:
pi@raspberrypi ~/code/python $ sudo python blinker.py
With the code running, press the button to turn on the digital LED. The PWM-ing LED will invert its brightness when you press the button as well.
Press CTRL+C to cleanly exit the script.