Using pcDuino's WiFi Dongle With the Pi
This Tutorial is Retired!
This tutorial covers concepts or technologies that are no longer current. It's still here for you to read and enjoy, but may not be as useful as our newest tutorials.
 jimblom
Introduction
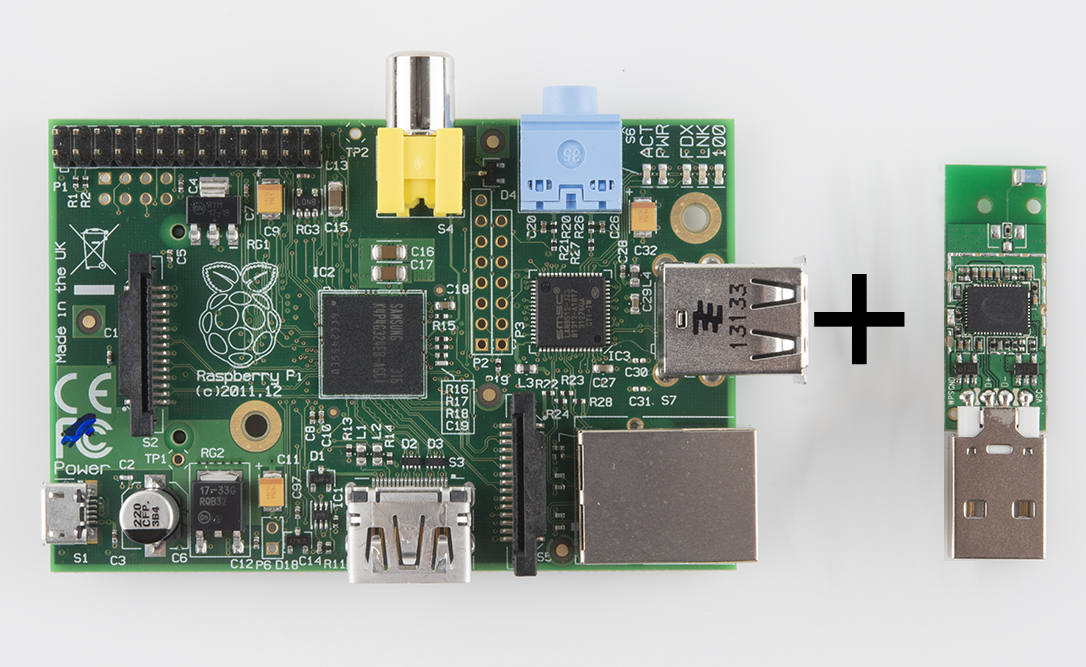
This quick tutorial aims to show you the steps required to set up the pcDuino WiFi Dongle with everyone's favorite fiberglass-flavored development board: the Raspberry Pi (model B or model A).
This WiFi dongle is a cheap solution to adding network connectivity to your Pi, if you don't have Ethernet nearby. It's easy to set up, once you get the hang of editting text files and typing Linux commands. It's not quite plug-and-play-easy, but it's easy enough.
Required Materials
- pcDuino WiFi Dongle
- Powered USB Hub with at least 3 ports
- Raspberry Pi with these accessories:
- USB mouse and keyboard
- 4+ GB SD card with Rasbpian installed and set up
- 5V USB power supply that can source at least 700mA, and a micro-B USB cable to connect between it and the Pi
- Display connected to the Pi via either HDMI or component
Suggested Reading
This tutorial assumes you have Raspbian installed on your Pi. If you haven't gotten that far, head over to our Setting Up Raspbian tutorial first.
This tutorial is all terminal based. Unfortunately, we haven't been able to get the GUI-based WiFi Config utility to work. So flex your typing fingers and/or prepare to copy/paste a lot of command lines!
Hardware Setup
There's not a whole lot to this hardware setup:
- Power down the Pi.
- Find an open USB slot.
- Plug the WiFi Adapter into USB slot.
- ???
- Profit
The trick is finding a USB slot on the Pi. It's only got two, and those are often swallowed up by a keyboard and mouse. If you're out of available USB slots, you'll need to find a powered USB hub to get more USB space.
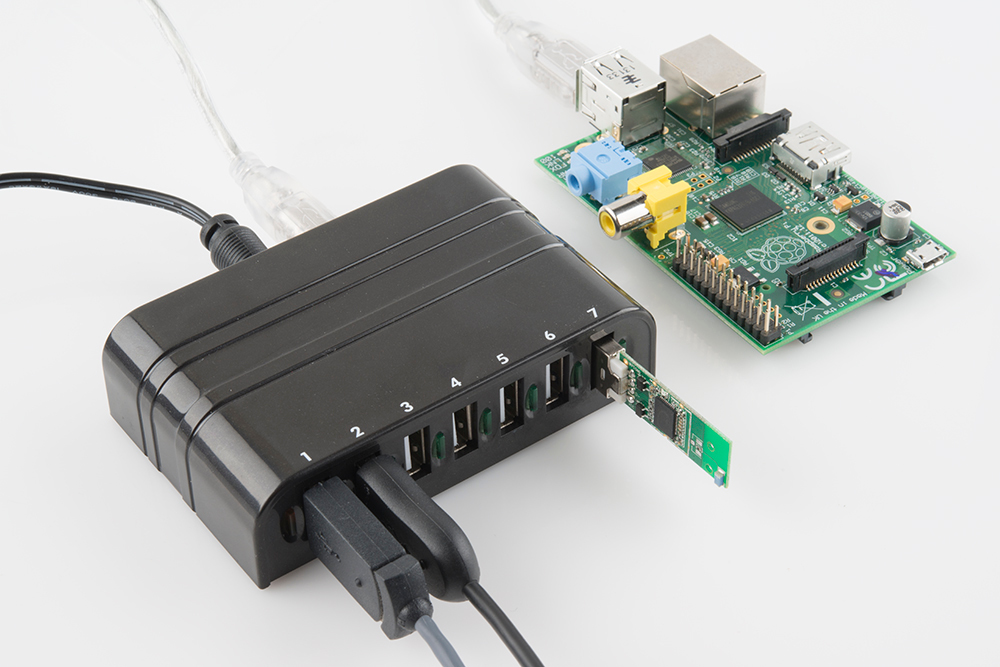
Make sure the hub is powered. The WiFi adapter can pull a lot of current, which the Pi isn't especially well-suited to sourcing.
Note: It's possible to perform this setup with solely a USB keyboard, plugging that and the WiFi adapter into the Pi's USB sockets. We generally recommend against this, as the WiFi adapter can pull a lot of current and potentially damage the Pi. Attempt at your own risk!
Verifying the Driver
After connecting the adapter to your Pi, go ahead and power it up. Once the Pi has booted up, open up LXTerminal and issue this command:
pi@raspberrypi ~ $ lsusb
This will list all USB devices attached to the Pi. Among other things, like your keyboard and mouse, you should see a listing for a Ralink Technology Corp. RT5370 Wireless Adapter.
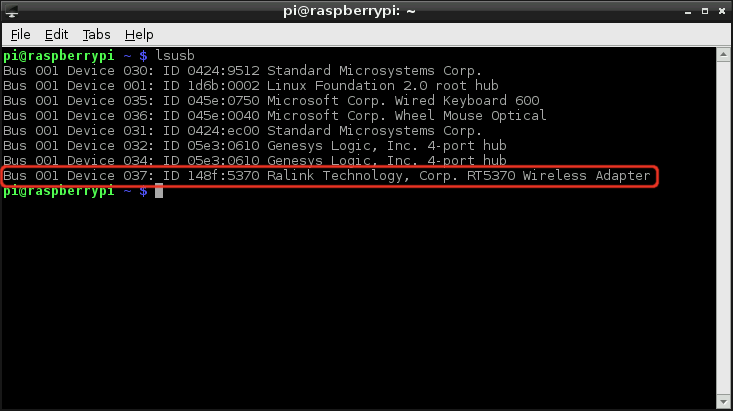
That's the WiFi adapter, and it's a good sign if you see that. It means the adapter has been recognized, and the RT2800 USB driver should have been installed for it.
Edit interfaces
There are two configuration files we need to edit to set up WiFi:
- /etc/network/interfaces -- Configures DHCP (or static) and tells the wireless utility where to look for your authentication settings.
- /etc/wpa_supplicant/wpa_supplicant.conf -- Stores your wireless network's SSID and authentication settings.
To edit both of these files we'll use Nano, Raspbian's default terminal text editor.
Open up LXTerminal to begin. Then, to open interfaces with the Nano editor, enter this command:
pi@raspberrypi ~ $ sudo nano /etc/network/interfaces
That command will open interfaces in Nano. By default it should look like this:

First delete or (if you're a digital packrat) comment out the bottom three lines (iface wlan0 inet manual, wpa-roam /etc/wpa_supplicant/wpa_supplicant.conf, and iface default inet dhcp).
Next, following line 4 (iface eth0 inet dhcp), add these six lines:
auto wlan0
iface wlan0 inet dhcp
    wireless mode managed
    wireless essid any
    wpa-driver wext
    wpa-conf /etc/wpa_supplicant/wpa_supplicant.conf
All done! Save interfaces by pressing CTRL+O, keep the file name the same when it asks. Then exit with CTRL+X. Your new interfaces files should look like this:
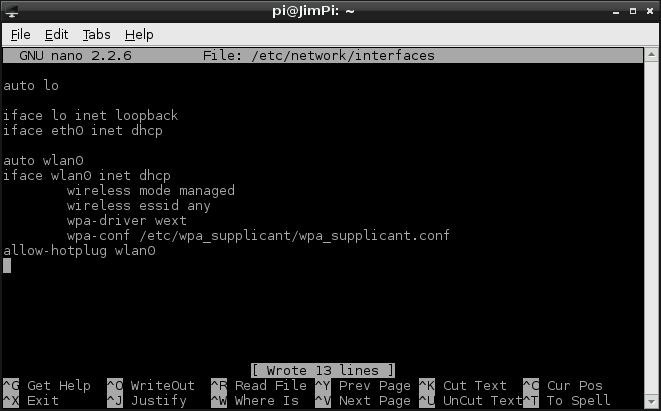
This is a fairly generic configuration that sets the Pi up to receive an IP address dynamically, through DHCP.
If your network requires that you statically assign an IP you'll need to use something like this instead:
iface wlan0 inet static
    address 192.168.0.101
    netmask 255.255.255.0
    network 192.168.0.0
    broadcast 255.255.255.255
    gateway 192.168.0.1
    wireless mode managed
    wireless essid any
    wpa-driver wext
    wpa-conf /etc/wpa_supplicant/wpa_supplicant.conf
Make sure to modify the IP addresses to match the needs of your network.
Now that our network interface is configured, the next step is to specify the SSID and authentication parameters, which we'll do in wpa_supplicant.conf.
Edit wpa_supplicant.conf
wpa_supplicant.conf is a configuration file for wpa_supplicant, a piece of software used to implement WPA and other security protocols that WiFi networks implement.
Before continuing on, you should know what kind of security protocol (WPA, WPA2, WPA-PSK, WPA2-PSK, etc) your network requires. And, obviously, you'll need to know the name (SSID) of your network as well.
Open wpa_supplicant.conf in Nano with this command:
pi@raspberrypi ~ $ sudo nano /etc/wpa_supplicant/wpa_supplicant.conf
Lot's of typing! For lazy folk, don't forget you can press Tab to ask the terminal to try to finish a directory location for you.
By default, wpa_supplicant.conf should have two lines at the top:
ctrl_interface=DIR=/var/run/wpa_supplicant GROUP=netdev
update_config=1
Leave those be, we'll be adding some extra information below them.
Now it's time to "choose your own adventure". What, exactly, you fill this file out with depends on your network's authentication protocols. Here are a few example configurations for the file:
Open Authentication With No Encryption
This is about as basic as it gets. If you're trying to connect to an open network, all you need to know is the SSID:
network={
    ssid="yourNetworkSSID"
    key_mgmt=NONE
}
Just replace yourNetworkSSID with your WiFi network's name.
Network with Authentication (WPA, WPA2-PSK, etc)
If your network does require authentication with a passkey, you'll need to enter two parameters:
network={
    ssid="yourNetworkSSID"
    psk="yourNetworkPassword"
}
Again, pretty bare bones. This should work for networks using WPA and WPA2-PSK, and should be agnostic to the cipher (TKIP, CCMP).
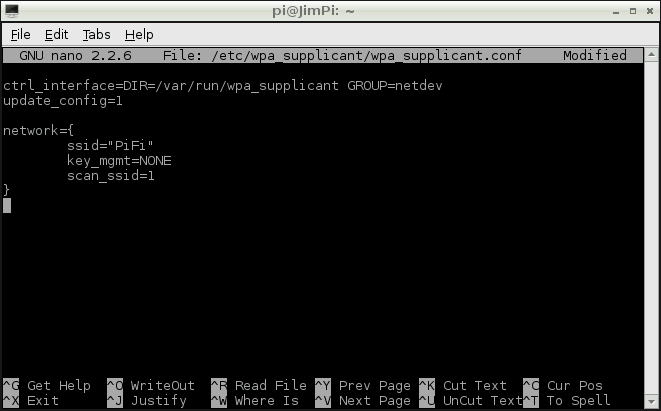
Non-Broadcasting Network
If your network does not broadcast its SSID, you'll need to add scan_ssid=1 to the list. For example, here's a configuration for a hidden open network with no authentication:
And the Rest...
There are all sorts of options to be added to this configuration list. You can enforce which cipher is accepted, set up priorities, private keys, etc. For a really great breakdown of everything you can add to wpa_supplicant.conf check out this page.
After editing wpa_supplicant.conf make sure to save, and exit. If you hit CTRL+X it'll prompt you to save before you exit.
The final step is restarting the network interface. Cross your fingers, and hope that all of the settings here are correct, then jump the penultimate page.
ifdown and ifup wlan0
The last step, after you've modified interfaces and wpa_supplicant.conf is to restart the wireless interface.
First, we'll assume that the network is up. We need to bring the wlan0 interface down, which can be done with this command:
pi@raspberrypi ~ $ sudo ifdown wlan0
You'll either get a response that DHCP was released, and the interface has been disabled, or (more likely) the Pi will tell you that it's already down. Fine! Just making sure.
Next, send this to bring wlan0 up:
pi@raspberrypi ~ $ sudo ifup wlan0
Now you should see lots of text start to scroll by as the Pi attempts to connect to the network listed in the configuration file. This is the real test. If everything you configured on the last page is correct, the last message before returning your command of the terminal should be something like bound to 192.168.0.101 -- renewal in 398425 seconds. There's your IP, and confirmation that you've connected to the network!
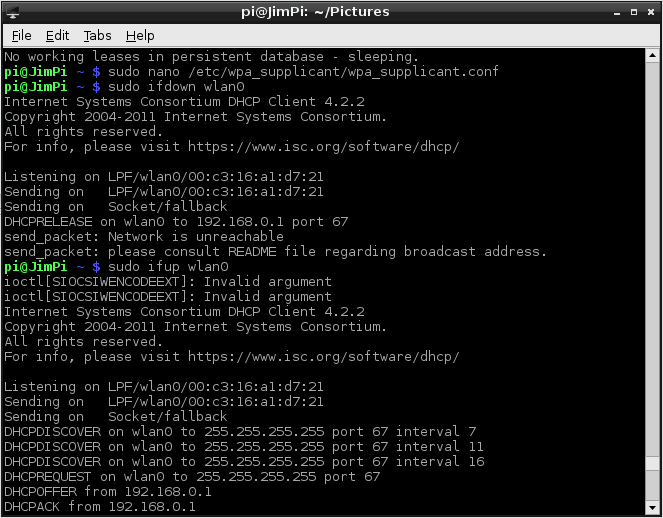
On the other hand, if you get more than a few repeated messages like DHCPDISCOVER on wlan0 to 255.255.255.255 port 67 interval #, and eventually get a DHCP failure message, you probably have something configured incorrectly. Double-check everything in wpa_supplicant.conf, or you may have to resort to statically assigning IPs if your network demands it. (A lot of times it's just a typo in one of the two files.)
Useful Utilities
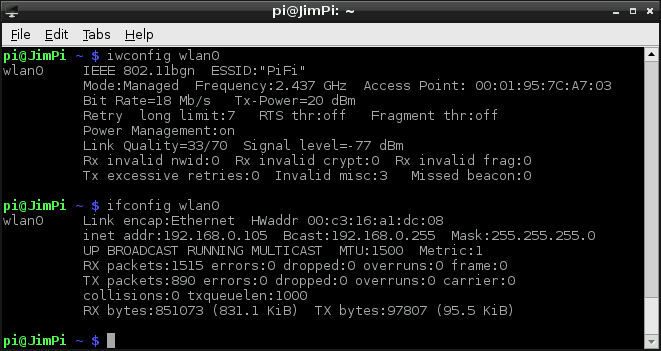
If you ever forget your IP address, type ifconfig wlan0 into the terminal to be reminded. You can also try iwconfig wlan0 if you want to find out some statistics and other settings related to your wireless interface.
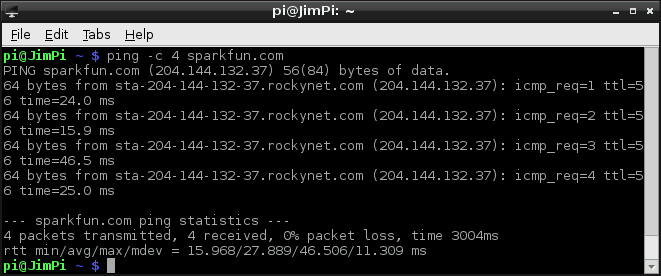
If you just want to verify whether you're connected to the Internet or not, ping and traceroute are great utilities. Try ping -c 4 sparkfun.com, and hopefully you'll receive four, healthy, fast responses.
Resources and Going Further
Now that your Pi is Internet-connected, you can do all sorts of fun network-related stuff:
- There is, of course, Internet browsing using the Midori web-browser
- You can also make a Twitter-activated LED by following along with our Raspberry Pi Twitter Monitor tutorial
SparkFun Resources