Raspberry gPIo
 jimblom,
  MTaylor
Using an IDE!
Thus far we've been using simple text-editors -- Leafpad or Nano -- to write our Python and C programs. So seasoned programmers are probably missing a whole lot of features assumed of even the most basic editors: auto-tabbing, context-highlighting, even automated building. If you want to incorporate any of those features, we recommend using an IDE (integrated development environment). One of our favorite Pi IDE's is Geany, here's how to get it up and running.
Download and Install Geany
Geany isn't included with Raspbian, so you'll need an Internet connection to download it. You can use the magical apt-get utility. First you will need to enter the following command.
language:bash
sudo apt-get update
Once updated, you can install it with this command.
language:bash
sudo apt-get install geany
Once installed, you can run Geany by going to the "Start" menu, and looking under the "Programming" tab.

Or, from the terminal, you can type sudo geany. You can even open a file in Geany, directly from the command line. To open our previous C file, for example, type sudo geany blinker.c.
Using Geany...
Once Geany is running, you can create a new file by going to File > New. Saving the file as either ".c" or ".py" (or any other common language file extension) will immediately inform Geany what kind of language you're working with, so it can start highlighting your text.
Geany can be used with most languages, including the Python and C examples we've just examined. Some tweaks to the default IDE options are necessary, though. Here's an overview of using Geany with each language.
...with C and WiringPi
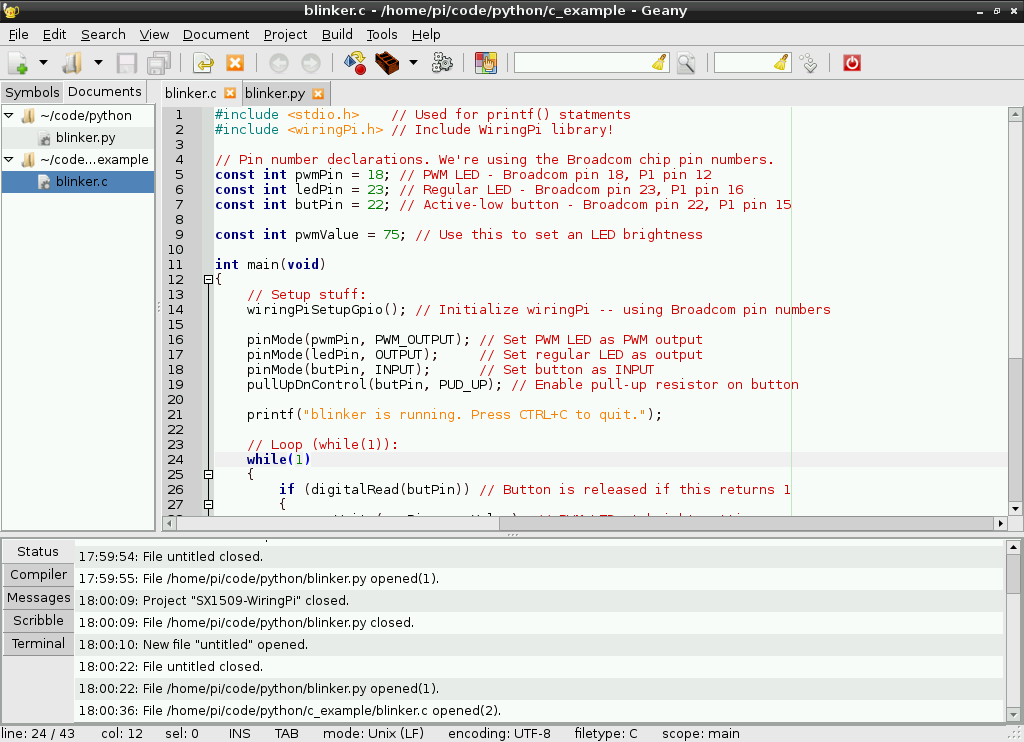
Let's recreate our WiringPi Example with Geany. Open the "blinker.c" created earlier within the confines of Geany. You should immediately be presented with some very pleasant color-coding.
Before trying to compile the code, though, you'll need to tweak some of the build options. Go up to Build and Set Build Commands. Inside the "Compile" and "Build" text blocks, tack this on to the end of the default command: -l wiringPi. That will load the wiringPi library.
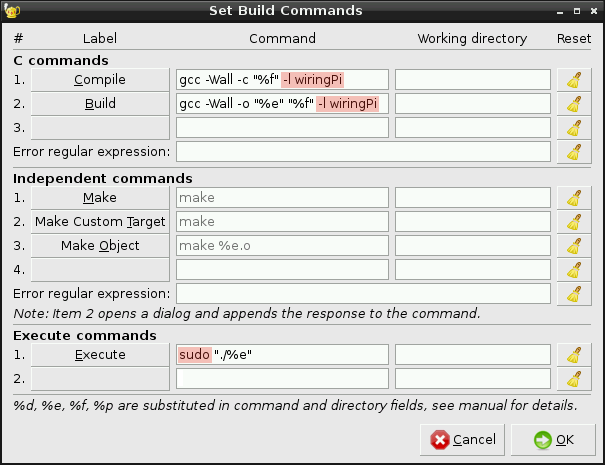
While you're here, add "sudo" to the beginning of your execute command. Make sure your build commands look like the window above and click "OK".
Once you've adjusted that setting, you should be ready to go. Click the Build menu, then click Build (or click the red cinder-block-looking icon up top). Upon building, the IDE will switch focus to the bottom "Compiler" tab, and relay the results of your compilation. If the build was successful, go ahead and run with it.
To run your built file, click Build > Execute (or click the gear icon up top). Executing will bring up a new terminal window, and start your program running. You can stop the program by pressing CTRL+C in the terminal window.
...with Python
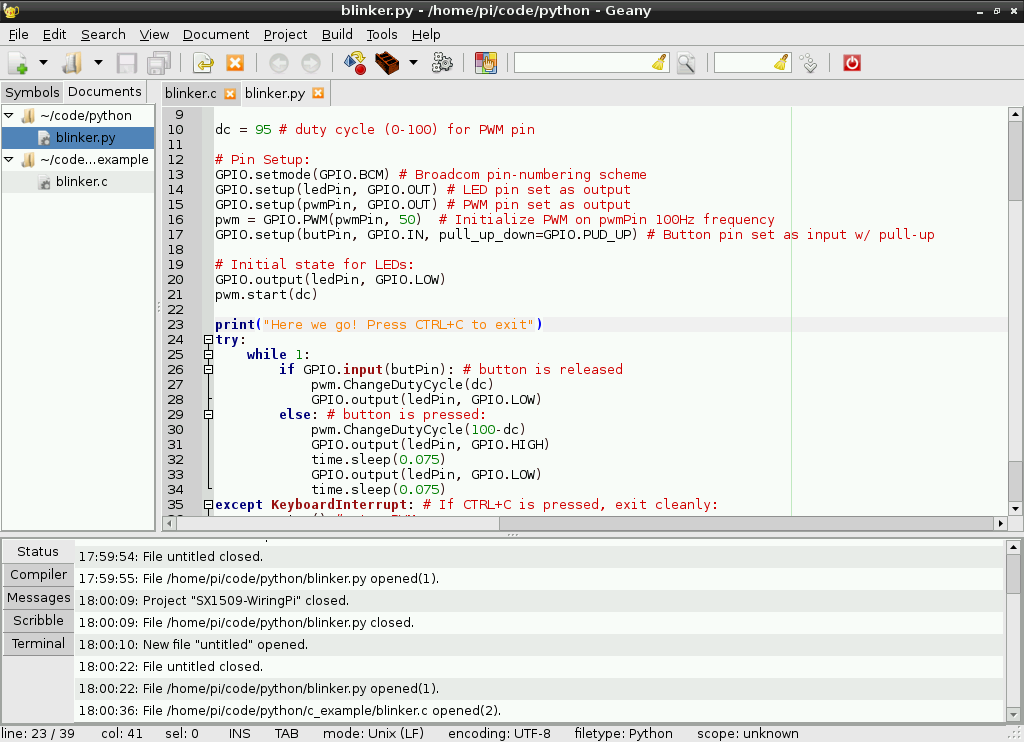
You can also use Geany with Python. To test it out, go ahead an open up the "blinker.py" file we created earlier. As with the C file, you'll be greeted with some pleasnt context highlighting.
No building required with Python! Once you're script is written, simply click the "Execute" gear up top. Again, running will produce a separate terminal to pop up. To exit, simply press CTRL+C.
Geany has tons of features beyond what we've covered here. Check out the tabs at the bottom. Check out the menus up top. Experiment and see how the IDE can make your programming life easier!