Qwiic Pro Micro USB-C (ATmega32U4) Hookup Guide
 bboyho
Setting Up Arduino
We're still not completely ready for Arduino, but this is the final stretch. Before you can use the Qwiic Pro Micro in the Arduino IDE, you'll need to install the board (*.brd) files for the Qwiic Pro Micro so the Arduino IDE will know how to communicate with your board. Jump to the section based on your operating system for instructions on how to install the board files so that you can select the SparkFun Pro Micro, ATmega32U4 (5V, 16MHz).
Installing the Arduino Addon Windows
Using the Board Manager
Since the release of Arduino 1.6.4, adding third party boards to the Arduino IDE is easily achieved through the board manager. If you're running an older version of Arduino (v1.6.3 or earlier), we recommend upgrading now. As always, you can download the latest version of Arduino from arduino.cc.
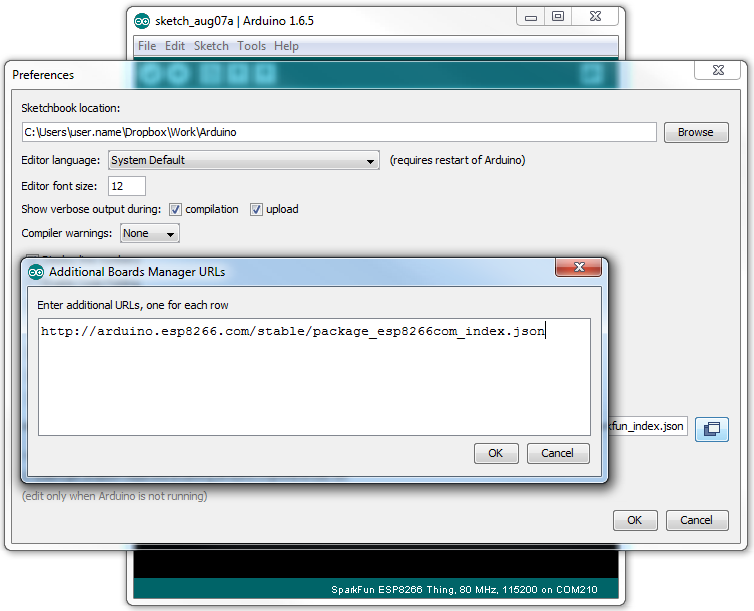
To begin, you'll need to point the Arduino IDE board manager to a custom URL. Open up Arduino, then go to the Preferences (File > Preferences). Then, towards the bottom of the window, paste this URL into the "Additional Board Manager URLs" text box:
https://raw.githubusercontent.com/sparkfun/Arduino_Boards/main/IDE_Board_Manager/package_sparkfun_index.json
You can add multiple URLs by clicking the window icon, and pasting in one URL per line.

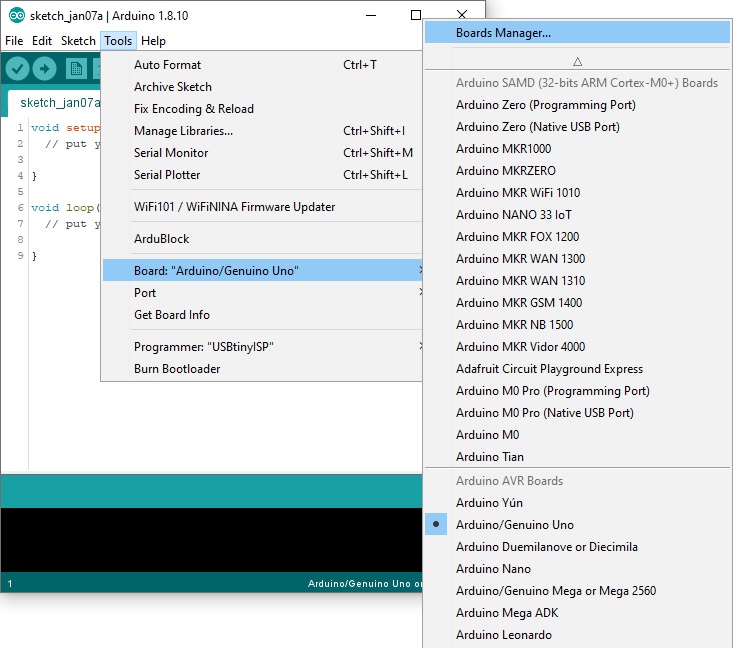
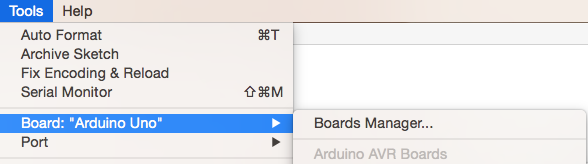
Click OK. Then open the Board Manager by clicking Tools, then hovering over the Board selection tab and clicking Board Manager.
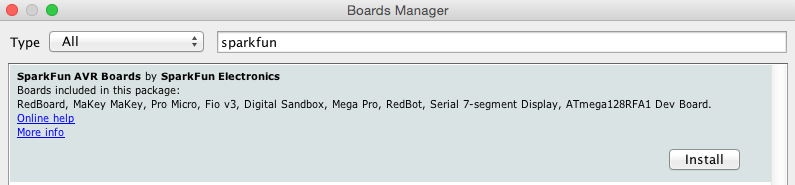
Search for 'sparkfun' in the Board Manager. You should see the SparkFun AVR Boards package appear. Click install, wait a few moments, and all the *.brd files you'll need should be installed, indicated by the blue 'Installed' that is printed next to the package.

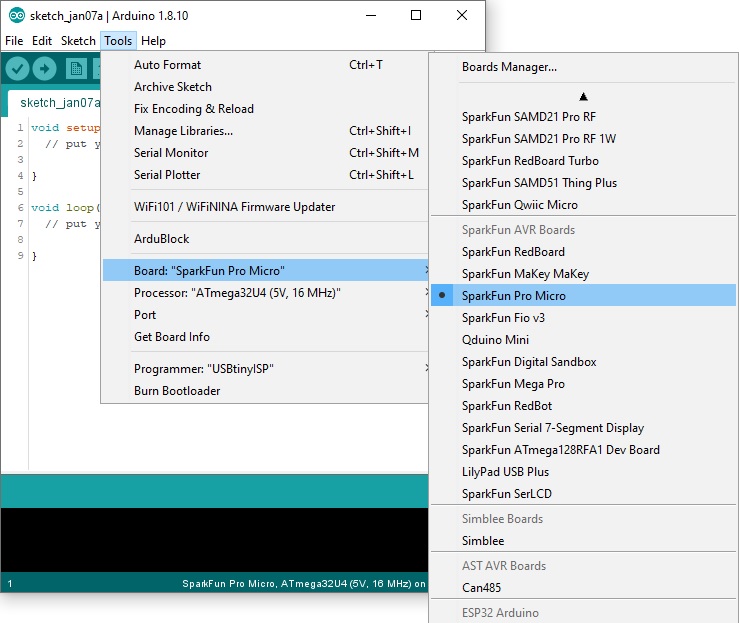
You should now be able to upload code to a number of SparkFun Arduino-compatible products, including the SparkFun Pro Micro.
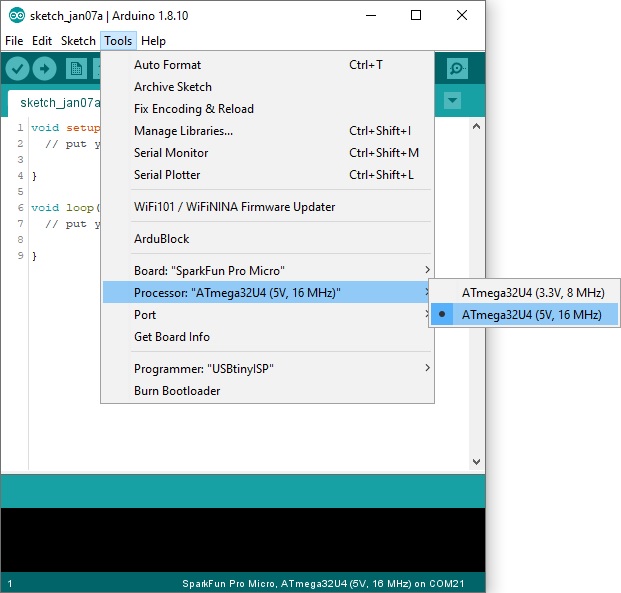
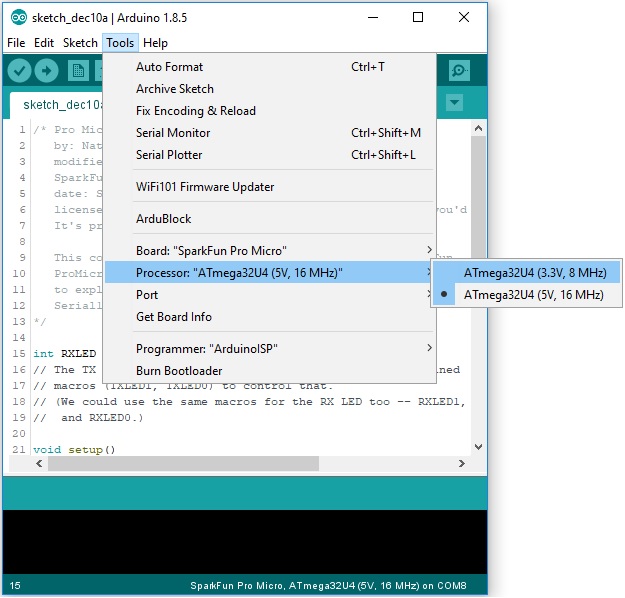
Notice there are two options for the Pro Micro - 8MHz and 16MHz. It's very important that you select the Pro Micro option that matches your board's voltage and speed. This should be listed under the Tools > Processor. For the Qwiic Pro Micro, you will need to ensure that you select the ATmega32U4 (5V, 16MHz).
You should also see your Pro Micro's COM port under the 'Tools > Serial Port' menu. Select it, and head over to the Example 1 page where we'll upload our first piece of code.
Manually Installing the *.brd Files
If you are using an older version of the Arduino IDE and do not have access to the Arduino Board Manager, then you'll need to install the *.brd files the old fashioned way.
To begin, download this zip folder, and unzip its contents into a 'hardware' directory within your Arduino sketchbook.
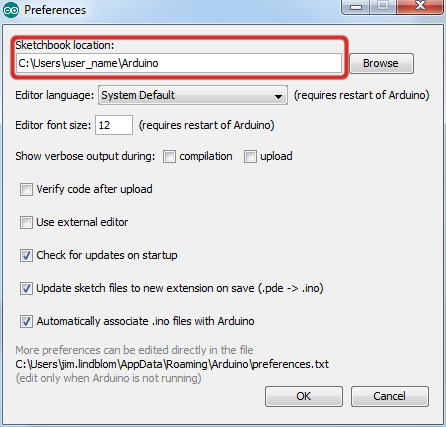
Where's your Arduino sketchbook? Well, by default, it should an 'Arduino' folder in your home directory, but to double check you can go to File > Preferences within Arduino and check the 'Sketchbook location' text box. Just make sure you close all Arduino windows once you're done.
Once you've unzipped that folder into the 'hardware' folder within your Arduino sketchbook (you may actually have to create a hardware folder), your directory structure should look something like this:

The structure of this directory is critical -- it should look something like ".../Arduino/hardware/[manufacturer]/[architecture]", in this case [manufacturer] is "sparkfun", and [architecture] is "avr."
language:bash
.../Arduino/hardware/sparkfun/avr
There's a lot going on in that addon, but one of the most important files is 'boards.txt', which will add a few new entries to your 'Tools > Board' menu.
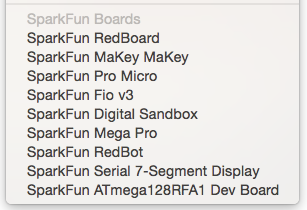
To double-check that the board definitions have been added to Arduino, open up Arduino, and check under the 'Tools > Board' menu. There should be some new entires for 'SparkFun Pro Micro', 'SparkFun FioV3', 'Qduino Mini', and other 32U4-based boards.
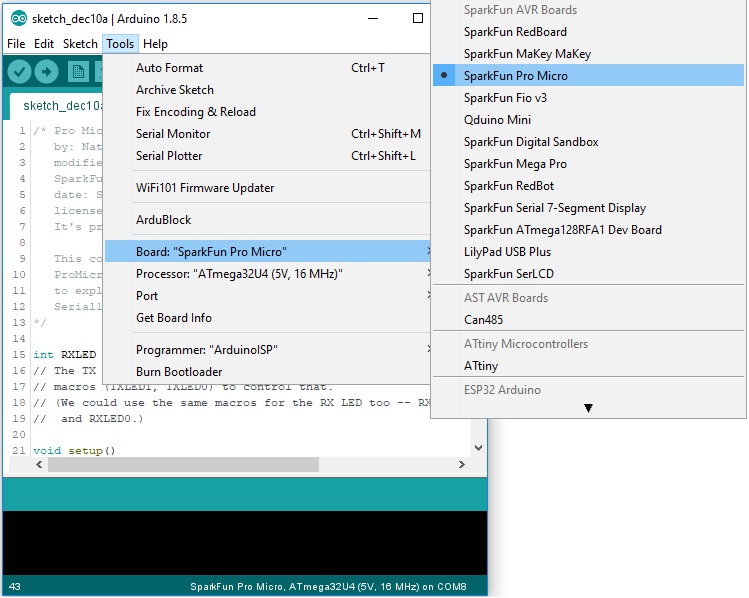
Notice there are two options for the Pro Micro - 8MHz and 16MHz. It's very important that you select the Pro Micro option that matches your board's voltage and speed. This should be listed under the Tools > Processor. For the Qwiic Pro Micro, you will need to ensure that you select the ATmega32U4 (5V, 16MHz).
You should also see your Pro Micro's COM port under the 'Tools > Serial Port' menu. Select it, and head over to the Example 1 page where we'll upload our first piece of code.
Installing the Arduino Addon Mac and Linux
Following these directions is critical to getting your Pro Micro supported within your Arduino environment!
Using the Board Manager
Since the release of Arduino v1.6.4, adding third party boards to the Arduino IDE is easily achieved through the board manager. If you're running an older version of Arduino (v1.6.3 or earlier), we recommend upgrading now. As always, you can download the latest version of Arduino from arduino.cc.
To begin, you'll need to point the Arduino IDE board manager to a custom URL. Open up Arduino, then go to the Preferences (File > Preferences). Then, towards the bottom of the window, paste this URL into the "Additional Board Manager URLs" text box:
https://raw.githubusercontent.com/sparkfun/Arduino_Boards/main/IDE_Board_Manager/package_sparkfun_index.json
You can add multiple URLs by clicking the window icon, and pasting in one URL per line.
Click OK. Then open the Board Manager by clicking Tools, then hovering over the Board selection tab and clicking Board Manager.
Search for 'sparkfun' in the Board Manager. You should see the SparkFun AVR Boards package appear. Click install, wait a few moments, and all the *.brd files you'll need should be installed, indicated by the blue 'Installed' that is printed next to the package.
You should now be able to upload code to a number of SparkFun Arduino-compatible products, including Pro Micro.
Manually Installing the *.brd Files
If you are using an older version of the Arduino IDE and do not have access to the Arduino Board Manager, then you’ll need to install the *.brd files the old fashioned way.
In order to use the Pro Micro in your Arduino IDE, you need to add a few board definition files to it. That's what we'll do in this section. Begin by downloading the Pro Micro addon files.
With that downloaded, follow these steps to enable the Pro Micro in your Arduino environment:
- The addon files are supplied in a zip folder, so you'll need to extract the files within first.
- Find your Arduino sketchbook folder. If you don't know where it is, you can locate your sketchbook by looking at the preferences dialog in your Arduino IDE.
- If there isn't already one, create a folder in your sketchbook called 'hardware'.
- Copy the 'sparkfun' folder that was unzipped in the first step into the 'hardware' folder.
- Your directory structure should look something like ".../Arduino/hardware/sparkfun/avr."
- Restart Arduino, and look under the Tools > Board menu. You should see a few new options, including SparkFun Pro Micro, SparkFun Fio V3, and Qduino Mini.
If the boards are visible, select the option that matches your board. If you have a Pro Micro, make sure you select the correct operating speed and voltage under Tools > Processor! At this point, select the COM port that the Pro Micro enumerated on. Then head over to the next page where we'll upload our first sketch!