Qwiic Pro Kit Project Guide
Contributors:
 M-Short,
  bboyho
Hardware Hookup
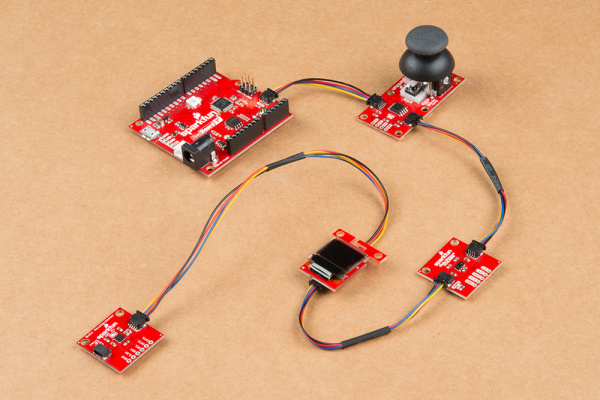
The Qwiic connection system makes it easy to connect the boards together. Simply grab a Qwiic cable of your choice to connect. If you are using the demo code from this tutorial to play micro pong, you will need to connect all the boards together. We recommend using longer cable lengths for users using the Qwiic boards to control each paddle and placing them on opposite sides of the micro OLED. We also found it easier to add the accelerometer at the end of the daisy chain since the board requires movement. Additionally, you will need to orient the micro OLED so that the paddle is on the side of the player's Qwiic board after uploading the example code.
Warning! You will need to connect all of the boards together when using the demo code in this tutorial. Otherwise, you will need to comment out lines of code for the Qwiic board that is not connected to the daisy chain.
Note: The code used in this tutorial is also compatible with Atmega328P-based Arduinos like the RedBoard Qwiic! If you purchased the components separately or Qwiic Ideation Kit, the setup is the same. Instead of the RedBoard Turbo, you would be using the RedBoard Qwiic. Check the note below for more information when compiling for the Atmega328P-based microcontrollers!
Retired


