Pro Micro & Fio V3 Hookup Guide
 jimblom
Troubleshooting and FAQ
On this page you'll find troubleshooting tips and FAQs. Here's a directory of the subjects covered:
- Troubleshooting
- Frequently Asked Questions
Serial Port Not Showing Up in 'Tools > Board' Menu
The Pro Micro can be a finicky little thing. There are a few series of events that can lead to its serial port being removed from the Arduino IDE's Serial Port selection menu. If you can't see your Pro Micro's serial port, give these steps a try:
- Close all Arduino windows. (Don't forget to save!)
- Unplug Pro Micro from your computer.
- Wait a few seconds for the device to be detached.
- Plug Pro Micro back in.
- Open Arduino back up, check the Serial Ports menu again.
Reset to Bootloader
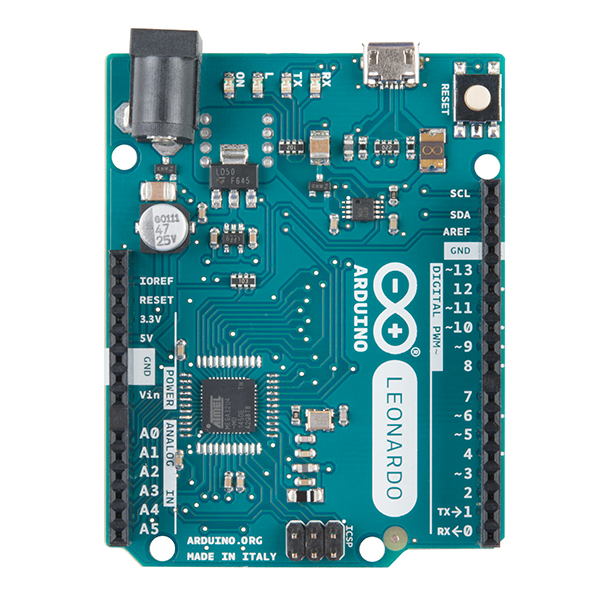
We ship the Pro Micro with a modified version of the Arduino Leonardo bootloader, with one major enhancement. When a Leonardo (or any device using the "stock" bootloader) is externally reset, it goes back into the bootloader...and waits there eight seconds before it starts running the sketch. For some embedded projects, waiting eight seconds before a program runs isn't acceptable, so we modified the bootloader run time.
 |
 |
| Arduino Leonardo | Leonardo bootloader on reset functionality. |
When a Pro Micro is externally reset (by pulling the RST pin low), it'll only briefly (<750ms) start the bootloader before continuing on to the sketch. If you need the bootloader to run longer, resetting twice quickly will get the Pro Micro to enter bootloader mode for eight seconds.
 |
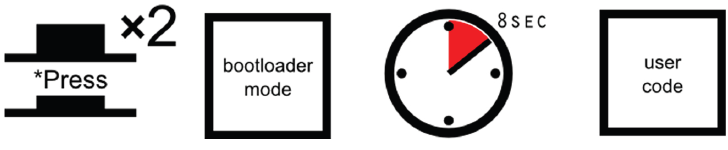 |
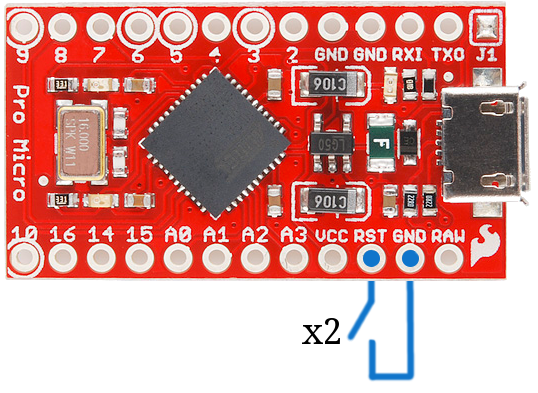
| Pro Micro and Fio v3 | Pro Micro, Fio v3, and any SparkFun Atmega32U4-based board reset functionality. Press reset twice, quickly to enter bootloader mode. |
Resetting the Pro Micro's, in particular, can be tricky, because there's no reset button. The 'RST' pins needs to be connected to ground to initiate a reset. This can be done with a small piece of wire, or an externally connected button.
Why would you need to enter bootloader mode in the first place. Glad you asked...
How to Revive a "Bricked" Pro Micro
Incorporating all of the USB tasks on a single chip is an awesome feature that makes the Pro Micro and boards like it truly unique. But it also places more stress on a single chip, and if anything goes wrong with that chip, the board becomes nearly unusable. It's not uncommon for Pro Micro's to become "bricked" and unprogrammable. But, in most cases, the bricking is reversible!
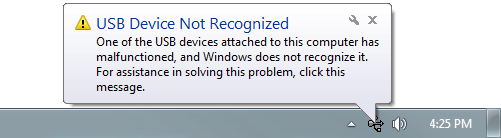
The most common source of Pro Micro "bricking" is uploading code to it with an incorrectly set board (e.g. programming a 16MHz/5V Pro Micro with the board set to 8MHz/3.3V). Also, make sure your sketch doesn't mess with the ATmega32U4's PLLCSR register, or any other register that sets up USB functionality on the ATmega32U4. The Pro Micro will actually take code compiled for the wrong operating speed, but when it tries to re-enumerate, you'll be greeted with a notification like this:
To revive the Pro Micro, you'll need to find a way to upload a sketch to it with the board option correctly set. We can do this with a little help from the bootloader.
First, you'll need to set the serial port to the bootloader. But that port is only visible when the board is in bootloader mode, so pull the reset line low twice quickly to invoke the bootloader reset feature discussed above. On Pro Micro's, or other devices which don't have a reset button, you can either use a wire to quickly short 'RST' to 'GND' twice, or wire up a temporary reset button. While the Pro Micro is in the bootloader change the 'Tools > Serial Port' menu to the bootloader COM port. Quick! You've only got eight seconds. On Windows, the bootloader's COM port number is usually one number higher than the Pro Micro's regular port number.
With the serial port set, we're just about ready to re-upload our sketch. But first, double check that the board is correctly set. Then reset to bootloader again, and quickly upload your sketch. Again, you'll have to be quick...you've only got eight seconds. It may help to press the Upload keybind -- CTRL + U / CMD + U -- immediately after resetting.
It can take a few tries to get the timing right. Since the code has to compile first, it may help to hit upload first and then reset.
Still having trouble getting that timing down?
One of our customers (shout out to RichardDL) has come up with a nifty solution (Windows only) to automate the bootloader process and program the board, by creating a batch file. Check out the details in his forum post!
Code Runs After Upload But Fails to Start After Power Cycle
We found that an ATmega32U4 (like the Pro Micro 3.3V/8MHz) can brown out when outputting power to a boost converter. While code can run after uploading, a power cycle from the initial current draw to a boost converter is enough to cause the Pro Micro brown out. Thus causing the sketch to not run. This requires the user to toggle the reset button after a power cycle.
Frequently Asked Questions
If you're having technical difficulties with your Pro Micro or Fio v3, see if any of the answers to these FAQs help. If not, please get in touch with our tech support team.
What are VID and PIDs?
VID is short for 'Vender Identification' and PID is short for 'Part Identification'. In other words, this pair of IDs defines the device. This is how your computer knows what you've plugged in, what drivers to use with it, what COM port is assigned to it, etc. All native USB devices have a VID/PID.
All SparkFun ATmega32U4 boards share the same VID -- 0x1B4F, and they all have unique PIDs. 5V Pro Micros lay claim to PIDs 0x9205 and 0x9206 (one for the bootloader, one for the sketch). 3.3V Pro Micros will show up as 0x9203 and 0x9204 for bootloader and sketch, respectively. And the Fio v3 has 0xF100 and 0xF101.
How Can I Change the VID and PID on an ATMega32U4 Board?
Every time you upload code the VID and PID are uploaded to the device. These values are located in the 'boards.txt' file and will therefore be determined by the board you have selected. Keep in mind that if you select the wrong board you will get the wrong VID/PID uploaded which means the computer can’t recognize, and program the board. The VID/PID for the bootloader is part of the bootloader file. To change this you will need to recompile the bootloader with the new VID/PID, and upload it.
Why Does my ATMega32U4 Board Show up Twice in Device Manager?
Both the bootloader and the sketch have their own VID/PIDs. When you plug in a board the bootloader starts running for a few seconds, and you will see the board show up in Device Manager based on those VID/PIDs. After a few seconds, the sketch will start running, and you will see Device Manager disconnect from the bootloader and connect to the sketch.
How Does the IDE Know Which COM Port to Use?
When the IDE resets the board, the COM port is disconnected from the computer. The IDE then looks for a new COM port. This is the port it uses. This is one of those weird things Arduino did to get things to work on this chip.
How Do I Reinstall the Bootloader?
Check out or reinstalling the bootloader tutorial, which should work for both ATMega32U4 and ATMega328 boards. If you have the tools to do so, reinstalling the bootloader is often easier then trying to stay in the bootloader. Since reinstalling the bootloader puts the board back in factory settings this will reset the VID/PID numbers allowing your board to work again.