Pro Micro & Fio V3 Hookup Guide
 jimblom
Installing: Mac & Linux
If you're using Mac or Linux, follow the steps below to get your Pro Micro (or Fio v3) ready to go on your computer. We're not going to name names here, but installing the Pro Micro on Mac OS X and Linux is a lot easier than on other OS's...
Following these directions is critical to getting your Pro Micro supported within your Arduino environment!
Board Installation
Using the Board Manager
With the release of Arduino 1.6.4, adding third party boards to the Arduino IDE is easily achieved through the board manager. If you're running an older version of Arduino (1.6.3 or earlier), we recommend upgrading now. As always, you can download the latest version of Arduino from arduino.cc.
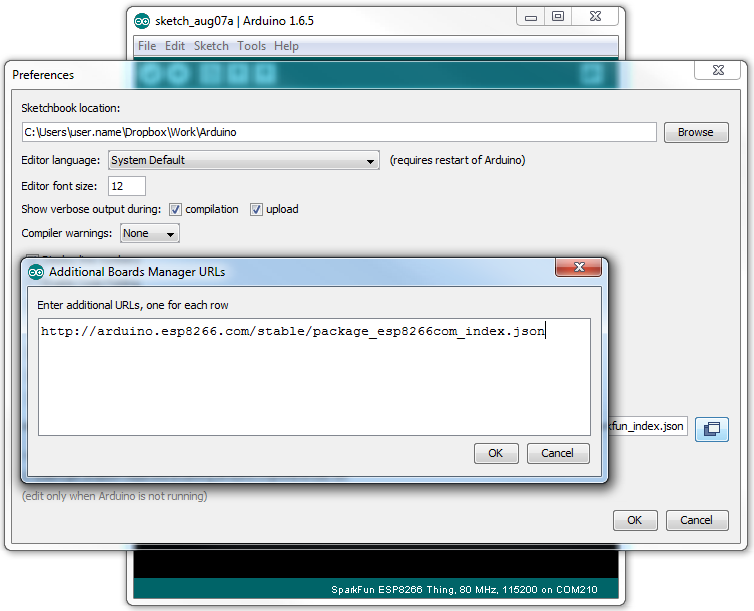
To begin, you'll need to point the Arduino IDE board manager to a custom URL. Open up Arduino, then go to the Preferences (File > Preferences). Then, towards the bottom of the window, paste this URL into the "Additional Board Manager URLs" text box:
language:bash
https://raw.githubusercontent.com/sparkfun/Arduino_Boards/main/IDE_Board_Manager/package_sparkfun_index.json
master" and changed the default to "main". SparkFun has followed this move as well. If you're unable to see a particular board inside of Arduino it may be that you are using the older "master" link. As a result, you will only see the previous changes on the old master branch. Please change to the 'main' json url listed above and all should be well.
You can add multiple URLs by clicking the window icon, and pasting in one URL per line.
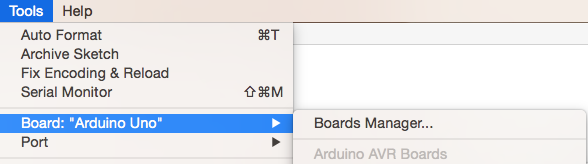
Click OK. Then open the Board Manager by clicking Tools, then hovering over the Board selection tab and clicking Board Manager.
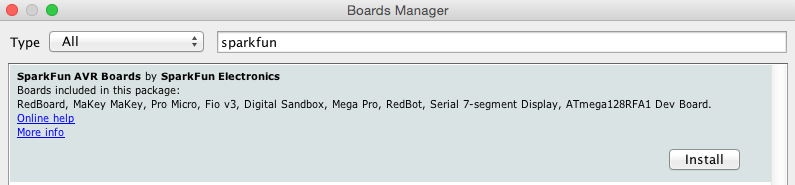
Search for 'sparkfun' in the Board Manager. You should see the SparkFun AVR Boards package appear. Click install, wait a few moments, and all the .brd files you'll need should be installed, indicated by the blue 'Installed' that is printed next to the package.
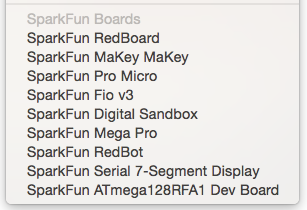
You should now be able to upload code to a number of SparkFun Arduino-compatible products, including the Fio and the Pro Micro.
Installing the .brd Files Manually
If you are using an older version of the Arduino IDE and do not have access to the Board Manager, then you’ll need to install the .brd files the old fashioned way.
When you initially plug your Pro Micro into a Mac, it'll pop up a "Keyboard Setup Assistant" window. This stems from the Pro Micro's ability to emulate an HID USB device (e.g. keyboards and mice) -- the Mac thinks your Pro Micro is a human input device (which it could be! but isn't yet).
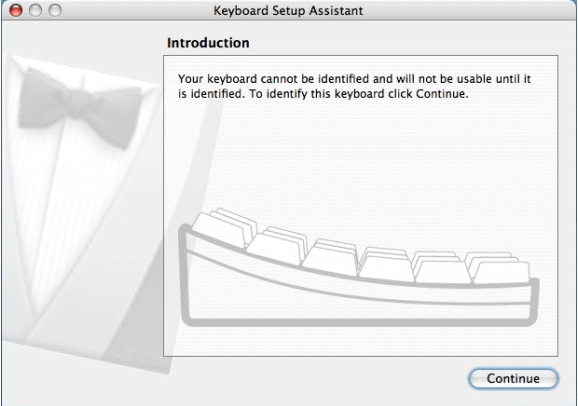
There's nothing to configure in this window, so just click the big, red, 'X' to close it.
That's all there is to it! The CDC (communication device class) portion of your Pro Micro (the part that handles USB to Serial conversion) should automatically install on your computer.
Installing the Arduino Addon
In order to use the Pro Micro or Fio v3 in your Arduino IDE, you need to add a few board definition files to it. That's what we'll do in this section. Begin by downloading the Pro Micro addon files.
With that downloaded, follow these steps to enable the Pro Micro in your Arduino environment:
- The addon files are supplied in a zip folder, so you'll need to extract the files within first.
- Find your Arduino sketchbook folder. If you don't know where it is, you can locate your sketchbook by looking at the preferences dialog in your Arduino IDE.
- If there isn't already one, create a folder in your sketchbook called 'hardware'.
- Copy the 'sparkfun' folder that was unzipped in the first step into the 'hardware' folder.
- Your directory structure should look something like ".../Arduino/hardware/sparkfun/avr."
- Restart Arduino, and look under the Tools > Board menu. You should see a few new options, including SparkFun Pro Micro, SparkFun Fio V3, and Qduino Mini.
If the boards are visible, select the option that matches your board. If you have a Pro Micro, make sure you select the correct operating speed and voltage under Tools > Processor! At this point, select the COM port that the Pro Micro/FioV3/Qduino enumerated on. Then head over to the next page where we'll upload our first sketch!