Preassembled 40-pin Pi Wedge Hookup Guide
 Byron J.
Background
In the process of developing projects like the Twitter Monitor and Great American Tweet Race around the Raspberry Pi, we found that we were experiencing some growing pains when trying to expand the Pi into a prototype that involved external hardware.

The Raspberry Pi Model B+ has a 40-pin connector that provides access to several communication interfaces, plus GPIO and power. But the connector doesn't have detailed labeling, and the native pin arrangement is somewhat scattershot. Pins used for similar functions aren't always grouped together, and power and ground pins are interspersed with no obvious pattern.
The pins also don't translate to a solderless breadboard very easily. Our first projects used a bunch of F-M jumper wires that we just plugged into the header. They involved a lot of "ratsnest jiggling" when things stopped working.
Bootstrapping
In addition to the physical issues of using the I/O connector, getting started with a brand new Raspberry Pi B+ always seems to involve a chicken-and-egg situation. We just want to SSH into it, so we can use the command line. But in order to SSH to it, we need to know it's IP address...and of course, the IP address is most easily learned by running ifconfig on the command line.
The Solution
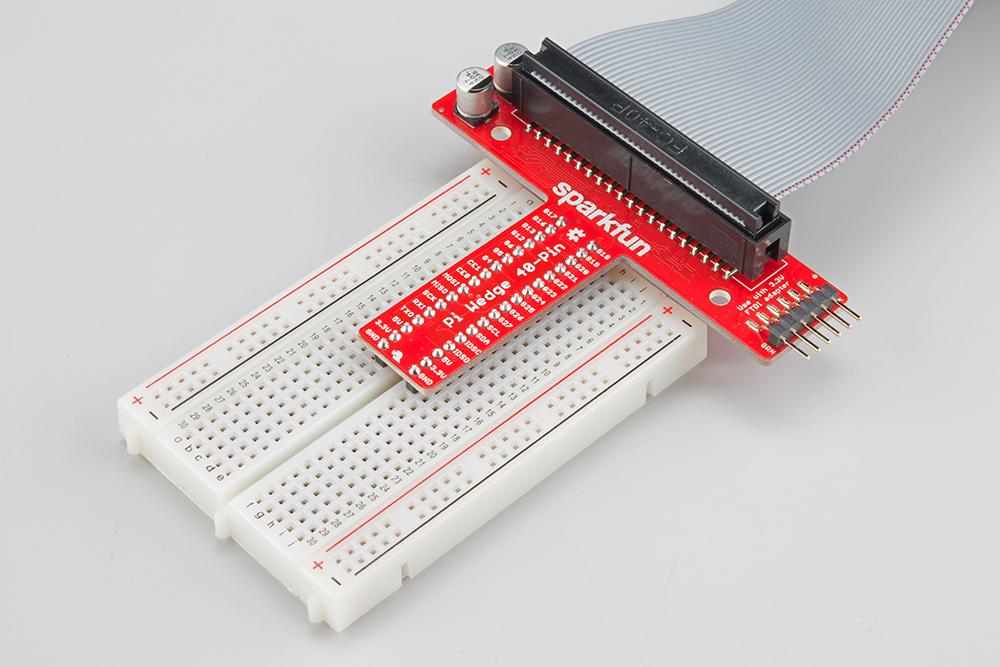
The Pi Wedge B+ connects to the 40-pin GPIO connector, and breaks out the pins in a breadboard-friendly arrangement and spacing. It adds a pair of decoupling capacitors on the power supply lines, and it makes the initial bringup process easier - you can plug an FTDI Basic module into the serial port.