Photon Weather Shield Hookup Guide
This Tutorial is Retired!
Note: V11 of the Photon Weather Shield utilizes the Si7021 for humidity and temperature sensing as opposed to the HTU21D.
View the updated tutorial: Photon Weather Shield Hookup Guide V11
 Joel_E_B
Example 2: Adding External Sensors
This example will show you how to control any and all external senors attached to the Weather Shield including the Soil Moisture Sensor, Waterproof Temperature Sensor, and the Weather Meters.
To start, we'll just add control of both the Soil sensors to our code, then we'll add the Weather Meter code.
Soil Sensors Example
I2C Scanner
Before uploading this second sketch, you must first retrieve your Soil Temp Sensor address(es). You'll need to upload the I2C Scanner code (found in the same folder as all the examples in the github repo) to find the address of any and all DS18B20 temp sensors hooked up to the Photon. The Soil Temp port is connected to pin D4, by default. If you add any additional DS18B20s, you'll need to account for their pin connections in your code.
Upload the scanner code, open a serial terminal, and you should see something like this:

Take note of that address. Any numbers that are single digit may need to have a 0 placed before them. For example, the 0x6 in the image above would become 0x06.
Particle Dev
Open Particle Dev. Click File -> Add Project Folder. Navigate to where you downloaded the SparkFun Photon Weather Shield repo, and select the 'SparkFun_Photon_Weather_Basic_Soil' folder. Click open, and the folder will be added to the left hand sidebar. The .ino file along with the library files will be avaialble here. Double-click the SparkFun_Photon_Weather_Basic_Soil.ino file to see the sketch.
There's only one variable you'll need to change before uploading the code, the address of the temp sensor that was retrieved in the previous step. Scroll until you see this line:

Select your target device, compile and upload the sketch.
Particle Build
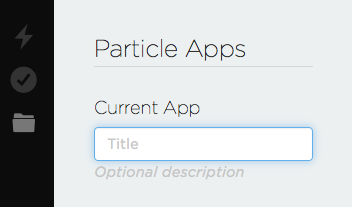
Create a new App by typing a name in the 'Current App' field and pressing 'Enter'.
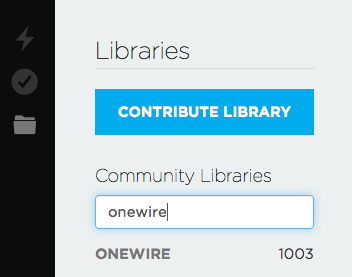
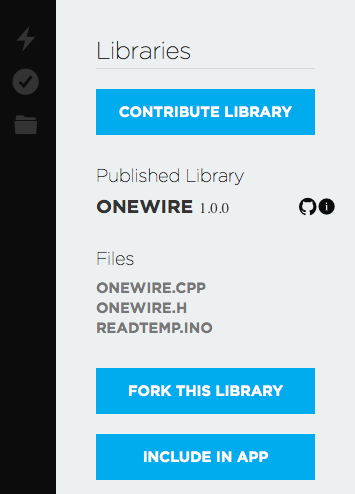
Search for 'onewire' in the "Libraries" tab to find the OneWire Particle Library. Once found, click on the library.
Select INCLUDE IN APP, and add it to your desired code file.
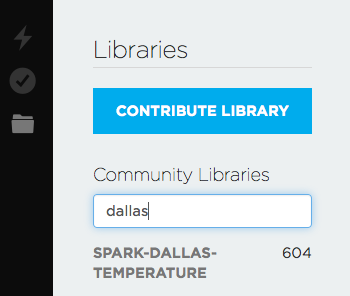
Repeat the same process for the Dallas Temperature Particle Library, as well as the SparkFun Photon Weather Shield Library used in the previous example. You should have three libraries total for this example.
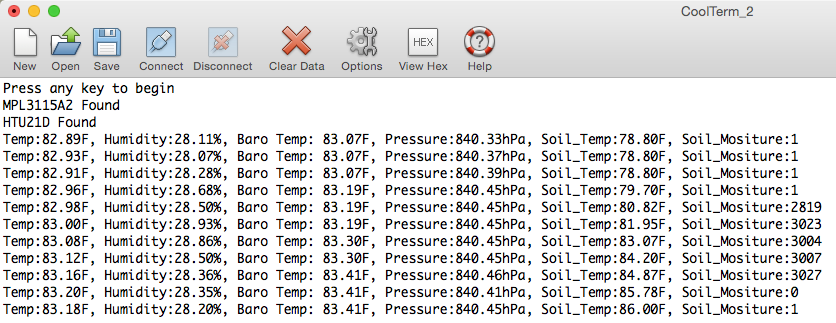
What You Should See
Once everything has uploaded correctly, open your favorite Serial Terminal program at 9600-8-N-1-NONE. Select the serial port your Photon has showed up as, and click connect. You should see something like the following print out in the window:
Weather Meters
Building off the last two examples, we can complete the package by adding the weather meter code. The meters do not require any external libraries. However, if you are using the on-board sensors as well as the soil sensors, which is assumed in the example sketch, then you will need the three previous libraries we have used so far: OneWire, DallasTemperature, and the SparkFun Photon Weather Shield libraries.
Particle Dev
Open Particle Dev. Click File -> Add Project Folder. Navigate to where you downloaded the SparkFun Photon Weather Shield repo, and select the 'SparkFun_Photon_Weather_Basic_Soil_Meters' folder. Click open, and the folder will be added to the left hand sidebar. The .ino file along with the library files will be available here. Double-click the SparkFun_Photon_Weather_Basic_Soil_Meters.ino file to see the sketch.
Select your target device, compile and upload the sketch.
Particle Build
The easiest way to go about this would be to use the app you made for the soil sensors and copy and paste this example of the previous sketch. Otherwise you'll have to create a new app and add all the libraries again.
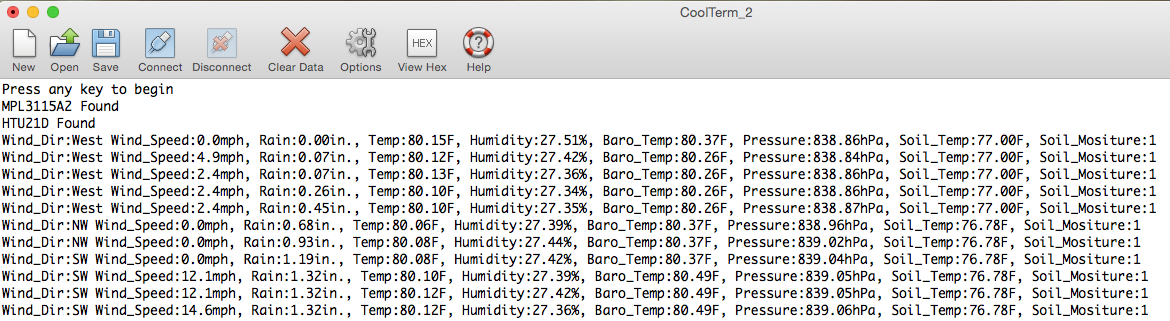
What You Should See
Once again, open your favorite Serial Terminal program at 9600-8-N-1-NONE. Select the serial port your Photon has showed up as, and click connect. You should see something like the following print out in the window:
Wind Vane
If your wind vane is printing No_Wind, it is recommended that you use analogRead() on pin A0 to see what analog values your wind vane is outputting. Upload the code below to see if your wind vane values match those found in the example sketch.
language:c
int analogPin = A0;//Wind Vane Pin on Weather Shield
int val = 0;// variable to store the read value

void setup()
{
  Serial.begin(9600);
}

void loop()
{
  Serial.println(analogRead(analogPin));  // read the input pin and print it
  delay(100);
}