Photon RedBoard Hookup Guide
Introduction
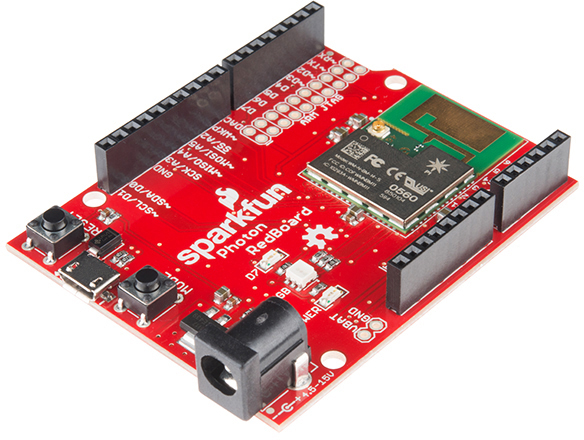
The SparkFun Photon RedBoard is an over-the-air-programmable WiFi development board that is compatible with the Particle cloud. At the heart of the Photon RedBoard is Particle's P1 module, which packs an ARM Cortex M3 processor and a Broadcom WiFi controller into a single chip. The I/O, USB, and power connectors are all broken out to a familiar Arduino shape.
Aside from the form-factor, the Photon RedBoard is nearly identical to a Particle Photon: same microprocessor, an RGB LED to indicate connectivity or other states, and RESET and MODE buttons to help configure the chip.
Covered In This Tutorial
The purpose of this tutorial is to familiarize you with all aspects of the Photon RedBoard -- both hardware and software -- and to help get you started down the path of Photon development. The tutorial is broken down into a handful of sections, including:
- Board Overview -- This section glosses over some of the Photon's hardware components and features.
- Getting Started -- A step-by-step guide to connecting your Photon to WiFi and Particle's cloud.
- Arduino Shield (In)Compatibility -- Despite the familiar size, the Photon RedBoard isn't quite Arduino-compatible. If you plan on using it with shields, read through this section first.
Use the navigation bar on the right to find your way through.
Suggested Reading
This tutorial builds on a few electronics concepts you should be familiar with. If any of the topics below sound foreign to you, consider checking out those tutorials before continuing on.
- Logic Levels -- The Photon RedBoard operates at 3.3V. This tutorial will explain the difference between 3.3V and 5V devices.
- Analog to Digital Conversion -- The Photon RedBoard features a number of 12-bit ADC inputs. ADC's help us convert the analog world into the digital values a microcontroller can understand.
- Light-Emitting Didoes (LEDs) -- LEDs are key on the Photon RedBoard. They help to relay connectivity or diagnostic status.
