Night Sky Halloween Costume
 Feldi
Feldi 
Understanding Your Circuit
In this project, you will be sewing several of the same circuit. The cape that we have made includes 10 circuits. Let's take a few minutes to understand what these look like and how they work before we get started.
Notice that the silver sew tabs on your LilyPad LEDs and battery holders are labeled either positive or negative. Many electronic components like these have polarity, meaning electric current can only flow through them in one direction.
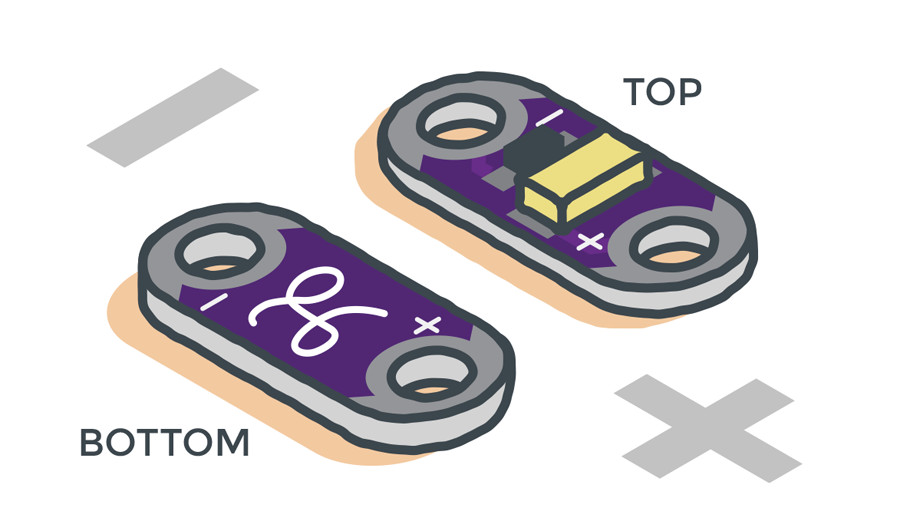
If hooked up incorrectly, they will not light up. Batteries are also polarized; they have a positive and negative side. Always check the labels on LilyPad pieces to make sure they are correctly oriented before sewing together a circuit.
The following diagram illustrates the circuit you will be following in order to add twinkling LEDs to your garment. The number of constellations will determine how many LEDs you will need, as well as how many circuits you will be building. I will be including 18 - 21 LEDs per circuit, meaning 6-7 LEDs per I/O pin, as seen below.
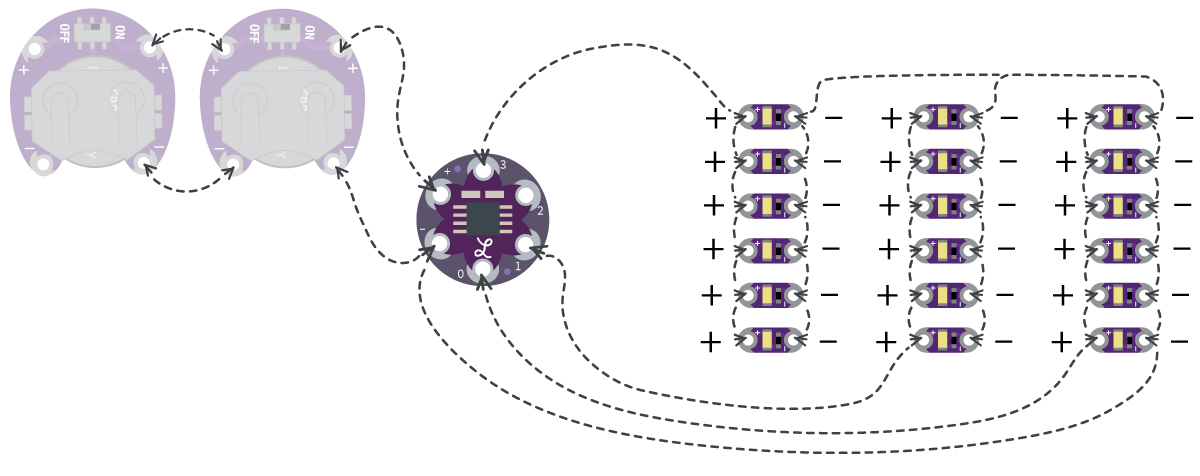
Notice how the LEDs have been grouped into three sets. No matter how many LEDs are included in your circuit, you will want to divide them into three groups as shown. The '-' tab of every single LED in your circuit connects to the rest with conductive thread, as well as the '-' tab on the LilyTiny and the '-' tab for power.
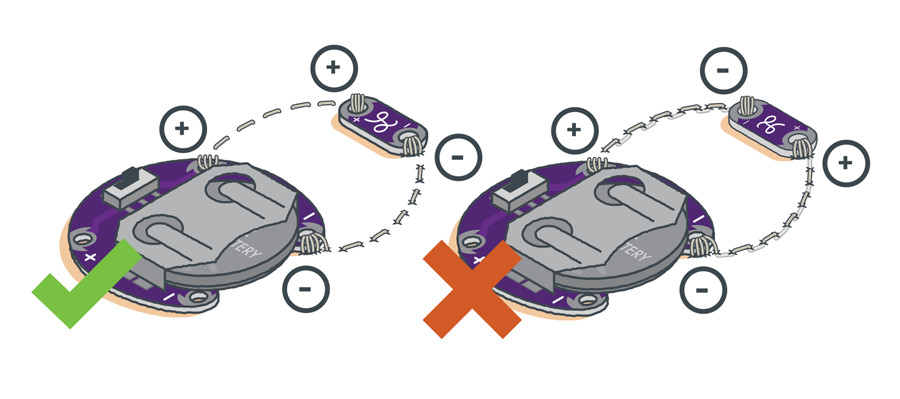
The '+' tabs will be treated differently. For each group of LEDs, you will connect all the '+' tabs inside that group together with conductive thread, and then connect them to either pins 0, 1, or 3 on the LilyTiny. We are not using pin 2 in this project as the pre-programmed animation is not ideal for the design. This circuit configuration is an example of LEDs in a parallel circuit. For power, you will need two LilyPad battery holders per circuit also wired in parallel in order to boost the longevity of power for a long night out. Connect the '+' tab of one of the battery holders to the '+' tab of the LilyTiny, and then the '-' tab of the same holder to the '-' tab of the LilyTiny. Then connect the '-' tab of the second holder to '-' of the first holder, and '+' on the second holder to '+' on the first holder.
Notice that the battery holder is dulled out in our circuit diagram. That is because it will lie on the opposite side of the fabric to LEDs and LilyTiny. The LEDs and LilyTiny should lie face-up on the backside of the fabric, or the side that will not be against your body. The battery holders should be on the other side of the liner, which will be against your body and remains exposed, allowing for access to replace batteries and switch on/off.