Night Sky Halloween Costume
 Feldi
Feldi 
Arranging Your Circuit
Each dot you marked with the Sharpie represents where a single LilyPad LED will live. Almost 200 LEDs have been included on our cape. That translates to 10 circuits. Count the number of dots you drew and divide that by 18-21 to figure out how many circuits you will be breaking the constellations into. It is OK if some circuits have a few more LEDs than others.
Do not worry about LEDs in a given constellation being part of separate circuits, as the wiring will be hidden upon completion.
While working on this project, we found it to be best practice to work on one circuit at a time. The following steps describe how to make a single circuit. Repeat until all the LEDs on your garment are sewn into a circuit.
STEP 6:
Find a set of 18-21 dots on your garment and place LilyPad LEDs over them. Place the LilyTiny somewhat centered among the LEDs and two LilyPad coin cell battery holders upside down, as they will ultimately be placed on the opposite side of the garment.
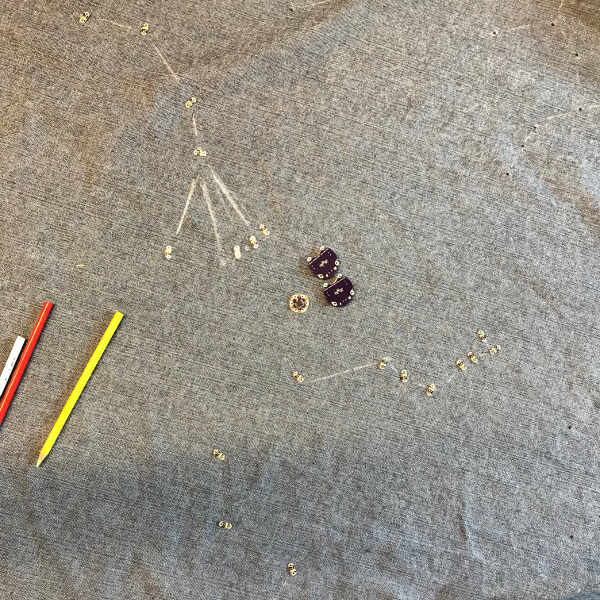
STEP 7:
Using the circuit diagram provided above and a white pencil, start to draw out the circuit design on the fabric. Keep in mind that traces cannot cross each other as that will cause a short.
When you have figured out the general arrangement of LilyTiny to LEDs, that will allow you to sew the circuit together as expressed in the diagram and start to hot glue the electronic components down in place. Make sure that the '+' and '-' tabs are arranged properly. The battery holders will live on the opposite side of the garment, so do not glue them down just yet but rather keep them in place for reference by leaving them upside down.
Then use a yellow colored pencil (or any color other than red) to draw a ground line connecting all '-' tabs according to the diagram.
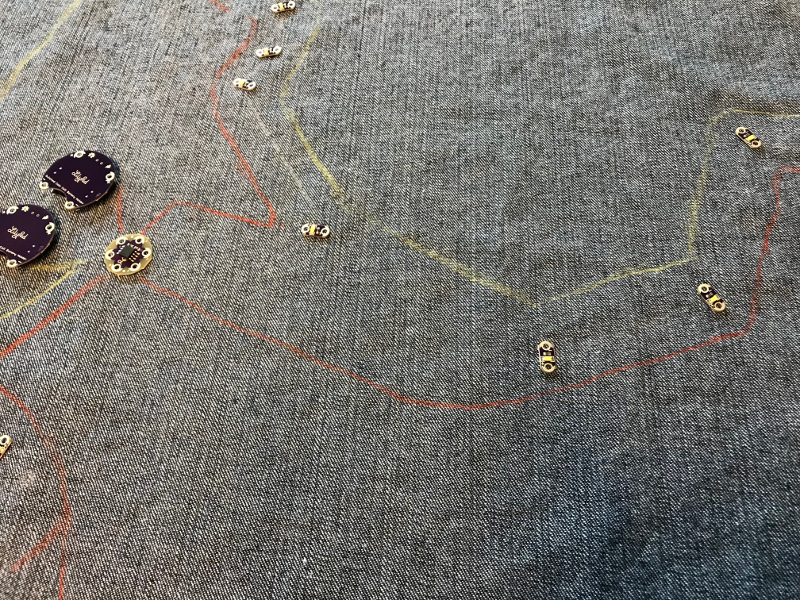
You will use these drawn lines as a guide on the sewing machine, so they should be straight and pass by all the sew tabs they will eventually be connected to.
Once the circuit has been drawn, flip the garment over and hot glue the two battery holders into place.