MicroMod Update Tool Hookup Guide
 El Duderino,
  PaulZC
Software Setup
Installing u-blox m-center
You can find the webpage for u-blox's m-center software here. Sadly m-center is only available for Windows and we don’t know of an equivalent for Linux. This link will download version 2.03.0 of m-center (but please do check the u-blox website for more recent versions):
Unzip the file and run the m-center .EXE to install the software.
Using u-blox m-center
Like u-center, m-center is very easy and intuitive to use. Let's go over the features of the software.
Home
Begin by clicking Set port and selecting the port for the CH340 Update Tool:
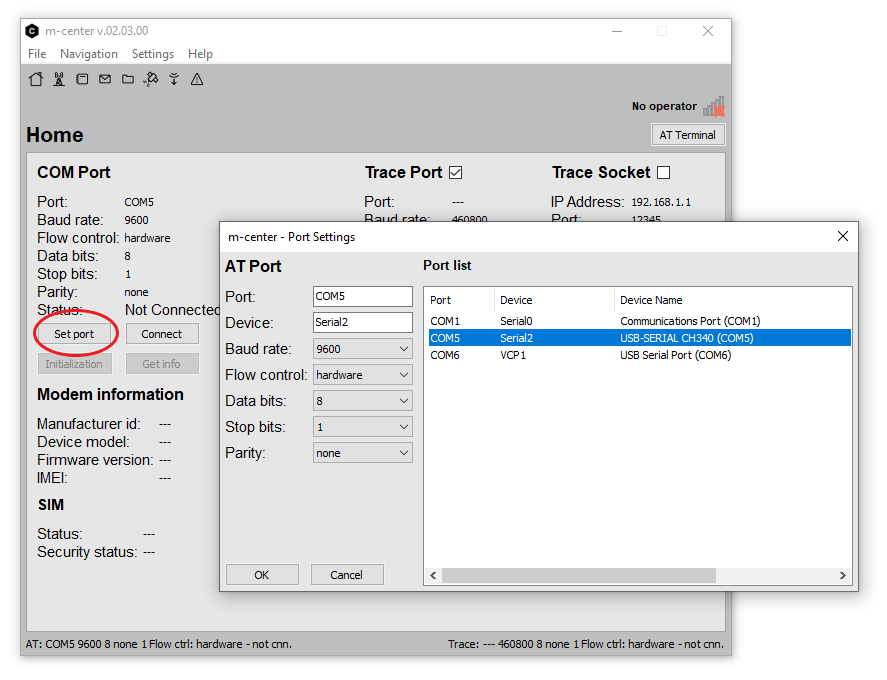
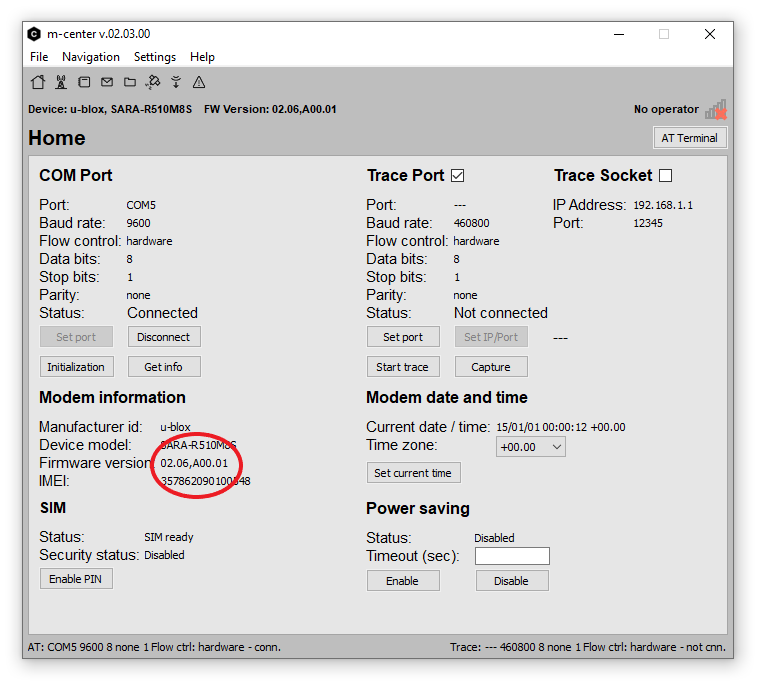
Click Connect, followed by Initialization to connect to the SARA-R5. The IMEI and firmware version should appear:

The carrier operator name and signal strength will appear in the top right corner of the window. We are told by u-blox that it is normal for the signal strength to appear quite low; LTE communication works with relatively low signal levels.
We believe the Trace Port option can be used to connect to the SARA-R5's USB diagnostic port via the SARA USB D+/D-/DET pins on the Asset Tracker Carrier Board, but we have not tried that yet.
Click Set current time to set the SARA's internal clock from the LTE network.
Network
Click the Network icon, next to the Home icon in the top left of the window, to see the network operator settings.
Click Refresh Info, Get List and Refresh to update the network information and Packet Switched Data Profiles.

You can choose to deregister from the current operator and connect to a new one if your SIM supports it.
You can also activate and deactivate the Packet Switched Data profile from this page. You will not able to send and receive data until you have activated a profile.
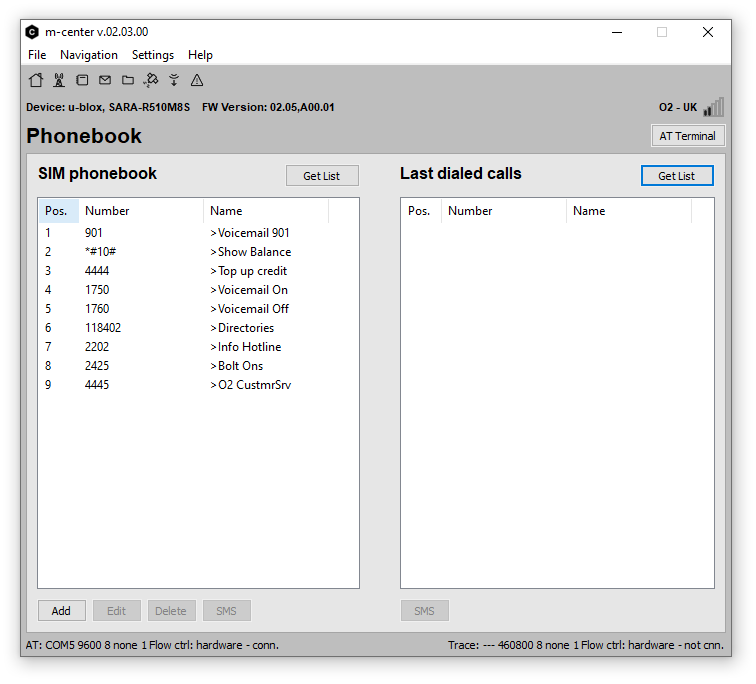
Phonebook
As the name suggests, the phonebook icon opens the SARA’s phonebook. You can add and delete numbers here.
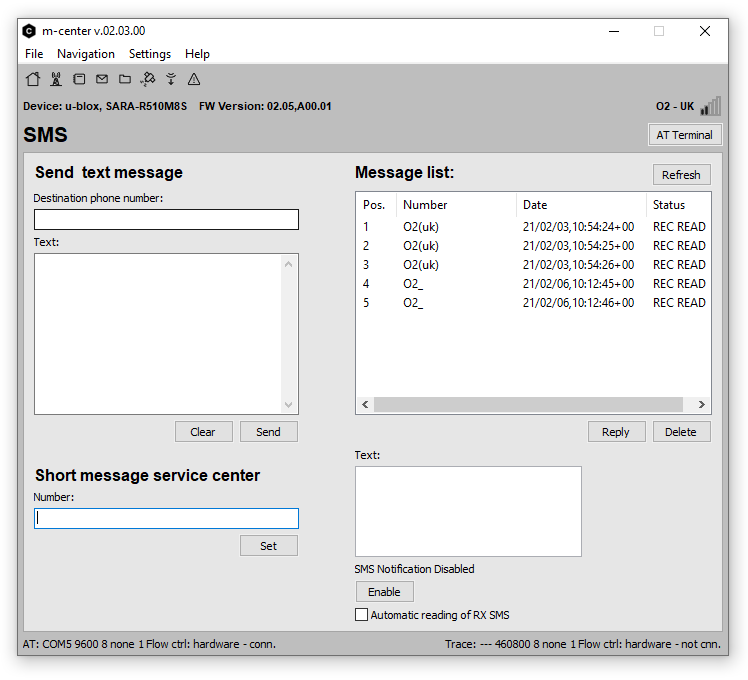
SMS
The SMS (envelope) icon will allow you to send text messages and read or reply to any received messages.
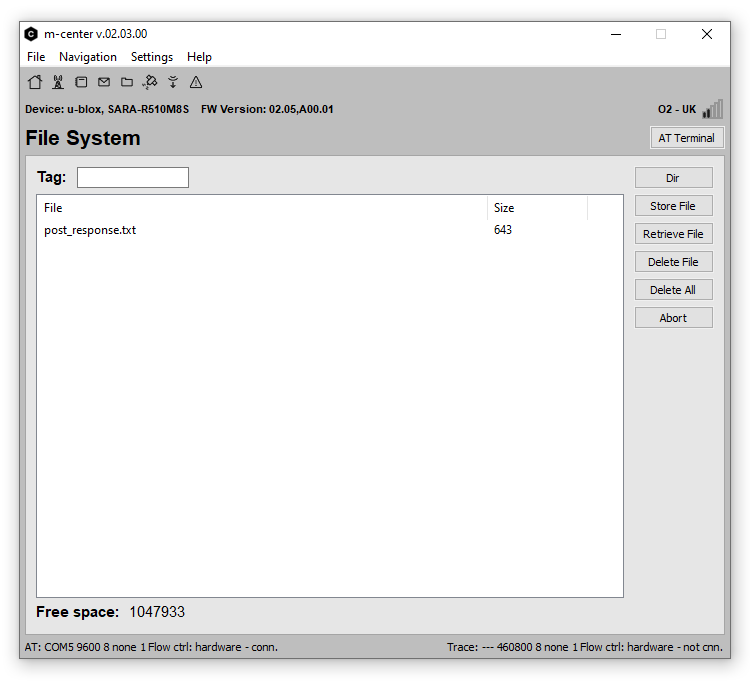
File System
The File System icon provides access to the SARA’s internal file system. You can add, retrieve and delete files from here. If you have run the Asset Tracker ThingSpeak (HTTP POST) example, the results of the most recent POST are stored in post_response.txt.
Did you know that the SARA-R5 supports FTP transfer too? Of course it does...
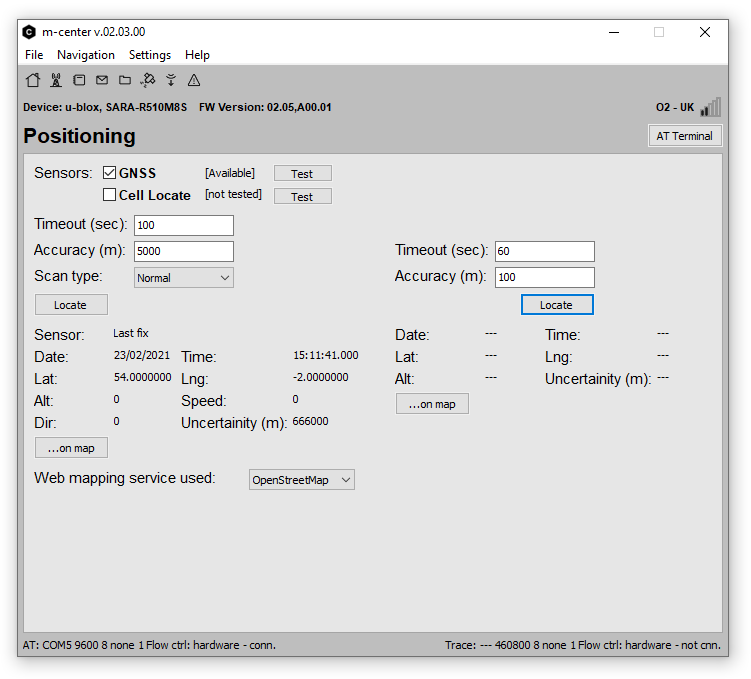
Positioning
The Positioning icon provides access to positioning information derived from either the LTE network, or the SARA-R510M8S’s built-in M8 GNSS receiver.
Firmware Over the Air (FOTA) and eCall Simulator
Advanced users can make use of the SARA’s Firmware download Over The Air and eCall Simulation functions:

AT Terminal
One of the most important features offered by m-center is the AT Terminal. Clicking the button below the signal strength indicator opens a Pandora’s Box full of AT Command goodies!

You can either type the AT commands manually into the text box, or select a template message from the drop-down menus, and then click Send or hit Enter to send the message. The replies from the SARA are shown in the Terminal window. You can log everything to file too if you wish. Scripts? Yes, you can run those too! This is a very powerful tool.
To manually Ping a server (such as www.sparkfun.com) the truncated set of commands is:
- AT+UPSD=0,100,1
- This instructs the SARA to map the Context ID 1 profile into Profile ID 0.
- AT+UPSD=0,0,2
- This instructs the SARA to use the “IPv4v6 with IPv4 preferred” protocol for Profile ID 0 (this needs to match the operator’s protocol).
- AT+UPSDA=0,3
- This instructs the SARA to activate Profile ID 0.
- AT+UPING="www.sparkfun.com"
- This instructs the SARA to ping the SparkFun server
Upgrading the SARA Firmware with u-blox EasyFlash
Just about the only thing that m-center doesn’t allow you to do is to upgrade the SARA-R5’s firmware. To do that you need to download and install u-blox’s EasyFlash update tool.

The link below will download EasyFlash version 12.08 but do check the SARA-R5 resources page for the latest version as of this writing:
Again, EasyFlash only appears to be available for Windows. We are not aware of a version for Linux. Unzip the .ZIP file and run the EasyFlash .MSI installer to install the software. u-blox will make the firmware updates available through the SARA-R5 resources page.
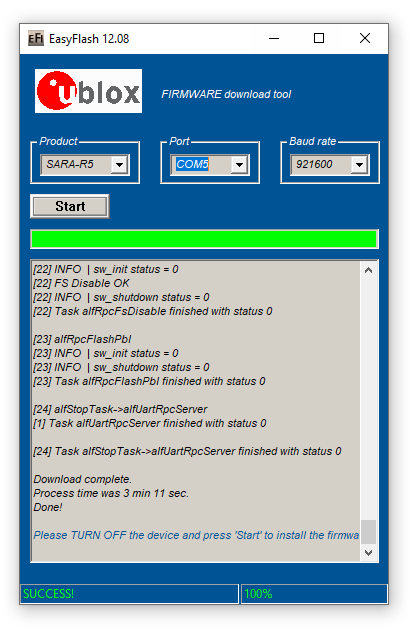
You need to manually download the .DOF update binary file and place it in the same folder as the EasyFlash executable. (That bit is important!). After the .DOF file is downloaded follow these steps:
- Run the EasyFlash executable.
- Select SARA-R5 as the Product.
- Select the COM port your Firmware Update Tool (CH340) is connected to.
- Select 921600 as the Baud Rate.
- Do not select 3000000 Baud as the CH340 cannot support it.
- Turn the SARA-R5 off by pushing and holding the SARA On button on the Asset Tracker for five seconds.
- Check that the white On LED on the Asset Tracker goes out.
- Click the Start button on EasyFlash.
- Press the SARA On button briefly when instructed to turn the SARA back on again.
- The update process takes around three minutes to complete.
- Turn the SARA off again when instructed to complete the update.

|
|
| Firmware update in progress | Firmware update completed |
You can confirm that the update was successful by opening m-center and connecting to the SARA-R5. The firmware version is shown on the Home page: